Manual
Login
Our 3D CAD supplier models have been moved to 3Dfindit.com, the new visual search engine for 3D CAD, CAE & BIM models.
You can log in there with your existing account of this site.
The content remains free of charge.

Top Links
Manual
 |
In this section
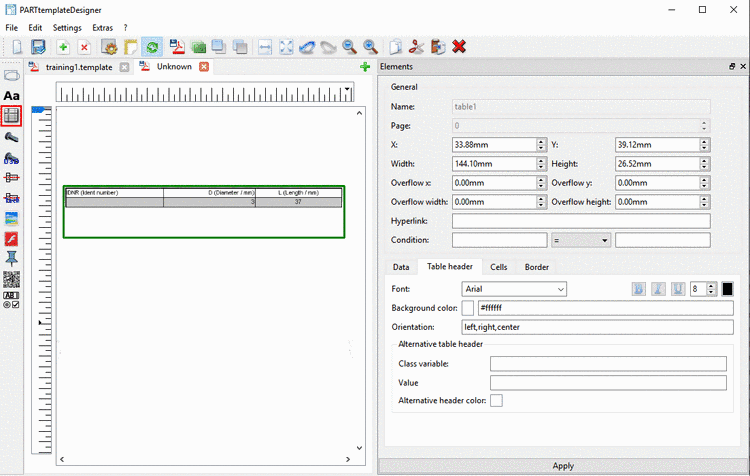
you can find details on the setting options of Table  .
.
-
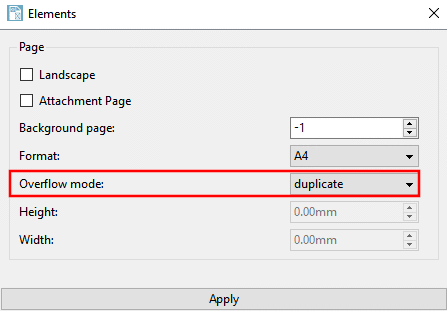
General: The general standard settings are found under Section 10.4.2, “General settings”. At tables there is the feature that the overflow pages can have another specification than the first page.
-
Overflow x / Overflow y: Table position in the overflow section
Overflow width / Overflow height: Dimensions of the table in the overflow mode
-
-
-
-
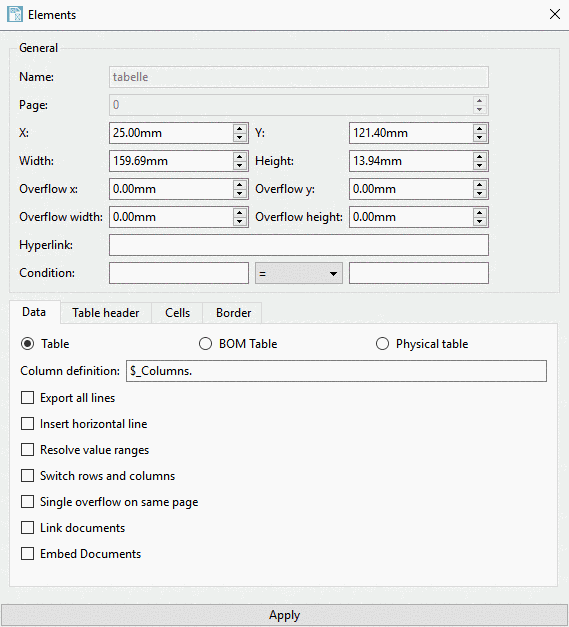
Column definition: The value
$_Columns.is already inserted by default.![[Note]](/community/externals/manuals/%24%7Bb2b:MANUALPATH/images/note.png)
Note In order to be able to perform a specific formatting of the table, the value has to be applied as Media Variable of the type PSOL_TABLE. If it does not exist, all visible columns are displayed. Detailed information on this is found under Section 10.6.2, “Edit table variables”.
LinkDB columns cannot be displayed by default. If desired, please contact CADENAS on this.
-
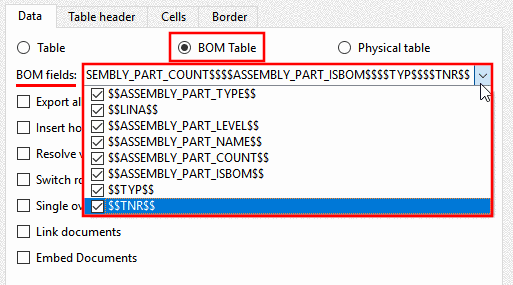
BOM Table: Via this option you can display BOM list information in a table.
BOM fields: In the list field, activate the checkbox at columns to be displayed.
-
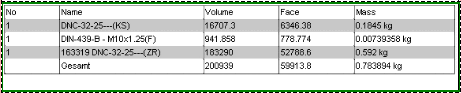
Physical table: Via this option you can display physical information such as Volume, Plane and Mass.
Physical fields: In the list field, activate the checkbox at columns to be displayed.
-
-
-
Insert horizontal line: If you are using this separate layout option, the settings under Border color, Border size and Border type are ignored.
-
-
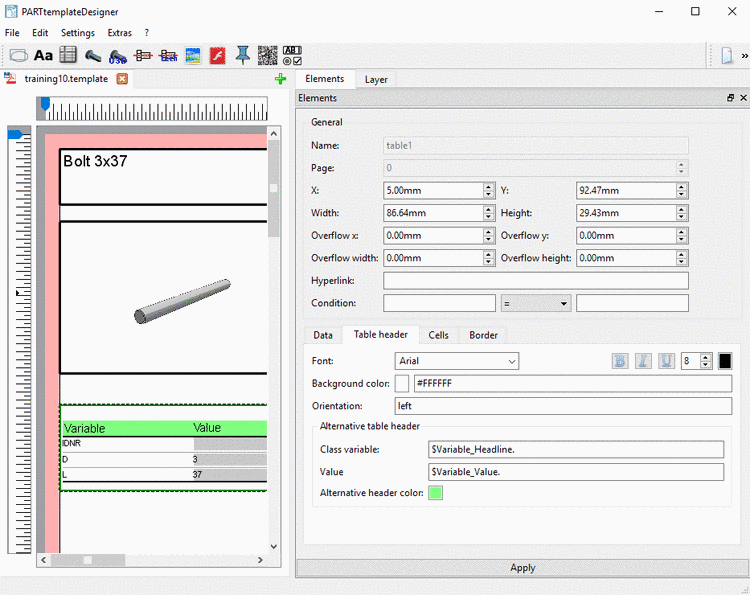
Switch rows and columns: See Fig. „Example "Alternative table header": For the Media Variables there are HTML texts.“.
-
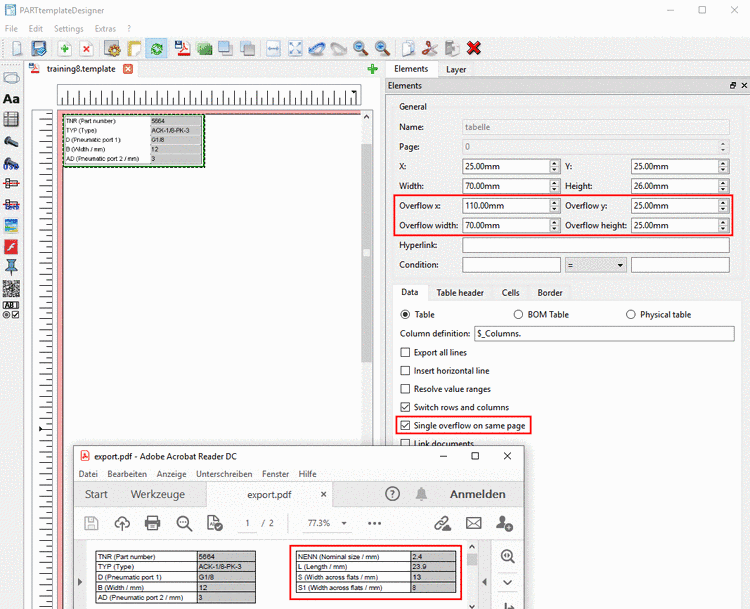
Using the option Single overflow on same page a table can be splitted and both parts placed beside each other. The table can only overflow once on the same page.
Set X-Y coordinate, width and height of overflow table under Overflow x, Overflow y, Overflow width and Overflow height.
-
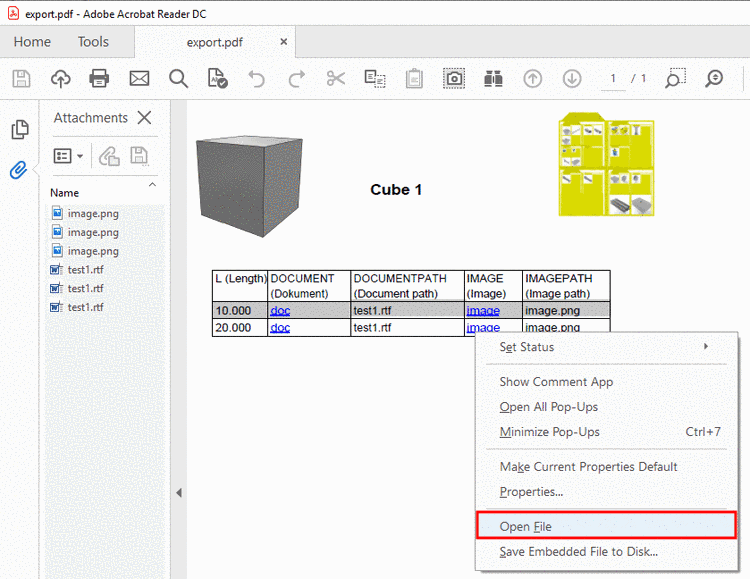
The functionality is analogously to Embed Documents. There, an internal link refers to a file within the catalog, here, a hyperlink is created which points to an external file.
-
With Embed Documents you can create links in the table where embedded documents can be called in the created PDF later.
Details on this can be found under Section 10.4.6.1, “ Embed Documents ”.
-
-
-
For the design of the font in the table header there are setting options such as Font (also see Section 10.4.5, “ Text ”), Font size, font color, bold, italics and underlined available.
-
#C8C8C8
-
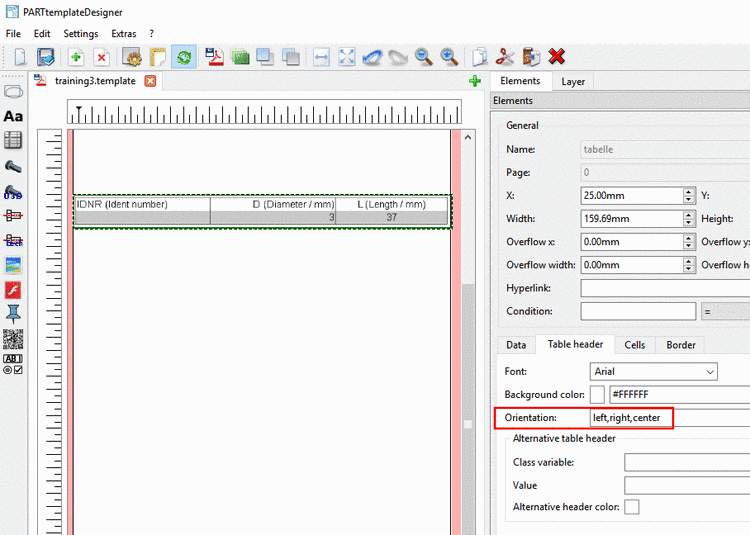
Orientation: left | right | center
In the input field, enter the desired value, if the same orientation is desired for all cells in the table header.
Otherwise enter a dedicated value for each column separated by comma.
-
This option can be used together with Switch rows and columns.
-
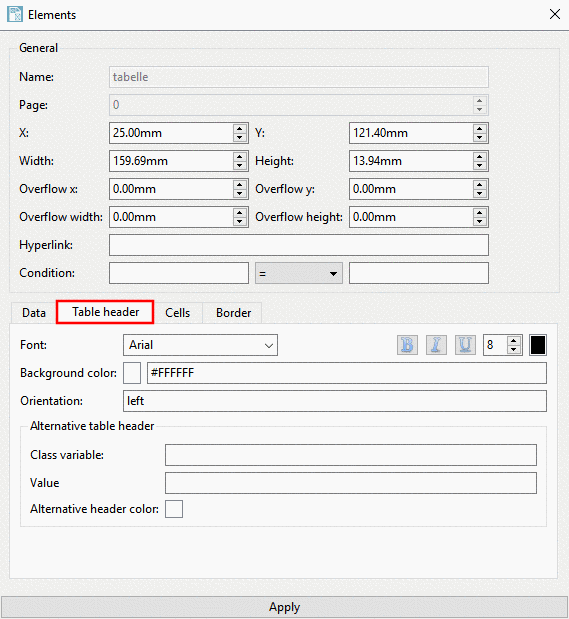
Class variable / Value: Class variable and value, both have to be applied as Media Variables. You can do this either in the Media editor (siehe Section 10.6.1, “Create / edit Media Variables”) or in PARTproject (Section 5.9.17.1, “Create Media Variables in PARTproject”).
Enter the variable names in the input fields (e.g. "$Variable_Headline."). See following figure.
Alternative header color: Specify the color for the table header..
-
-
-
Font: For the design of the font in the table body there are setting options such as Font (also see Section 10.4.5, “ Text ”), Font size, Font color, bold, italics and underlined available.
-
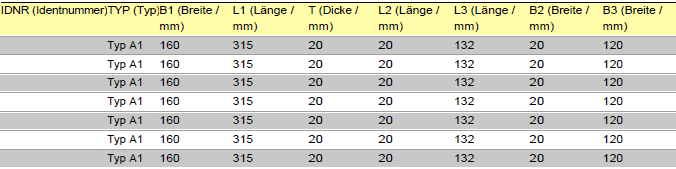
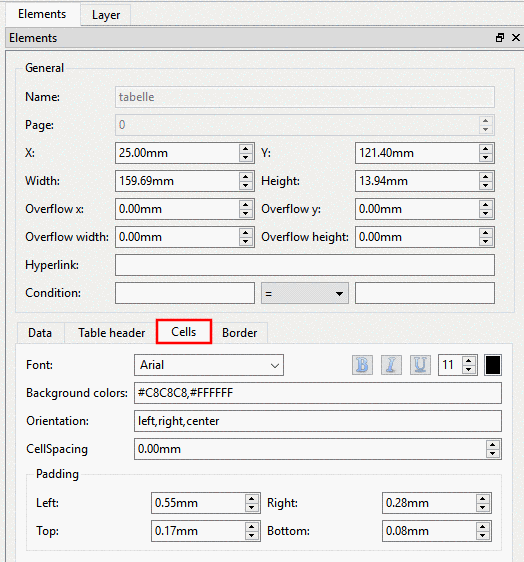
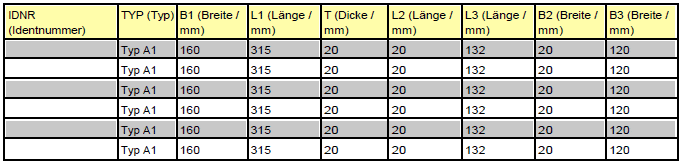
You can determine the color code of a single color, but also two. Then the background color of the lines, in the table body, is alternating (compare following figure).
#C8C8C8,#FFFFFF
Orientation: compare same point under Table header
-
CellSpacing: Distance between table cells
Padding: Within table cells, distance between border and content
-


![[Caution]](/community/externals/manuals/%24%7Bb2b:MANUALPATH/images/caution.png)