Manual
Login
Our 3D CAD supplier models have been moved to 3Dfindit.com, the new visual search engine for 3D CAD, CAE & BIM models.
You can log in there with your existing account of this site.
The content remains free of charge.

Top Links
Manual
 |
Select the Catalogs or Classes tabbed page for example and search the index tree for the desired part.


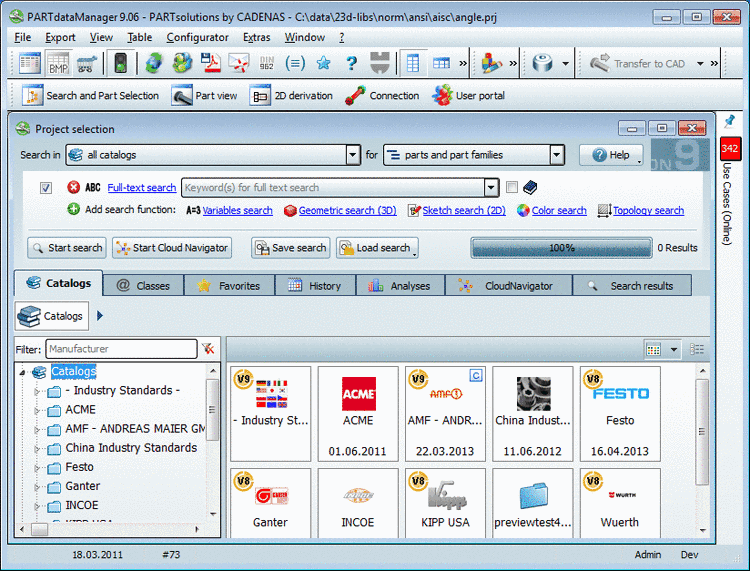
Starting interface
of PARTdataManager is always Part selection. Via
the  Search and Part Selection button you can always return here.
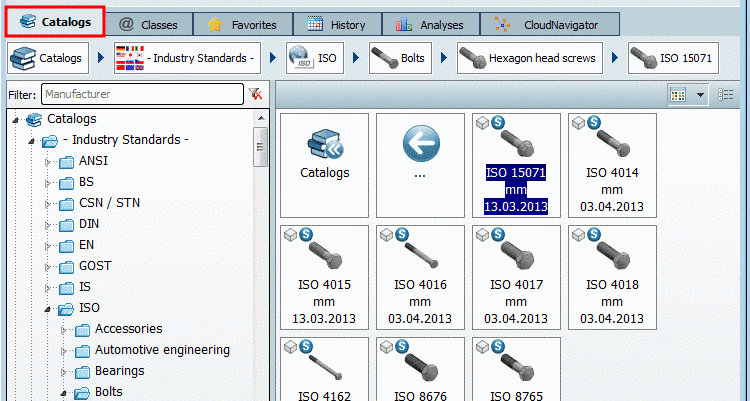
On the starting interface of PARTdataManager you can see all installed catalogs.[45]
![[Note]](/community/externals/manuals/%24%7Bb2b:MANUALPATH/images/note.png) |
Note |
|---|---|
|
Many catalogs contain quality seals.
More information about quality seals can be found under Section 3.1.1.12.1.1, “Catalog Quality Seal ”. | |


Beside the search method selection section the user interface is subdivided into 3 main sections.

|
Tree structure - The Catalogs, Classes, Favorites and History tabbed pages: Choose any tabbed page and browse the tree structure. In the tree structure you always keep in view on which level you are. When you single-click on a directory then on the right side you can see the respective subdirectories (or at the deepest level the projects) either in the Symbols or in the Details mode. Furthermore at each tabbed page you can specify in the index tree, for which catalog or which directory level a search has to be performed. |

|
Flat structure with preview images or details - Symbols or Details mode: Here the subdirectories (or projects) according to the selection in the tree are displayed.
|

|
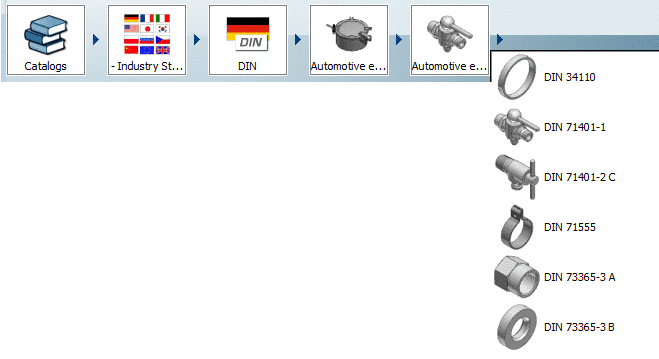
The navigation path shows the path of the current selection. You can jump directly into a level by clicking on the directory symbol. You can find more information under Section 3.1.1.6.4.8.7, “ Navigation via navigation path (breadcrumbs) ”. |
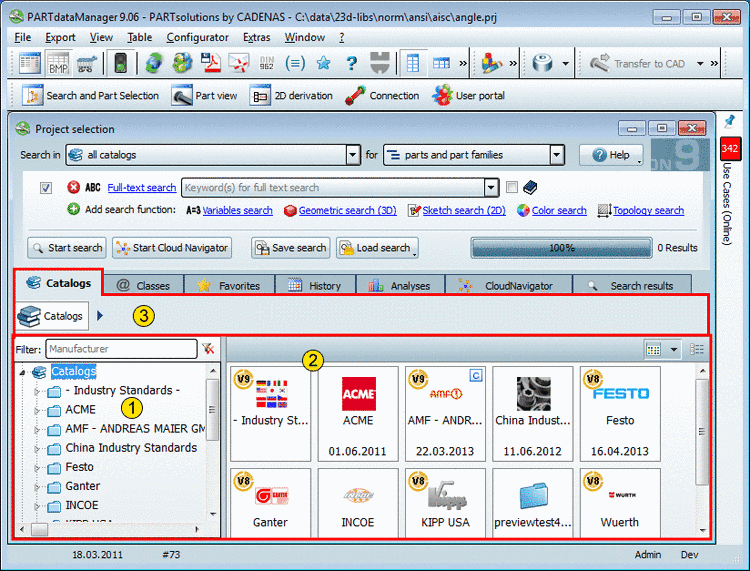
Example: In the figure on the left side the root directory "Catalogs" is selected. On the right side the single catalogs are displayed.
On the last level
of a directory branch a project icon (e.g.
 part or
  assembly) appears.[46]

Via double-click on a project the user interface changes to the Part view. Detailed information concerning Part view is found under Section 3.1.1.7, “ Part view ”.
|
The Symbols mode represents the index tree selection with preview images. At the deepest level the projects are displayed. Select the desired directory by double-clicking on the preview image. Results after double-clicking:
|
|

|
In the Details mode you receive more information such as Name, Description, Version, Unit, End date, etc. in a table view. |
|

To navigate in the depths, double-click on a row.
Results after double-clicking:
The selected directory shows up in the breadcrumbs row. (See Section 3.1.1.6.4.8.7, “ Navigation via navigation path (breadcrumbs) ”)
-
Under Details now the elements of the next lower level are displayed.
You go one step back each time you click on the back arrow button.
On the left in the tree the respective level is also selected.
Especially when Preview und Company logo are set on "small" it is helpful to move the mouse over the preview images in order to display the 3D Tooltip.
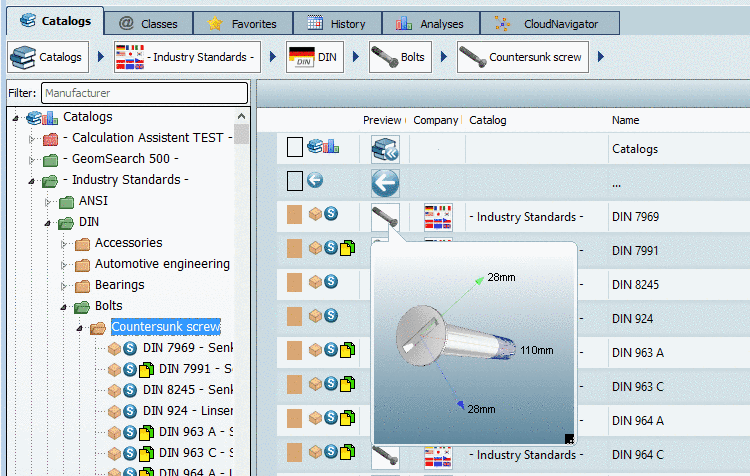
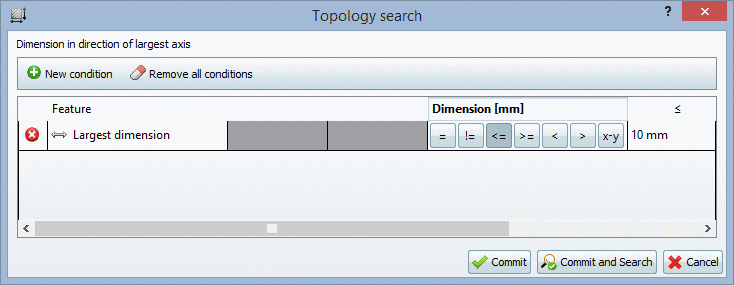
The 3D Tooltip is scalable and animated. In the down right corner you can find an icon to draw up the size. The extensions of X, Y and Z axis are automatically displayed.
Whether the 3D Tooltip (size small, medium, large) or a Preview image shall be used, you can set in the Extras menu under Preferences... -> Part selection -> 3D Tooltip:
Under PARTdataManager -> Extras menu -> Preferences... -> Part selection -> Show tooltip with previews you can switch on and off the Preview image.
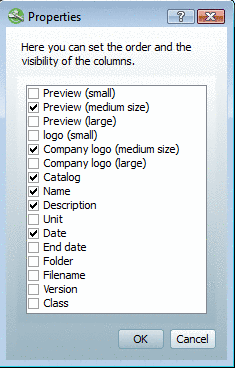
Order and visibility of columns
|
You can set the order and visibility of columns. In the dialog box that shows up, you can activate/deactivate and move the desired columns. |
|
Via clicking on a column header you can sort the rows depending on the values of the desired column.
If you use ERP integration, then you can sort via the red-green folder characteristic in addition.

On the tabbed page you can find the desired part via the catalog index with its subdirectories down to the project file.[47] [48]Successively open subdirectories. The branching symbol in the directory tree identifies those folders which contain other folders or projects.
To the right, on the Symbols or Details page, the next deeper level of subdirectories according to the selection on the left is displayed.
Use the Catalog filter, when many catalogs are installed.

Advantage: Overview and quick finding
You can also insert several suppliers comma separated.
ahp,afag,fibro
During typing under Filter the catalog view is already changed on the fly.

On the Classes tabbed page you can find the parts classified according to different classifications:
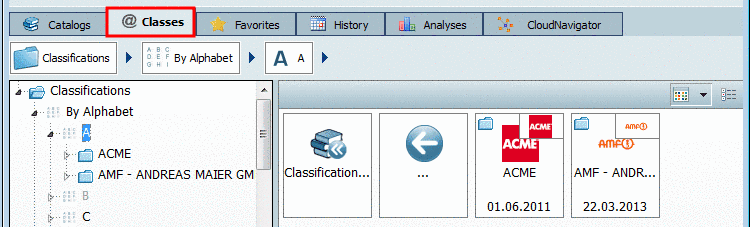
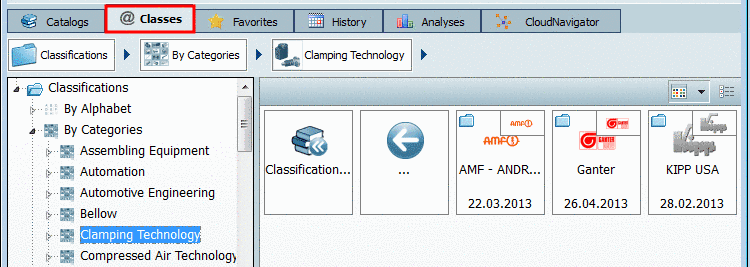
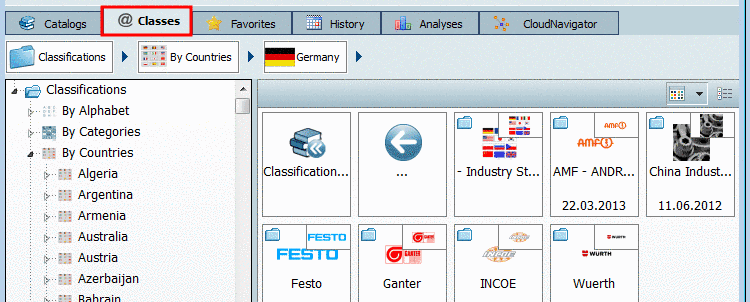
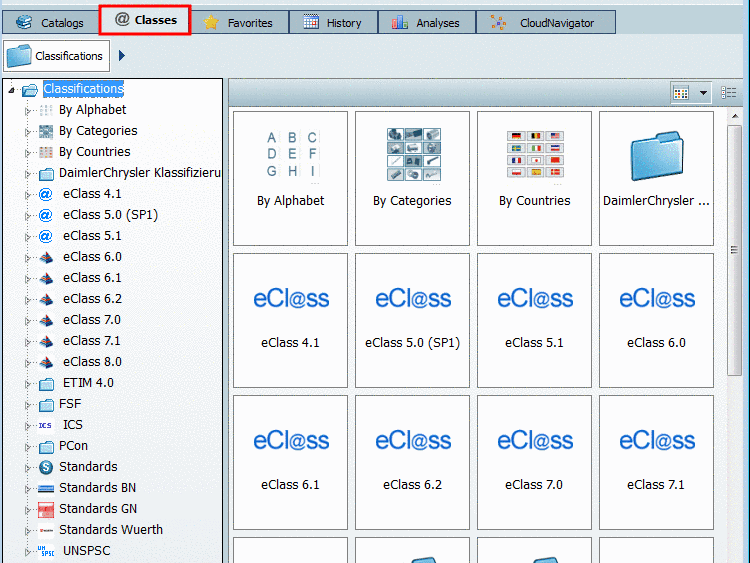
As soon as you have clicked on a certain class in the index tree, the subclasses of the next lower level will be shown to the right under Symbols or Details.

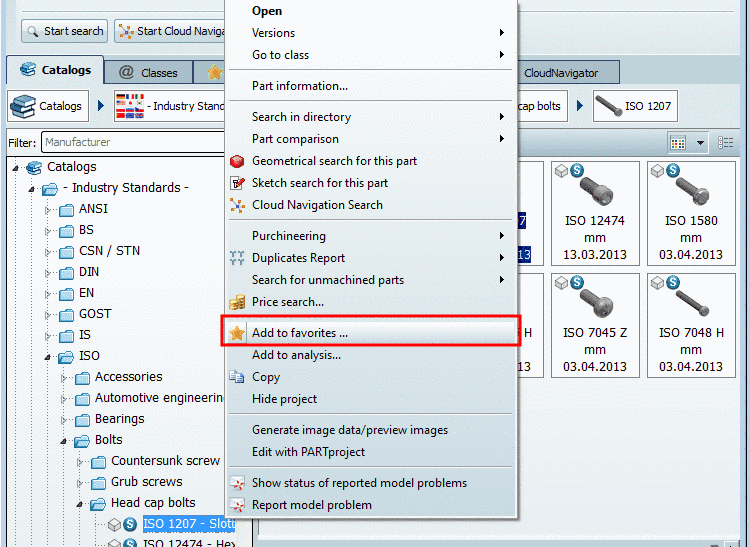
On the Favorites tabbed page you can remember often used directories or projects via the Add to favorites context menu command.

You can find the Add to favorites context menu command on the Catalogs, Symbols, Details, Classes, History, Analyses tabbed pages and in the search results.

Export favorites / Import favorites
|
On the Favorites tabbed page on directory level you can find the Export favorites / Import favorites commands. This will help you easily transfer your personal favorites onto another computer. |
|

-
For favorites, which have been saved on the tabbed page Search results with the method Save search results in favorites
 , you have the same column information available
here again. Also see Section 3.1.1.6.7.1, “
Save search results: in favorites / in file”.
, you have the same column information available
here again. Also see Section 3.1.1.6.7.1, “
Save search results: in favorites / in file”.
-
On the tabbed page Favorites you can perform any further searches based on the results.


On the History [49] tabbed page, all parts and/or assemblies that have already been opened are listed in calendaric order.

Furthermore on the History tabbed page there is a rubric Installed catalogs.[50] Here you can see which catalogs have been added when and which files have been changed compared against the earlier version.
The following icons signalize the respective directory or project status:

|
Changes / New files in the directory |

|
|

|
|

|
The file is new / New project |

|
Project deleted |
The following figure shows an example.
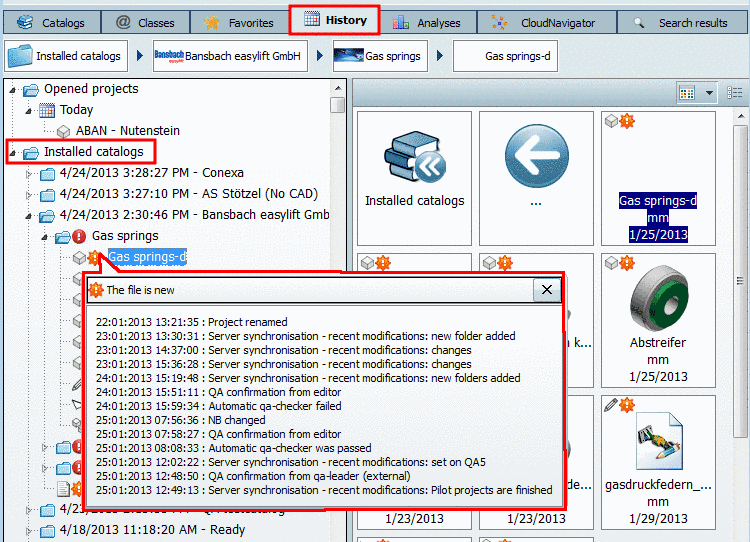
As soon as you move the mouse over an icon, a tooltip with the history of changes is shown.
As you go deeper into the directory structure, the selected directory is added to the breadcrumbs row (navigation path), so that you can see the current selection directly in front of you.

You can jump directly into a level by clicking on the directory symbol.
Via the arrows you can hide/show the respective subdirectories. Move the mouse over the desired directory (the selected is then highlighted).
To jump into the highlighted directory, simply click once.
[45] In April 2013 about 600 supplier catalogs are available.
[46] These are the most common icons. All other you can find under Section 3.1.1.12, “Legend: Used icons on catalog, directory, project level and part view ”.
[47] Changeable on single click. See Section 3.3.3, “ "Part selection" tabbed page ”)
[48] Beside alphabetical sorting of directories individual sorting is also possible.
You can find detailed information under Section 4.7.2.1.11, “ Sort directory ” in eCATALOGsolutions Manual.
[49] The history can be deleted optionally. On this please see under Section 1.1.4.4.5.3, “ Cleanup versions ” in PARTsolutions / PARTcommunity4Enterprise - Administration Manual.
[50] as of v9.02
[51] Via configuration file the display of the history can be set on and off. See under Section 1.1.7.5.6.2.9, “Änderungshistorie von Installation history an-/ausschalten ” in PARTsolutions / PARTcommunity4Enterprise - Administration Manual.
