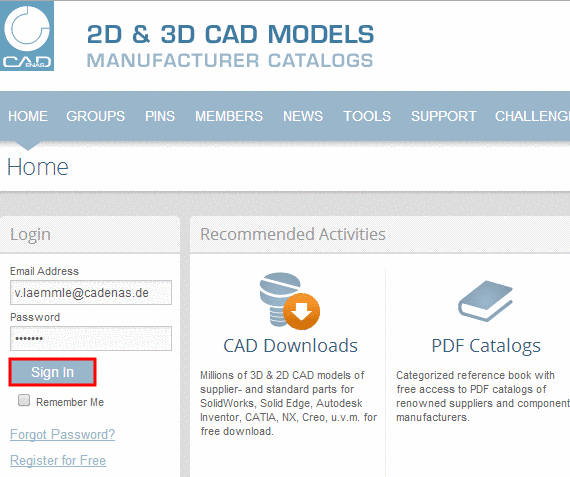
Login
Our 3D CAD supplier models have been moved to 3Dfindit.com, the new visual search engine for 3D CAD, CAE & BIM models.
You can log in there with your existing account of this site.
The content remains free of charge.

Top Links
Categories


Search FAQs
Most Recent FAQs
-
0 comments, 0 likes, 3,606 views100% helpful.
-
0 comments, 0 likes, 4,837 views100% helpful.
-
0 comments, 0 likes, 10,782 views
Most Viewed FAQs
-
0 comments, 0 likes, 129,559 views0% helpful.
-
0 comments, 0 likes, 25,490 views
-
0 comments, 0 likes, 21,546 views18% helpful.
FAQs
-
http://www.greentoken.de/onlineconv/ Online 3D Converter Convert 3D models between file formats (i.e. FBX to OBJ or OBJ to STL for 3D p...
-
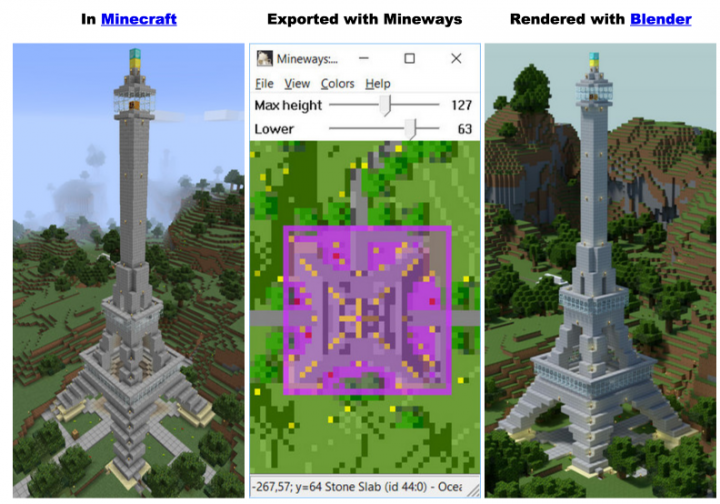
http://www.realtimerendering.com/erich/minecraft/public/mineways/index.html Mineways lets you export your Minecraft creations into files...
http://www.realtimerendering.com/erich/minecraft/public/mineways/index.html
Mineways lets you export your Minecraft creations into files you can use for making images, movies, or 3D prints. It is a free, open-source program for exporting your Minecraft models for 3D printing on your own printer or through a service such as Shapeways or Sculpteo, viewing on the web through Sketchfab, and rendering with Blender, 3DS MAX, Maya, Cinema 4D, or other rendering system.
The latest Windows version is 5.09; for Mac it's version 5.04, 32-bit only (read the notes for the Mac). For Linux, use WINE to emulate Windows.
Minecraft is a computer game that randomly generates infinite worlds made up of cubic blocks of various materials, with each block being 1x1x1 meter. There are rules that govern how the world works, but no set goals. Generally you mine the materials from the world, combine ("craft") them into blocks, and place each block in the world to build structures, all using an in-game character that moves like it would in a first-person shooter game. You can play in worlds on your own computer, or with other players on multiplayer servers.
There is more to it than that, including monsters that can get in the way, but I refer you to a few sites that describe it in more detail:
- Wikipedia
- Minecraft wiki
- Rock, Paper, Shotgun
- Penny Arcade comics here and here

A crafting example from the Minecraft wiki.The game has become quite popular over the past few months. The single Swedish programmer who is developing it has it has over 400,000 paying customers and has made over five million dollars on it so far. And it is only in an "alpha" state!
From my perspective, I find that it appeals to that part of you that loves LEGO, model trains, or building sand castles and pillow forts. I also find it very liberating to be limited to cubes, which sounds ironic. If I had more elaborate or complex tools to build with, the learning curve would discourage me from building something interesting. Only having cubes, I feel much more inclined to dive in and start building.
Permalink | 0 comments, 0 likes, 25,490 viewsWas this answer helpful? -
CAD models to download After generation, the CAD models are available in the Download CAD models area. &nbs...
 CAD models to download
After generation, the CAD models are available in the Download CAD models area.
CAD MODELLE als E-Mail Versand The CAD models are sent per e-mail immediately after generation.
Note
Permalink | 0 comments, 0 likes, 21,546 views18% users marked this FAQ as helpful.|11 votesWas this answer helpful? -
The following formats for 3D CAD models and 2D CAD models are available (license dependent): ADEM | Ali...
-
Here you'll find the PARTsolutions DVD for downloading: PARTupdate The Software is only provided for customers in maintenance or after ...
-
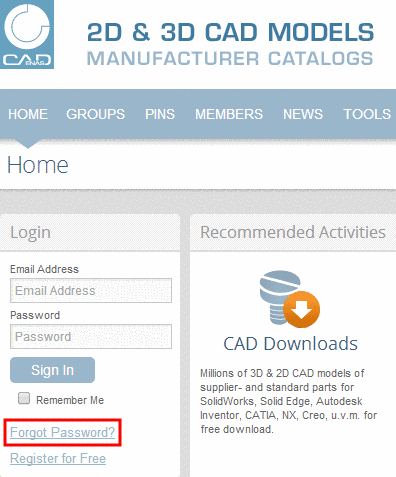
Click on the button "Forgot Password" at the left hand side. To reset your password please enter the e-mail addres...
-
-
Click on the button "Forgot Password" at the left hand side.
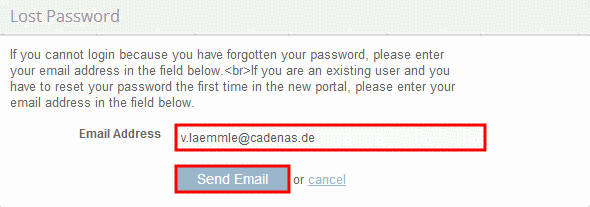
To reset your password please enter the e-mail address you used during your registration into the input field and click on "Send Email".
-> You will receive the confirmation „Forgot Password“.
-
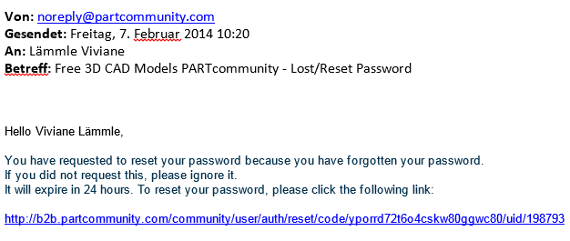
Open the e-mail sent to you and click on the link.
-> A dialog opens with a form for inputting your new password.
-
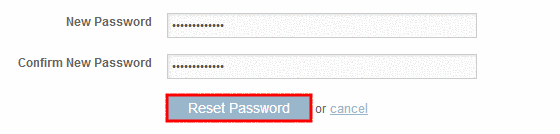
Enter your new password into the input field and click on "Reset Password" to reset your password.
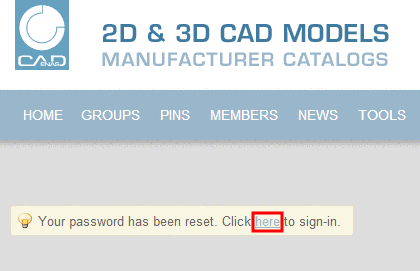
-> You will receive the confirmation „Your password has been reset. Click here to sign-in.“
-
In order to get to login click on "here".
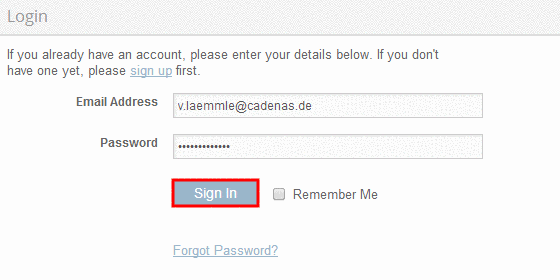
-
To log in, enter your email address and your new password into the input field and click on the button "Login".
-
Please check your spam folder if you have not received any e-mail to reset the password.
-
Permalink | 0 comments, 0 likes, 16,254 viewsWas this answer helpful? -
-
1. Please use the form which can download with the following link: Hardware exchange 2. For licensing the Host-I...
1. Please use the form which can download with the following link:
Hardware exchange
2. For licensing the Host-ID (MAC address) of the old and the new computer is required.
-> The Host-ID can be selected in the license manager PARTadmin.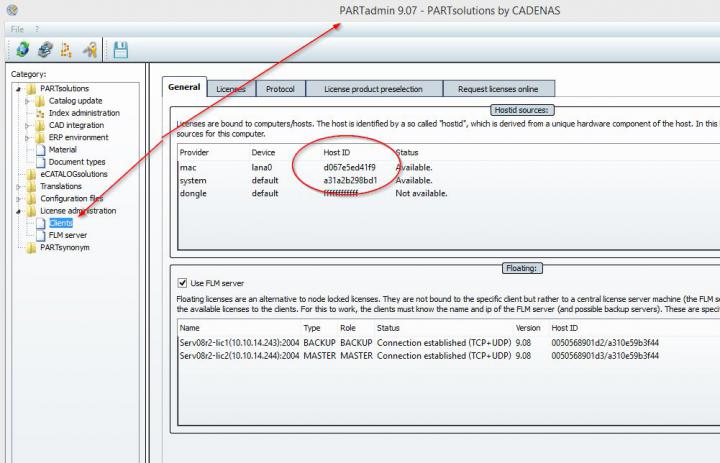
3. Get further help regarding licensing by clicking F1 within PARTsolutions
 Permalink | 0 comments, 0 likes, 16,188 views100% users marked this FAQ as helpful.|2 votesWas this answer helpful?
 -
catalogs >= 1.5 GB cannot be installed via PARTadmin - online (->PSOL 10.0 SP0) Please use PSOL >= 10.0 SP1 or download catalog...
-
Downloading parts is not possible without being registered On the left side, click on the button "Register for Free" in ...
-
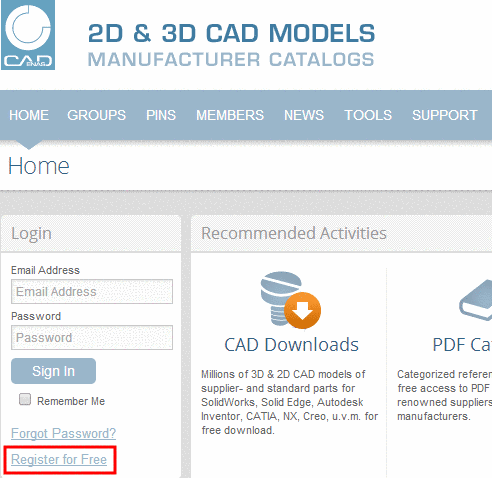
Downloading parts is not possible without being registered
-
On the left side, click on the button "Register for Free" in order to create a free account.
-> A dialog opens with a form for inputting your account information.
-
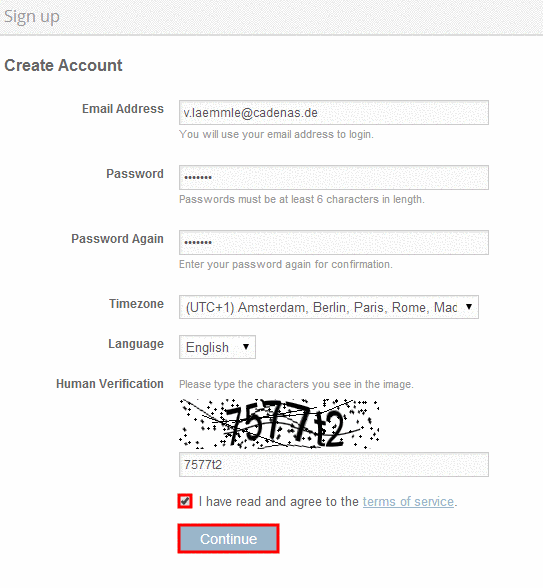
All fields are required to be filled in and the terms of use must be accepted. Click "Continue" at the bottom of the page to proceed with registration.
-
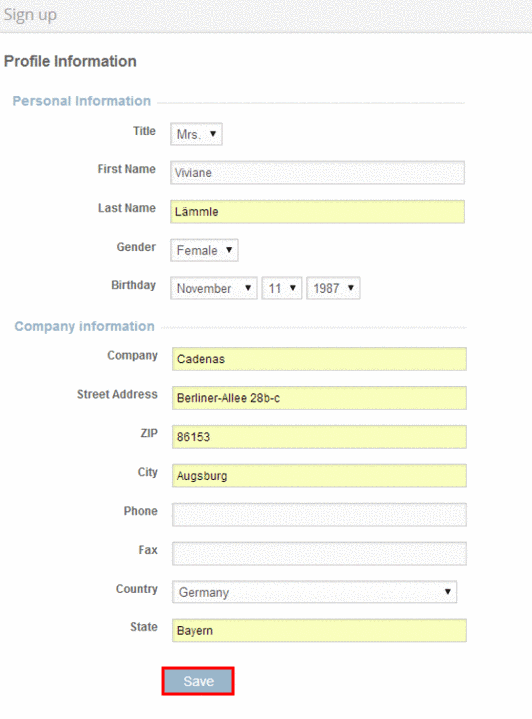
In the next step the personal informations and informations about the company must be specified. Furthermore the field of activity, the CAD System, the PLM- or ERP system and more contact details can be specified.
-
In order to verify that your details are correct, click on "Save"
The following details must be specified for a successful registration:
First name, last name, company, zip code, country.
By entering invalid Information appropriate information appears.
-
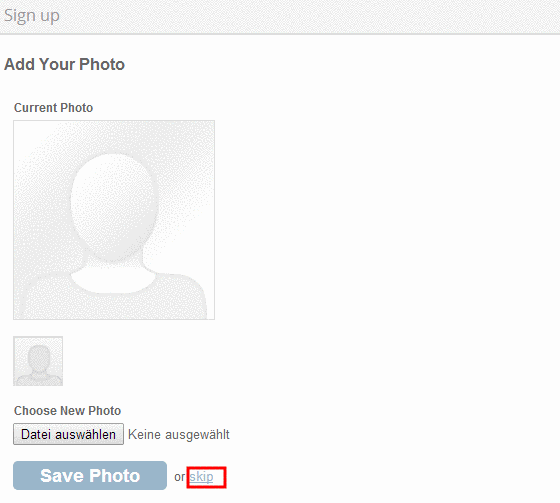
-
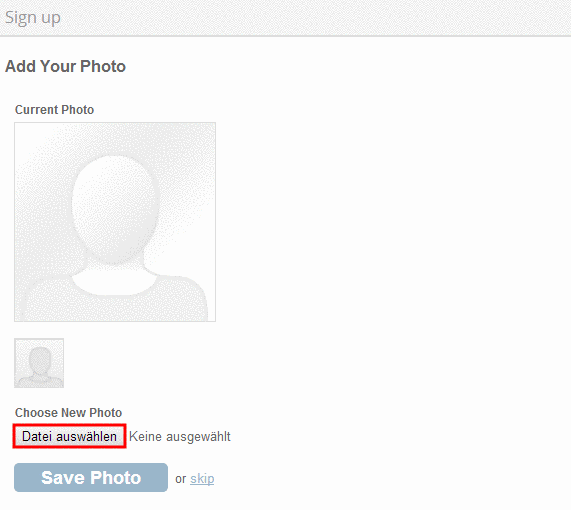
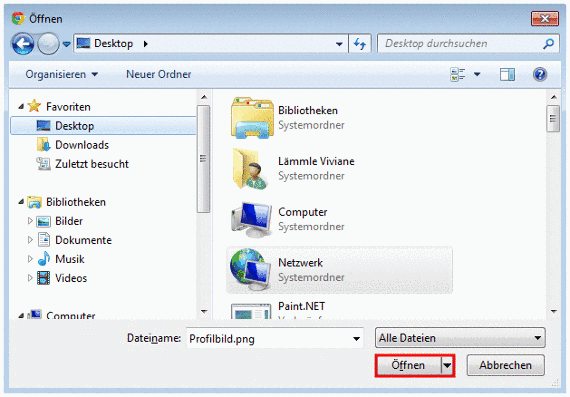
Choose the desired picture and open it by clicking the button "Open".
-
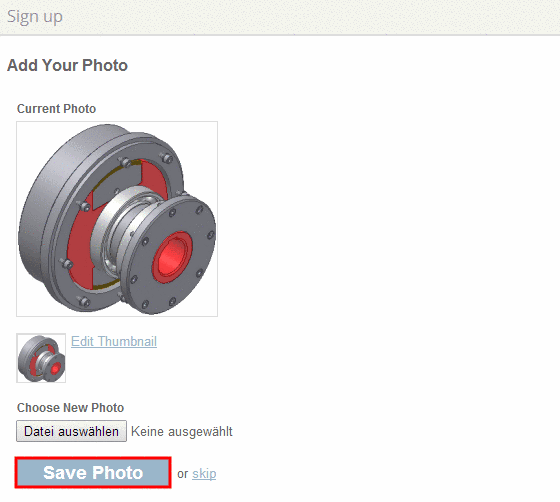
-> If no picture shall be uploaded this step can be skipped.
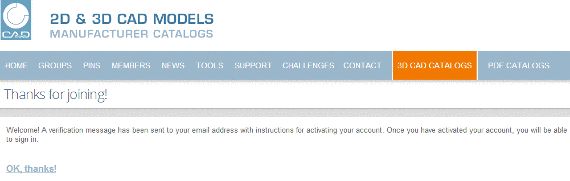
-
-> You will receive the confirmation „Thanks for joining!“
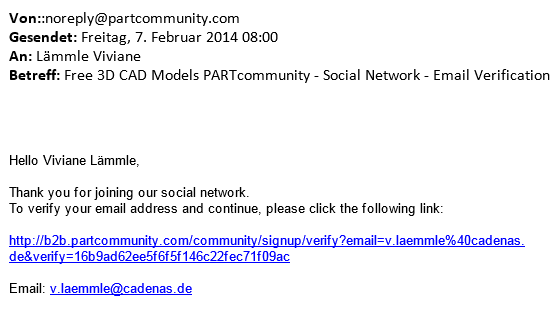
-> The activation link will be sent to the specified e-mail address automatically.
-
Open the e-mail sent to you and activate your account by clicking on the activation link.
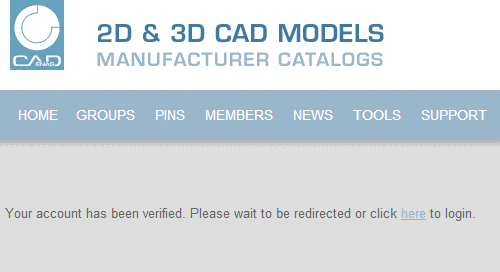
-
You will receive the confirmation „Your account has been verified. Please wait to be redirected or click here to login“ after that.
Furthermore you receive a welcoming e-mail of PARTcommunity, in which you'll be invited to login.
-
Permalink | 0 comments, 0 likes, 15,671 views67% users marked this FAQ as helpful.|3 votesWas this answer helpful? -
-
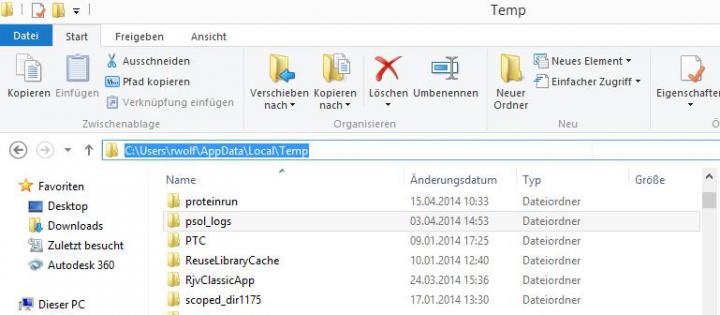
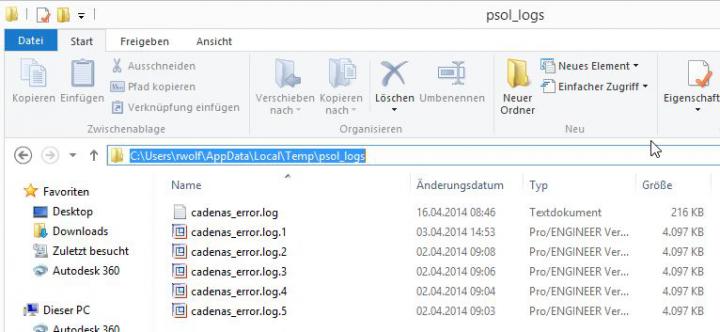
1. Please delete from folder %temp%/psol_logs (within WINexplorer) al files.Now please reproduce the problem and send logfile from this ...
1.
Please delete from folder %temp%/psol_logs (within WINexplorer) al files.
Now please reproduce the problem and send logfile from this folder.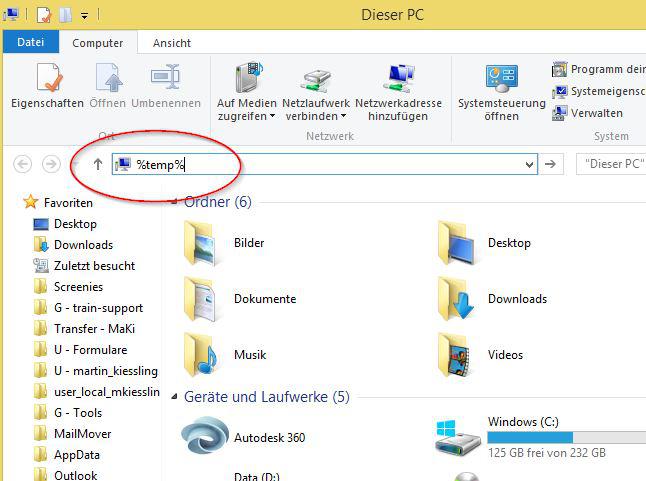
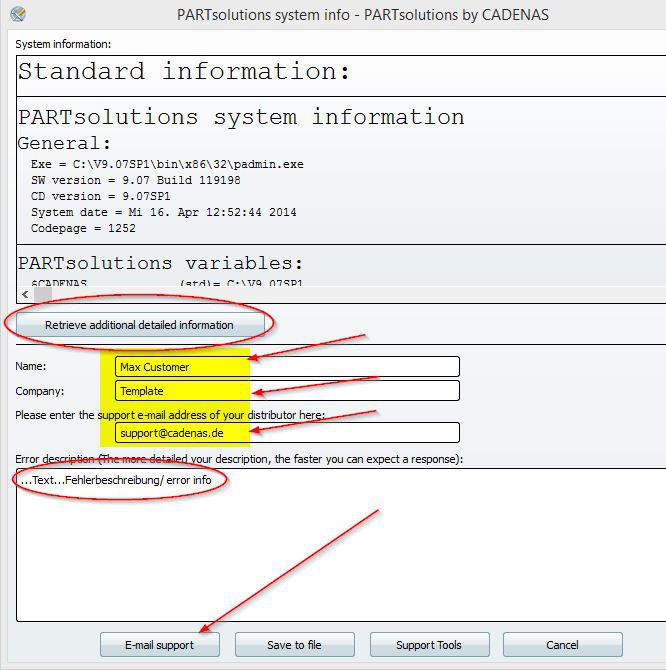
2.
Click button F7 while PARTdatamanager is opend and send the file systeminfo, too.
3. (only if problem with a special part)
Please open the part in PARTdatamanager an export it as PS3 V2 3D and add this file, too.
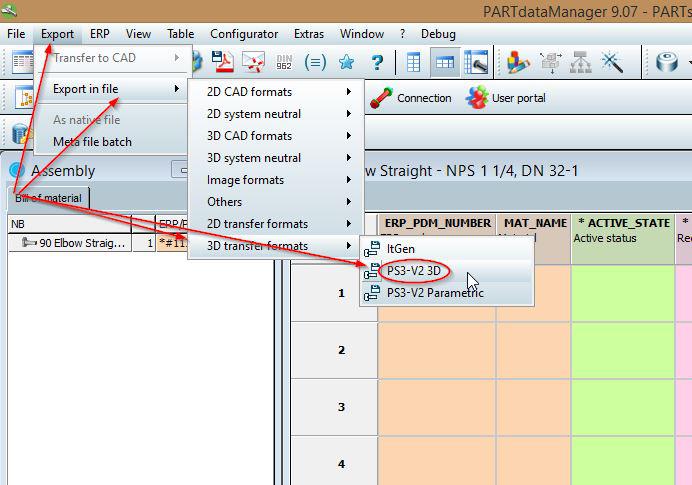
Please send data to support@cadenas.de
Permalink | 0 comments, 0 likes, 15,585 views50% users marked this FAQ as helpful.|2 votesWas this answer helpful? -
-> The activation link will be sent to the specified address automatically. Open the e-mail sent to you and activate your acc...
-
-> The activation link will be sent to the specified address automatically.
-
Open the e-mail sent to you and activate your account by clicking on the activation link.
-
Please check your spam folder if you have not received any activation link since the registration yet.
-> If you can't find the e-mail anymore you can request the activation link again.
-
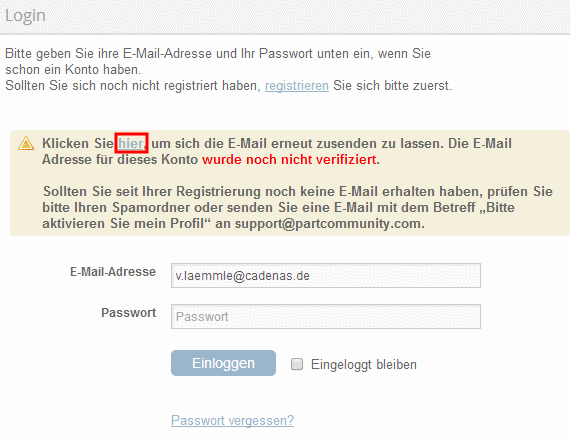
Enter your access data and click on "Login".
-
In order to request the activation link again click on "here".
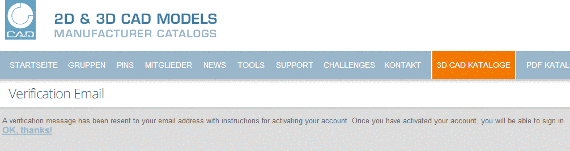
-> You will receive the confirmation „Verification Email“.
-
Open the e-mail sent to you and activate your account by clicking on the activation link.
-> Afterwards you will receive the confirmation "Your account has been verified. Please wait to be redirected or click here to login“.
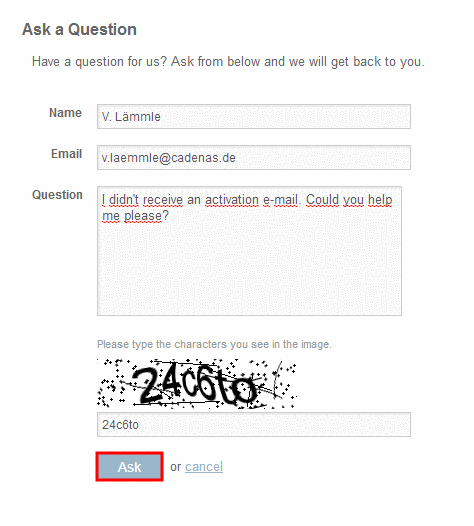
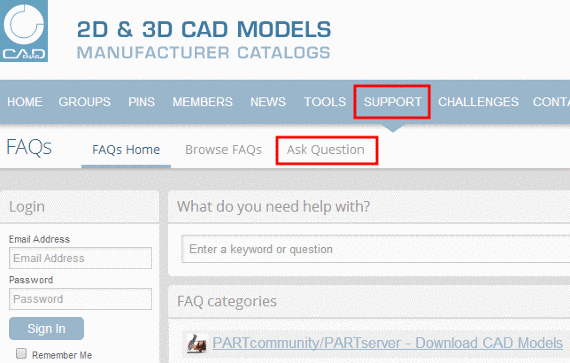
-> For further questions please contact the support team via "Ask Question" in the FAQ area.
-
Click on "Support" and afterwards on "Ask Question".
-
To send the request, please fill out all input fields and click on "Ask".
-
Permalink | 0 comments, 1 like, 15,493 views60% users marked this FAQ as helpful.|5 votesWas this answer helpful? -
-
You will find the latest CATIA Interface on our FTP. For details you can write a direct Email to support@cadenas.de and we ...
-
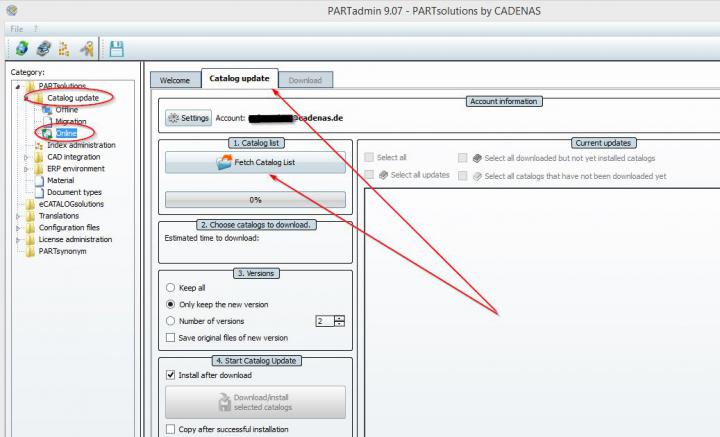
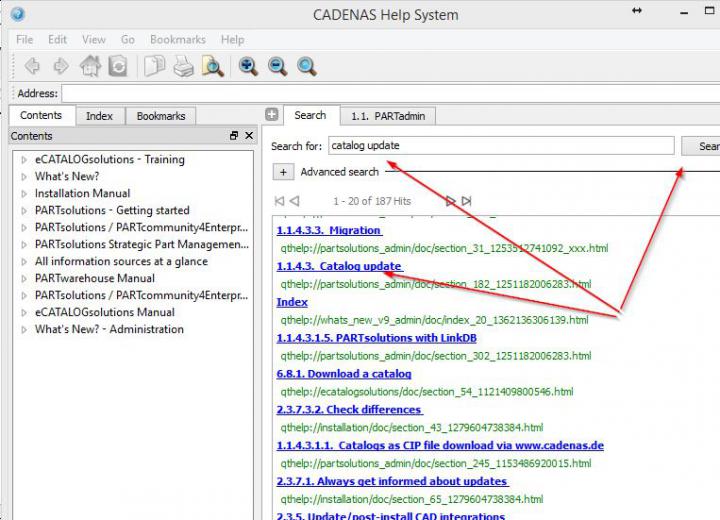
open module PARTadmin -> ...-> Online further help regarding updating catalogs by clicking F1 within PARTsolutions
-
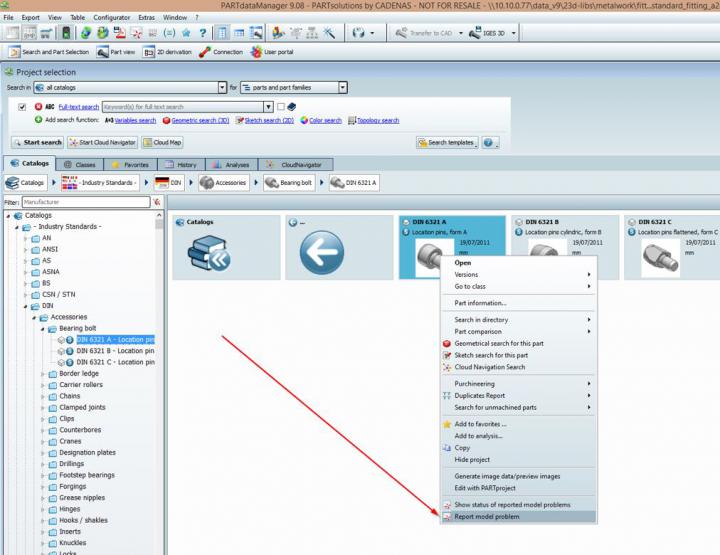
Click with right mousebutton on the corresponding part and open the dialog"report model problem" and send the info to us.
-
Please check the following points: - are you logged in on the partal with you account?- can the part be generated in other export format...
Please check the following points:
- are you logged in on the partal with you account?
- can the part be generated in other export formats?If your problem could not be solved please contact the support team
via Ask Question in the FAQ area.
Permalink | 0 comments, 1 like, 13,948 views33% users marked this FAQ as helpful.|9 votesWas this answer helpful? -
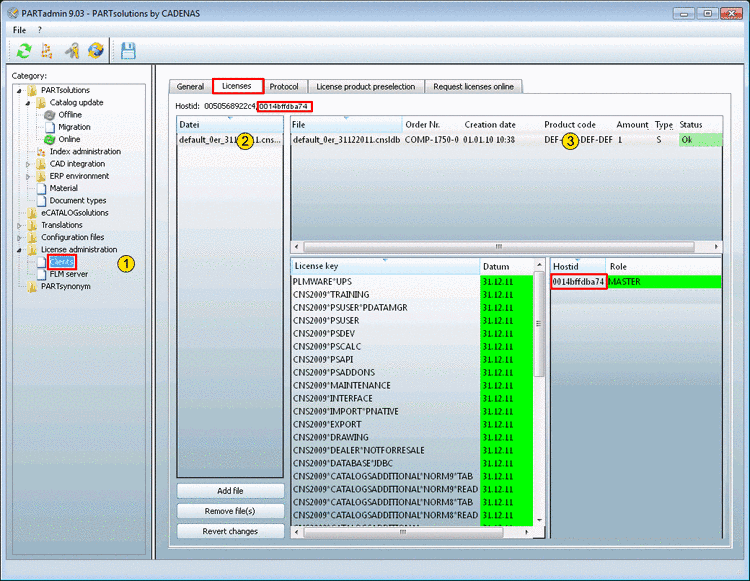
In the Category menu mark the item License administration -> Clients. Select the Licenses inde...
-
In the Category menu mark the item License administration -> Clients.
Select the Licenses index page.
Select a license product top right.
-> Now detailed license information is displayed under License key and Host ID/Role.
-
Check, whether all received licenses are listed.
If the license file „*.cnsldb“ is not listed or you have received a new license file, which you want to add to the list, then do the following:
--> Now the file is listed in the license administration.
-
Mark the License file in the dialog area top right.
--> The individual License keys with Expiration date and Status are listed.
-
Check, whether the Host ID of the license (downright) is according to one of the Host ID displayed above (see Fig. „Licenses“).
(Exception: Some products (e.g. free catalogs) have so-called zero-licenses '0000 0000 0000'). Here the hostid doesn't have to be according)
-
In order for the license to be effective for the respective module (PARTdataManager, etc.), the Status has to be OK (green).
-
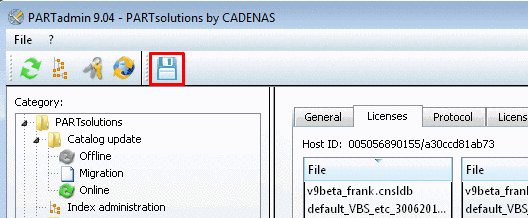
In order to finish the procedure, click on the Save changes button! (If not already happened during the license installation).
-
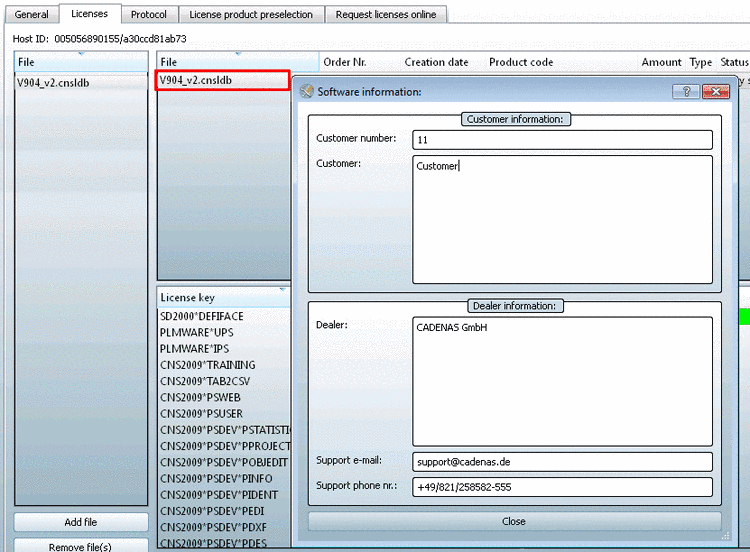
Call up software and support information
After double-click on a license file / license product (*.cnsldb) the Software information dialog box appears.
In the Customer information dialog area you can find your Customer number. Stating the number helps the support better help you.
Under Dealer information you can find the relevant dealer with Support e-mail and support phone number.
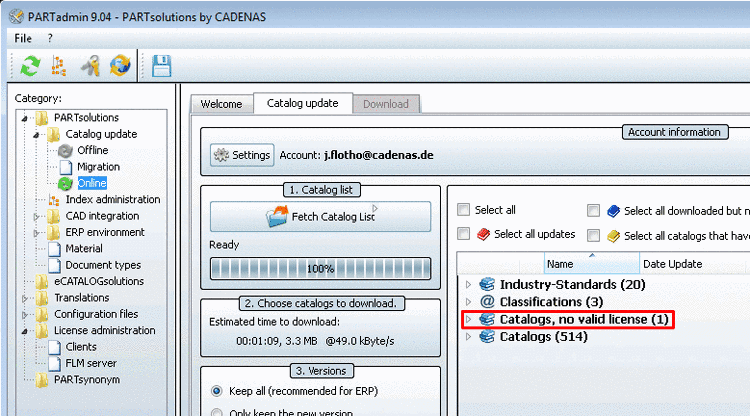
As of V9.03 catalogs without valid license are displayed in their own category under PARTadmin -> PARTsolutions -> Catalog update-> Online -> Catalogs, no valid license.
-
Get further help regarding licensing by clicking F1 within PARTsolutions

Permalink | 0 comments, 0 likes, 13,790 views0% users marked this FAQ as helpful.|1 voteWas this answer helpful? -
-
http://touchterrain.geol.iastate.edu/ What is Touch Terrain? Our TouchTerrain web application creates 3D terrain model files that can b...
http://touchterrain.geol.iastate.edu/
What is Touch Terrain?Our TouchTerrain web application creates 3D terrain model files that can be printed on a 3D printer. You select the area you want to print, decide which Digital Elevation Model (DEM) you want to use, set some print parameters and let the app do all the work. When it's done, you download the 3D model file(s) (STL or OBJ format) and print it out on your 3D printer or send it to an online 3D print service.
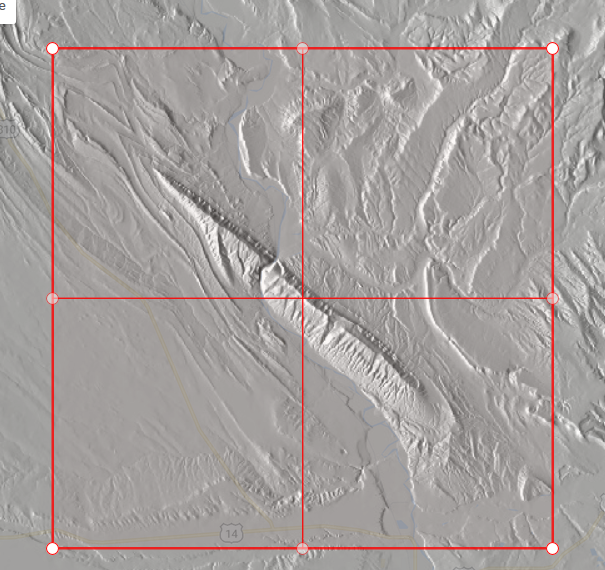
Area selection (hillshade):
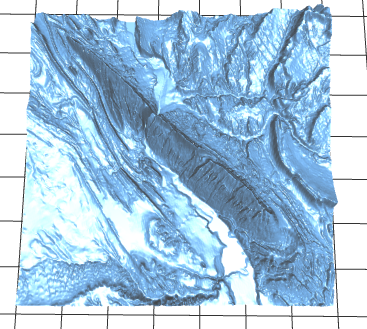
3D digital model (link to live viewer):
3D printed model:
This app is developed by Chris Harding and Franek Hasiuk of the Geofab lab at Iowa State University. It's use is free of charge but please understand that it is still in early development and so may not always work perfectly.
How to use the TouchTerrain app
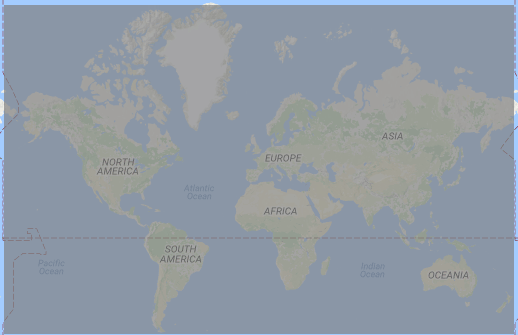
Let's say you want to 3D printable terrain file(s) for a certain area. First, you need to find this area on the Google Map.
Moving around the google map
- Move the Transparency slider to the left to hide the hillshade layer for now.
- Click on the - or + button the in the lower left corner to zoom out or in. (Or: use your mousewheel).
- Left click and drag your mouse to pan the map.
- Switch to different types of google maps via the buttons in the upper left corner: streetmap, terrain map, satellite map
- Use zoom and pan until you find the desired area.
Using the hillshade layer
The hillshade layer shows topographic relief, which tends to bring out ridges, river beds, and other terrain morphologies. It's useful for finding interesting terrain features for printing. The hillshade layer overlays the Google Map (street map or satellite map); Move the Transparency (%) slider to "mix" both layers, the higher the % the more the Google basemap will come through:
0%
45%
70%
70%, with street map
You can further tweak the appearance of the hillshade layer by setting different Gamma Correction values, which affects the luminance of the hillshade. Low Gamma (< 1.0) values make for a generally darker hillshade but can be helpful to bring out minute details, especially in relatively flat terrain. Unlike with the Transparency slider, where change is instantaneous, you have to click on Set New Gamma Value to see the change (because it requires server-side processing).
0.3
1.0
2.0
Choosing an Elevation Data Source
TouchTerrain offers several types of Digital Elevation Data (DEM) rasters, which differ in resolution and area coverage. Resolution refers to the real-world size of each raster cell (pixel), e.g. in the USGS/NED DEM raster, each cell is approximately 10 x 10 m. However, NED only covers the US - areas outside the US are covered at lower resolutions. After selecting a different Elevation data source, the areas covered by it will be shown via the grey hillshade layer:
USGS/NED:
~10 m resolution,
US lower 48 states onlySRTM GL1:
~30 m resolution,
Worldwide up to 60 degrees latitude
GMTED 2010:
~90 m resolution,
Worldwide, onshore-only
ETOPO1:
~1 km resolution,
Worldwide - including offshore (bathymetry)
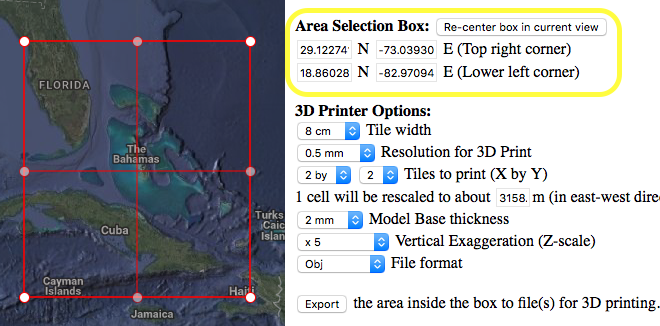
Selecting an area to print
Once you've decided on a general area, click on Re-center box in current view. This will show a red Area Selection Box, outlining the area you will 3D print.
- Click inside the box and drag - this will move the box without changing the size.
- Click on one of the small white circles and drag - this will resize the box.
- If you lose the box when moving around the map, press Re-center box in current view again.
- The lat/long coordinates of the top right and lower left corner of the selection box are shown as well. (But, you cannot change the box by typing in coordinates …)
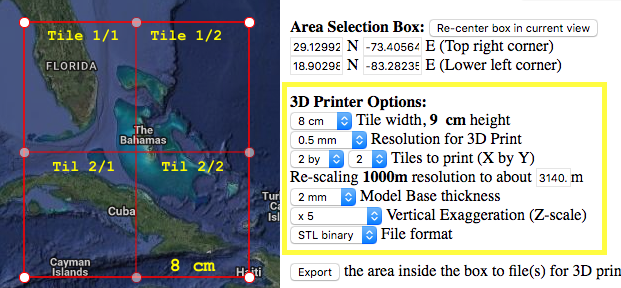
Setting the 3D Printer Options
This configures how the selected area will be converted into 3D model files for later printing.
- Tile width: The width of each tile after it's file has been printed out. Here, the selection box is divided into 4 tiles ( 2 x 2). The width of each of the 4 tiles set to 8 cm, their height has been calculated to 9 cm. To make a decision you need to know the approximate size on your printer's build plate.
- Resolution: Again, you will need to have some knowledge about the XY precision of your printer. This number is limited by the realistically smallest vertical distance (in mm) your printer can move. As finer resolutions leads to longer processing and print times and larger 3D model files, it is advisable to start with a rather coarse resolution (something like 20 x the finest XY precision of the printer given in your manual) and go to a finer resolution if the results lack desired details. Conceptually, this corresponds how the printer moves along an internal grid - for a 80 mm x 90 mm tile, 0.5 mm per step results in a 160 x 180 grid.
- Tiles to print: the number of tiles that divide the Selection box into smaller areas. Each tile has the same size (width x height)
- Re-scaling: Depending on the values for tiles and printer resolution, the original DEM raster will be re-sampled to approximately this resolution before creating the 3D models from it. This is directly related to the aforementioned grid. Here, the original DEM raster has a 1000 m resolution; however, the requested 160 x 180 grid corresponds to a coarser resolution of about 3140 m. Using this lower resolution means less processing and smaller files. But, if you wanted to, you could get closer to the original 1000 m resolution by either making the tiles larger (e.g. set the tile width to 10 cm), use more tiles (3 by 3) or lower the print resolution (e.g. to 0.3 mm). However, make sure that your do not rescale drastically below the original resolution, in this case below 1000 m.
- Model base thickness: a thin base will be put beneath the model to prevent having a hole at the lowest elevation. The thickness should be at least be four times as thick as a typical layer from your printer to ensure good coverage.
- Vertical Exaggeration (z-scale): the elevation is multiplied by this factor before printing. A z-scale of x 1 results in no distortion. Z-scales larger than one are useful to bring out details in comparatively flat terrain.
- File format: The type of 3D model file created. STL is the standard format for 3D printers. STL binary is prefered for its small file size.
Understanding the linkage of tile size, tile number, source DEM resolution and 3D print resolution
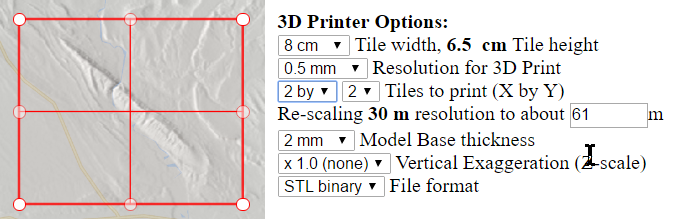
It is useful to understand how these four parameters are linked to create good quality 3D models. You probably want your 3D printer models to show as much detail as possible, which means setting the parameters in a way that the re-scaled resolution is close to, but not lower, than the source DEM resolution. As this can be a bit of a juggling act, here's an example scenario:
Let's assume you want to create a tiled model with the SRTM GL1 DEM source, for which each cell is 30 x 30 m. With 4 tiles, each 8 x 6.5 cm and a resolution of 0.5 mm, the 30 m cells need to be rescaled (resampled, interpolated) to a 61 m cells for 3D printing. This means that as the 3D printer moves in 0.5 mm steps, it jumps (roughly) 60 m in reality, so the printed model would have less detail than it could, given the original DEM data resolution of 30 m. That's not necessarily a bad thing, you're just not getting the degree of terrain details that the original DEM sources data provides.
If you wanted to get a print with better detail, there are several parameters you could tweak:
- Use a finer 3D printer resolution (i.e. lower the mm number). Using 0.25 mm instead of 0.5 mm yields a rescaling to 30.5 m from the original 30 m resolution, i.e. this printout would show better detail than the 60 m version we had before. However, you have to make sure that your 3D printer can actually realize this finer resolution effectively, something that may requires you to print both versions and compare the end results. It may well turn out that the finer resolution model does not actually look any better than the coarser version, in which case you might as well stick with the coarser resolution.
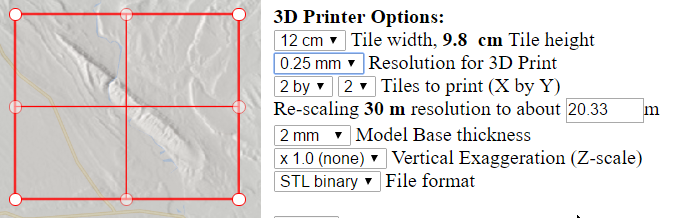
- Increase the tile size (cm). With a 12 x 9.8 cm tile size (but again using 0.5 mm), the print model would be rescaled from 30 m to 40.66 m. The full model would be physically larger (24 x 19.6 cm) and its detail noticeably better than the model with the 61 m resolution:
- Increase the number of tiles. Setting the size back to 8 x 6.5 cm, again using a 0.5 mm print resolution, but this time using 3 x 3 tiles, rescales from 30 m to 40.7 m. Very similar to the case above - again the full model would be 24 x 19.5 cm with better detail, but you would have to print out 9 tiles instead of 6 tiles.
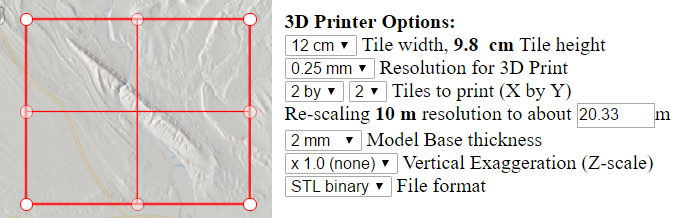
By now you can probably see how these parameters interact. You could, of course, change multiple parameters at once, e.g. set larger tiles (12 x 9.8 cm) and use a finer 3D print resolution of 0.25 mm:
This results in a rescaling from 30 m to 20 m, which will print but is actually somewhat pointless. Resampling the original DEM resolution to 20 meters will not increase the information content, and you're unlikely to print a model with better details than using around 30 m. You will, however, wait a bit longer and get larger files, which is simply inefficient. In other words, you might as well try slightly coarser print resolutions (0.3, 0.35, etc.) until the rescale meter number is pretty close to 30 m.
However, depending where your area is located, you may have the option to switch to a higher resolution DEM source! For this area, we can switch to the 10 m USGS NED DEM data source, which, with the same settings rescales from 10 m to 20 m, which will in fact result in a truly more detailed printout.
To recap: Once you've selected your area you need to have some idea about the effective range of resolution your 3D printer can do (e.g. 0.5 mm is a bit coarse, 0.2 mm is very fine) and know the size of your build plate (e.g. you are limited to models less than 12 x 12 cm). Decide on a rough physical size of your final 3D printed map (i.e. all tiles put together should be about 40 x 40 cm). Set the number of tiles and the tile size and adjust the 3D printer resolution setting until it is around the original DEM resolution but not much below. To be clear, there's nothing wrong with ending up with considerably larger numbers, as in my 10 m => 20.33 m example from before, as long as you're happy with the total size of your final 3D printed map and the number of tiles you have to print.
Processing and downloading the 3D model files
- Once you're set the 3D print options, press Export.
- This will show the pre-flight screen (Processing started). Press the Start button once and wait.
- The server now creates your 3D model files, however, there's no progress indicator, your browser will simply show that it trying to connect. That's normal, just be patient.
- (Note: we found that Safari tends to time out for large models i.e. high resolution and/or a lot of tiles, but Firefox or Chrome are more patient …)
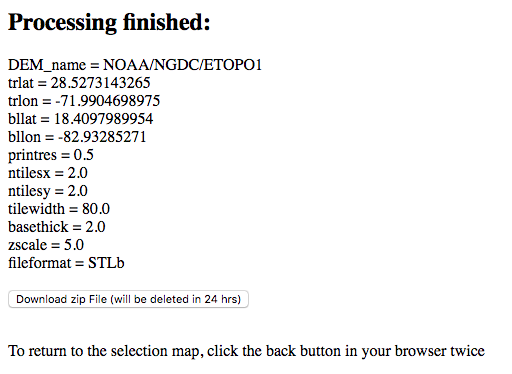
- Once processing has finished, you will see a summary screen. (Processing for this finished in about 60 seconds):
- Click the download button to download the zip file and unzip it. The unzipped folder will contain a 3D model file for each tile plus a log (text) file that summarizes the processing steps and detailed information about the DEM raster:
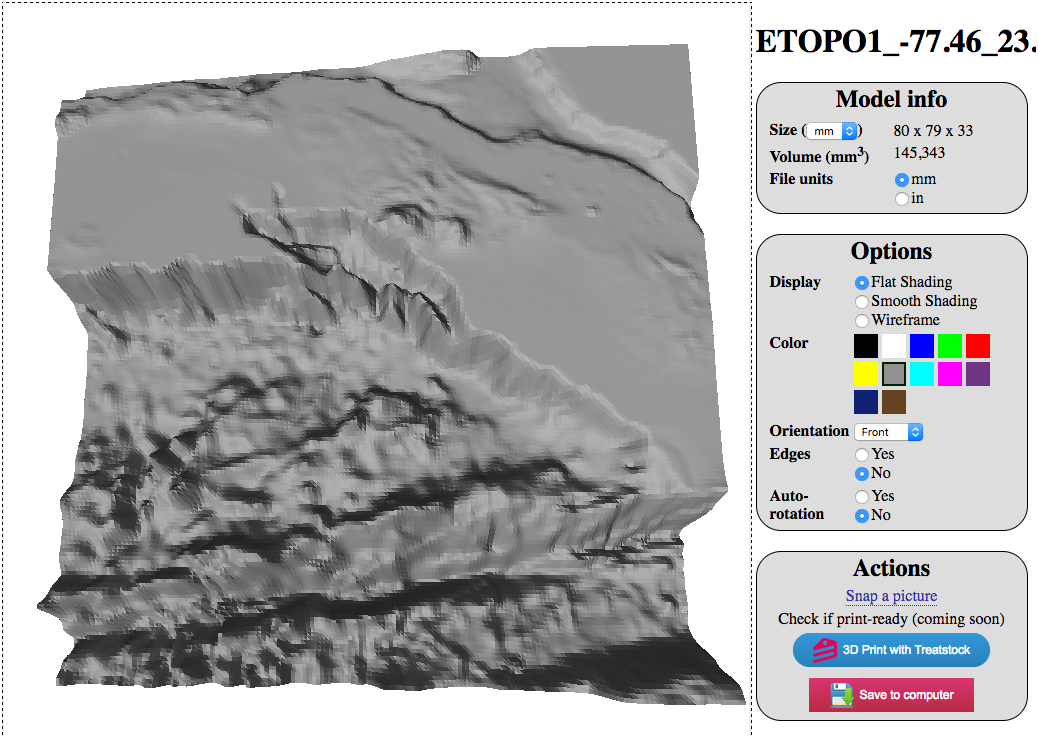
Checking the 3D model files
Before you start to print it's advisable to check the 3D models first. http://www.viewstl.com/ is a web site for uploading and previewing each tile. It also connects you to Treatstock, which will show a couple of online 3D print services.
If you want to print yourself, your 3D print program (e.g. MakerWare desktop) will give you a 3D view of your model. Note that you should never need to scale-to-fit as each tile model already has a true mm-based size given by width, height and z-scale from the 3D printer options.If you want to preview how multiple tiles look when put together, add them one by one to MakerWare desktop but do NOT have them move to the center. The x/y coordinates of all tiles are set so that all tiles will naturally fit together! However, the tiles will very likely exceed your build plate size, which is OK as this is just a preview.
Here are the four ETOPO1 STL files downloaded earlier, shown in 2 different colors to prove they are separate models:
(TODO: list of other multi-stl file viewers)
Looking at the 3D models, you may find that you don't like something in the model, e.g. you want more or less z-scaling or a different tile configuration, etc. Simply click the Back button on your browser twice and you're back at the Map screen with the exactly the same values you had before you clicked Export. Changes things to your liking and try again.
3D printing the models
Restart MakeBot and add a single tile. This time, make sure it is put at the center of the build plate.
Permalink | 4 comments, 1 like, 13,686 views100% users marked this FAQ as helpful.|1 voteWas this answer helpful? -
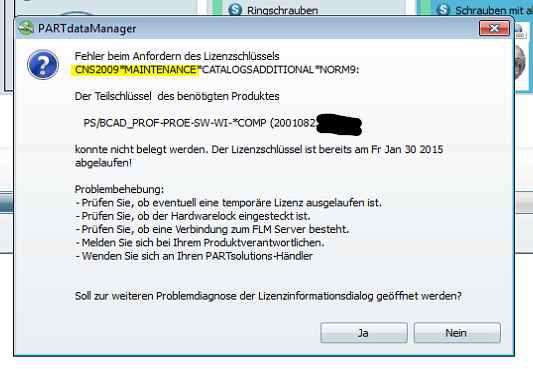
This message means that a licensefile is in use which date of maintenance expired. Solutions: 1. Usage of valid licensefile and make su...
This message means that a licensefile is in use which date of maintenance expired.
Solutions:
1. Usage of valid licensefile and make sure this is the only/ unique licensefile used (press F1-button in PARTsolutions
for documentation).if you do not have a valid licensefile:
2. Contact your local PARTsolutionsdealer to receive actual licensefile.
3. Contact your local PARTsolutionsdealer for renewal of maintenancecontract.
 Permalink | 0 comments, 0 likes, 13,605 viewsWas this answer helpful?
 -
You can log in after successful registration and account activation. Enter your access data in the input field at the left hand ...
-
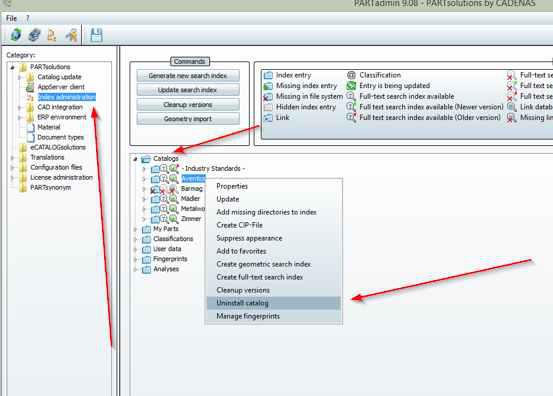
Remove catalog PARTadmin -> Index administration -> open folder Catalogs -> choose with right mousebutton catalogthat should be...