Manual
Login
Our 3D CAD supplier models have been moved to 3Dfindit.com, the new visual search engine for 3D CAD, CAE & BIM models.
You can log in there with your existing account of this site.
The content remains free of charge.

Top Links
Manual
 |
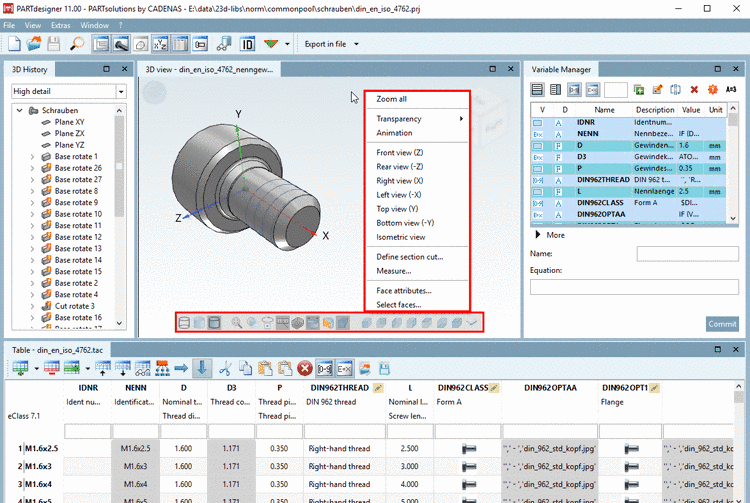
In the docking window 3D view the opened part is visualized.
![[Note]](/community/externals/manuals/%24%7Bb2b:MANUALPATH/images/note.png) |
Note |
|---|---|
|
The above figure shows all existing docking windows (working areas) as an overview. Normally you won't use all docking windows at the same time. Make your own user interface as desired.
| |


You can modify the depiction by a variety of commands.
The commands can be found in the:
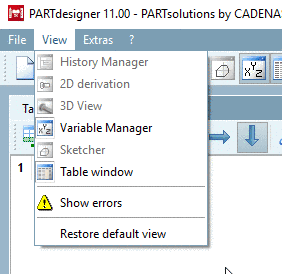
The docking window 3D view is mostly identical in PARTdesigner and PARTdataManager. A description on the single toolbar buttons and the context menu can be found under Section 3.1.7.6, “ Docking window "3D view" ” in PARTsolutions / PARTcommunity4Enterprise - User manual.
On the creation of texts and classes, you can find more information under Section 5.13.7, “Create Published elements ”.
In PARTdataManager, with the command Show texts and classes, you can show or hide them in the 3D view.