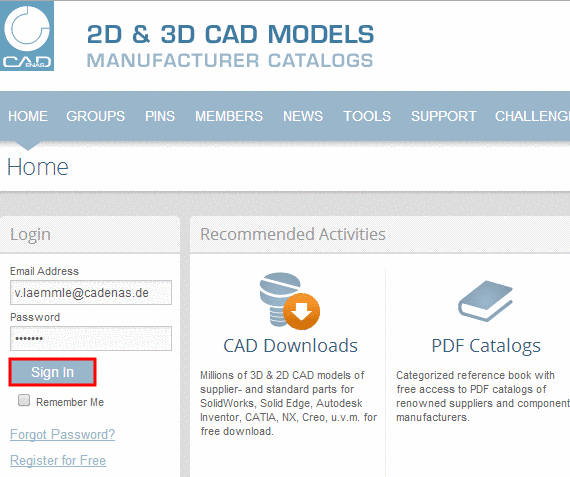
Login
Our 3D CAD supplier models have been moved to 3Dfindit.com, the new visual search engine for 3D CAD, CAE & BIM models.
You can log in there with your existing account of this site.
The content remains free of charge.

Top Links
Categories


Search FAQs
Most Recent FAQs
-
0 comments, 0 likes, 3,445 views100% helpful.
-
0 comments, 0 likes, 4,648 views100% helpful.
-
0 comments, 0 likes, 10,447 views
Most Viewed FAQs
-
0 comments, 0 likes, 129,000 views0% helpful.
-
0 comments, 0 likes, 23,808 views
-
0 comments, 0 likes, 21,204 views18% helpful.
FAQs
-
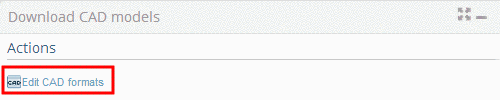
CAD models to download After generation, the CAD models are available in the Download CAD models area. &nbs...
 CAD models to download
After generation, the CAD models are available in the Download CAD models area.
CAD MODELLE als E-Mail Versand The CAD models are sent per e-mail immediately after generation.
Note
Permalink | 0 comments, 0 likes, 21,204 views18% users marked this FAQ as helpful.|11 votesWas this answer helpful? -
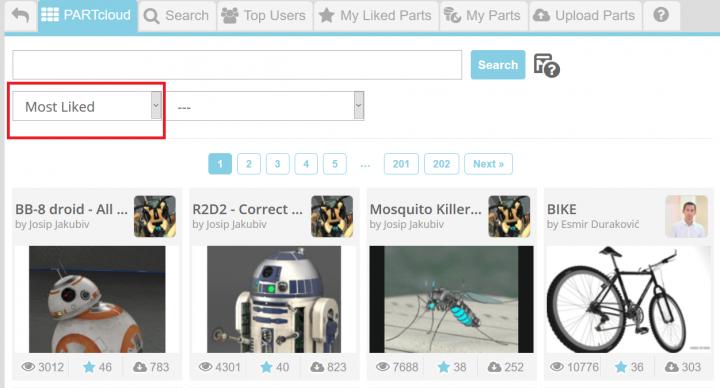
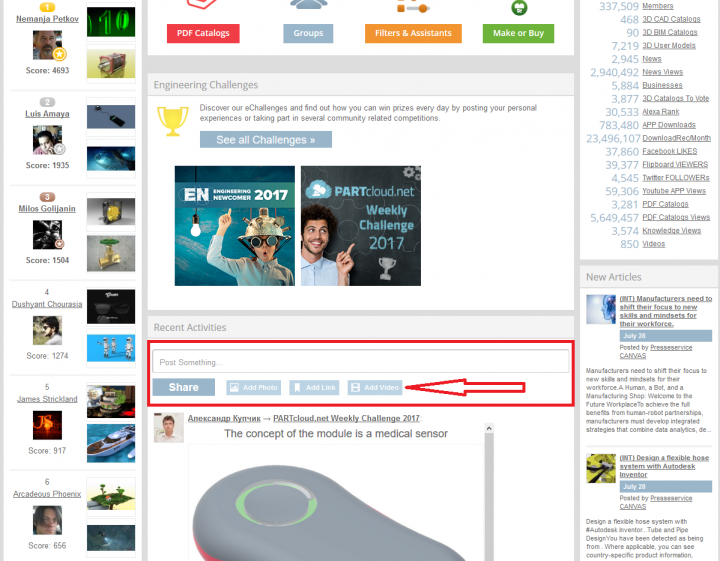
1. Go to PARTcommunity.com homepage and click on "Add Video" 2. Click on "Choose Source" 3. Choose between YouTube or...
1. Go to PARTcommunity.com homepage and click on "Add Video"
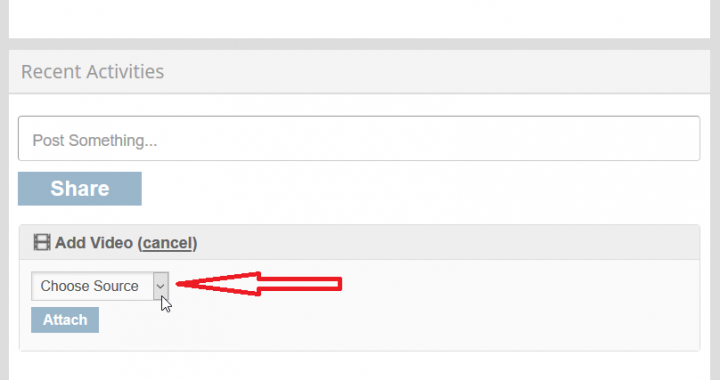
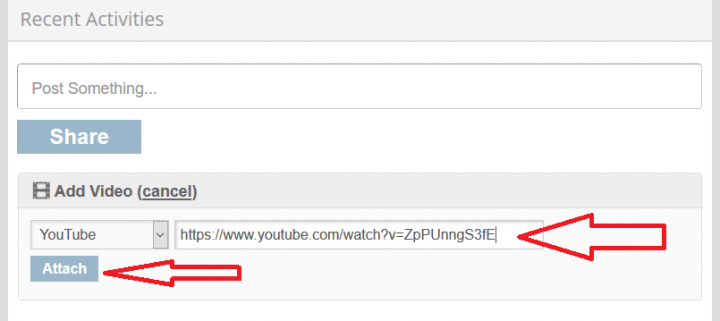
2. Click on "Choose Source"
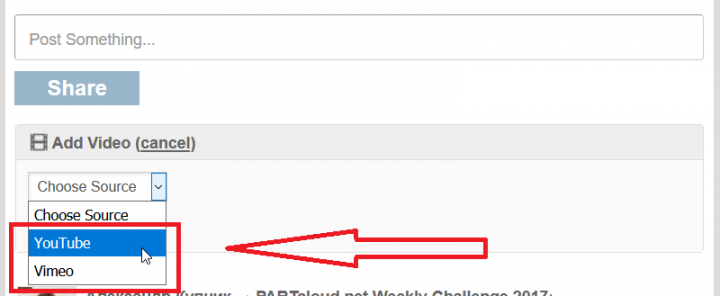
3. Choose between YouTube or Vimeo (depending on the source of the video clip you would like to publish). You cannot publish video clip from your computer, only between this two options.
4. Go to the video clip and copy the link
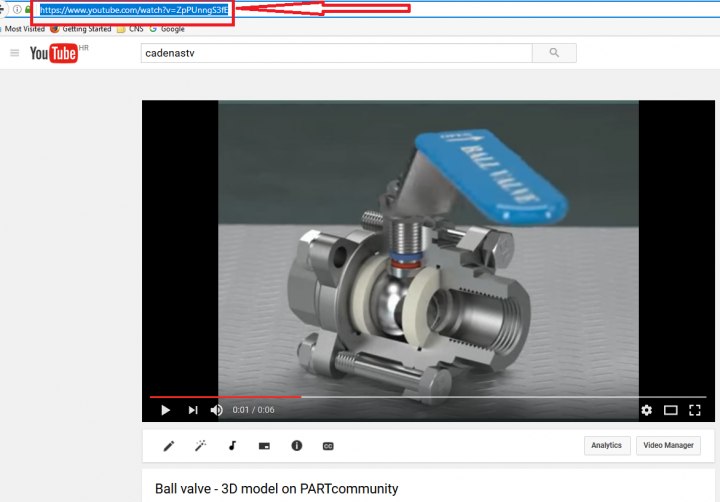
5. Paste the link and click on "Attach"
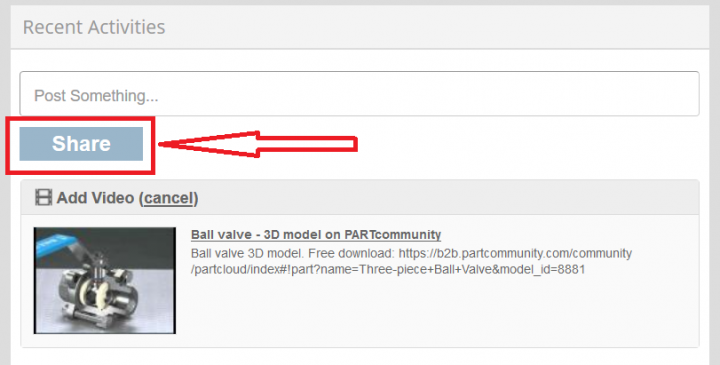
6. When the video clip is uploaded, click on "Share"
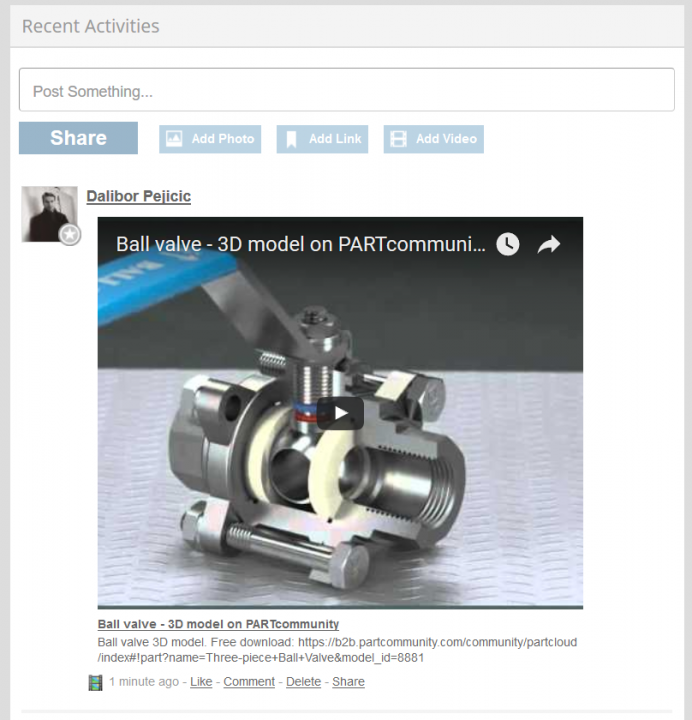
7. Your video clip should be published now. Simply click on it to watch it.
 Permalink | 0 comments, 0 likes, 2,574 views0% users marked this FAQ as helpful.|1 voteWas this answer helpful?
 -
http://www.greentoken.de/onlineconv/ Online 3D Converter Convert 3D models between file formats (i.e. FBX to OBJ or OBJ to STL for 3D p...
-
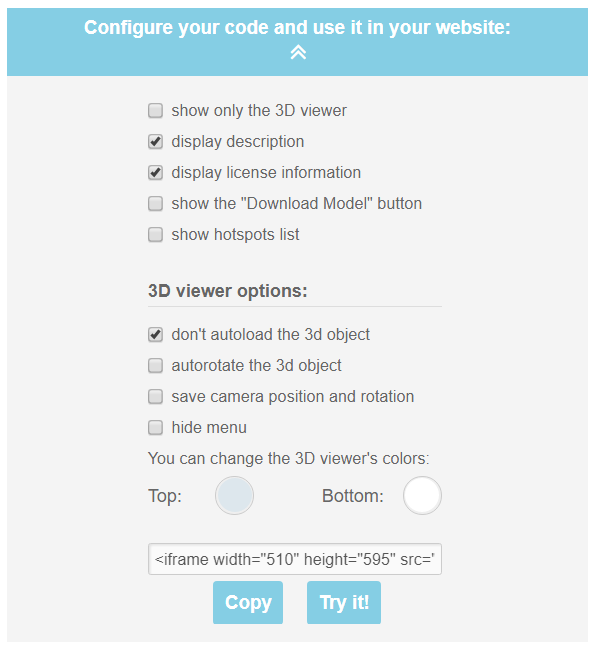
YES you can embed them very easy with this menu inside your webpage as IFRAME
-
Follow the steps listed below to download a CAD model: Make sure that you are in the dialog area 3D CAD CATALOGS and navigate ...
Follow the steps listed below to download a CAD model:
-
Make sure that you are in the dialog area 3D CAD CATALOGS and navigate to the required part.
-
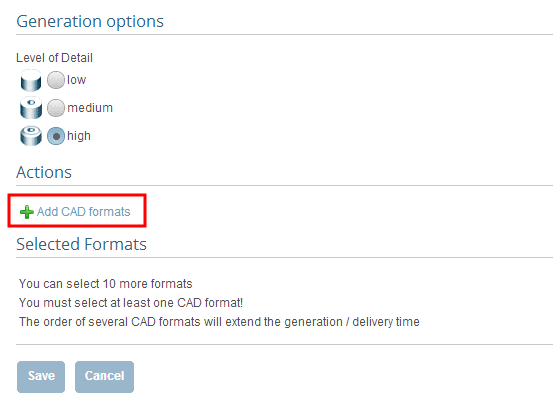
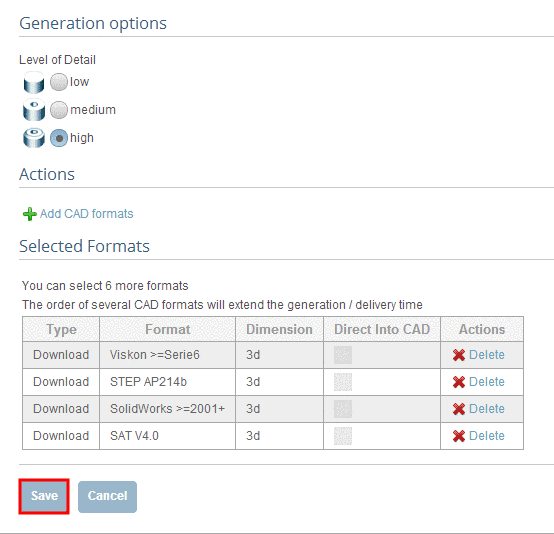
In the dialog area Download CAD models under Edit CAD formats -> Add CAD formats, select the transfer mode download by clicking into the option field. Then define one or more CAD formats and confirm your entries by clicking on Save.
-> The view returns to the dialog area Generation options / Selected formats. Confirm your entries by clicking on Save.
-
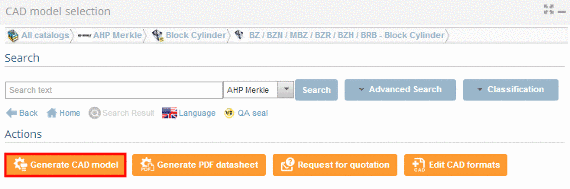
Under Actions click on Generate CAD model.
Note
All formats selected under Download CAD models (dialog area 3D CAD CATALOGS)
-> Edit CAD formats -> Selected Formats are generated. As long as the generation is running is shown.
-
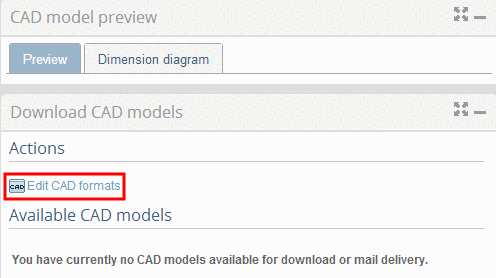
As soon as the generation has completed, the CAD models can be downloaded in this window directly. For this click on Download.
If you close this window, further CAD models can be selected.
Furthermore all generated CAD models are listed under Download CAD models.
-> At the transfer mode CAD models to download, in the column Actions, the link text will be the following:
-
After clicking on the link Info specific part information is displayed:
In order to import the models into the CAD system, do the following:
Permalink | 0 comments, 0 likes, 9,204 views0% users marked this FAQ as helpful.|3 votesWas this answer helpful? -
-
Follow the steps listed below to generate your desired part: Make sure that your are in the dialog area 3D CAD CATALOGS&nbs...
Follow the steps listed below to generate your desired part:
- Make sure that your are in the dialog area 3D CAD CATALOGS and select the desired catalog.
-
At directory level
 select product groups as long as a concrete assembly
  or concrete single part
  has been specified.
-> A soon as a concrete row has been determined, a 3D view and dimensional drawings are loaded under CAD model preview.
-
In the dialog area Download CAD models under Actions define the generation type and the desired CAD formats by clickingEdit CAD formats.
-
The information dialog Generating CAD models opens.
Permalink | 0 comments, 0 likes, 8,757 views0% users marked this FAQ as helpful.|2 votesWas this answer helpful? -
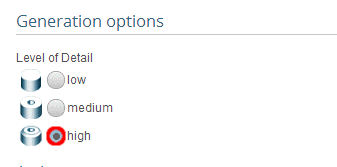
Under 3D CAD CATALOGS you have the possibility to choose CAD formats and to define the handing over mode in the CAD system. &n...
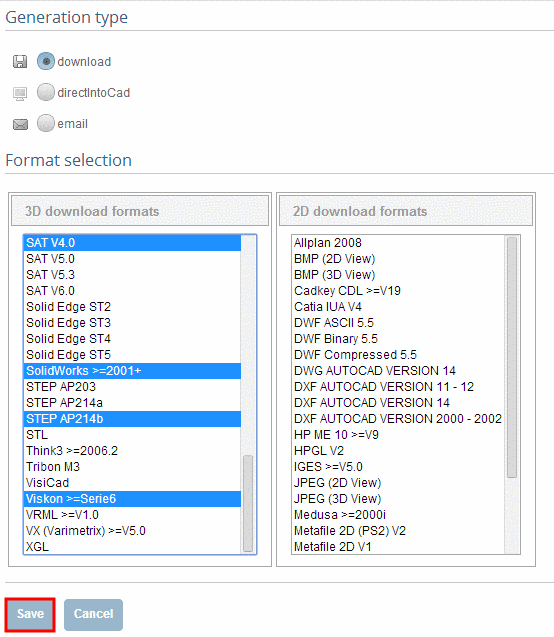
Under 3D CAD CATALOGS you have the possibility to choose CAD formats and to define the handing over mode in the CAD system.
-
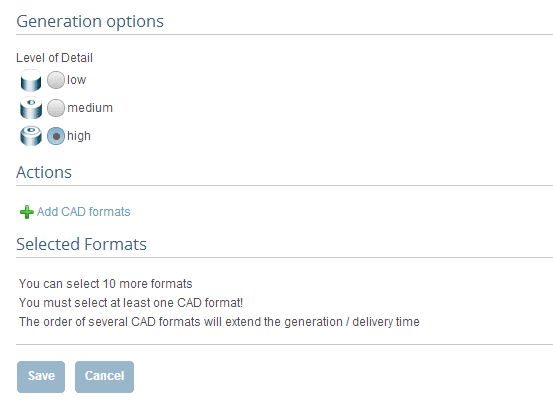
-> The settings area for Generation type and Format selection opens.
-
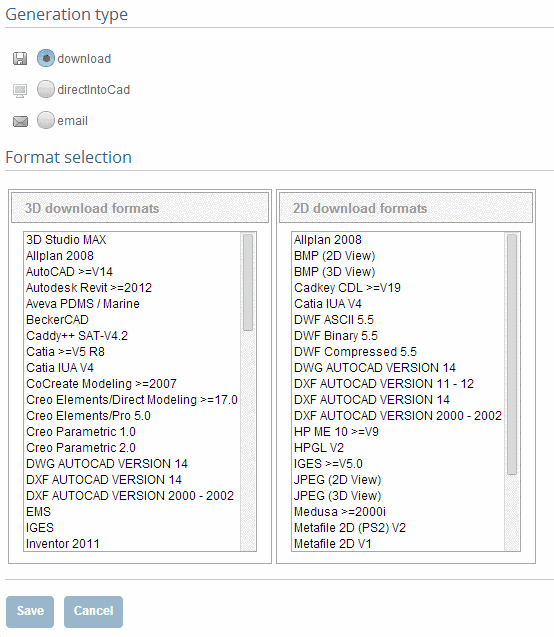
First determine the desired generation type. Click into the desired option field.
-
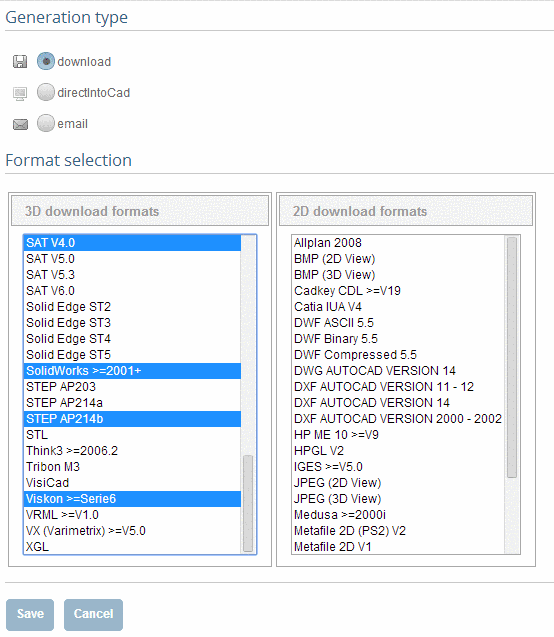
Select a format or several formats. By holding down the CTRL key, you can make multiple selections.
Note
Max. 10 formats (in total for all generation types) is possible.
-
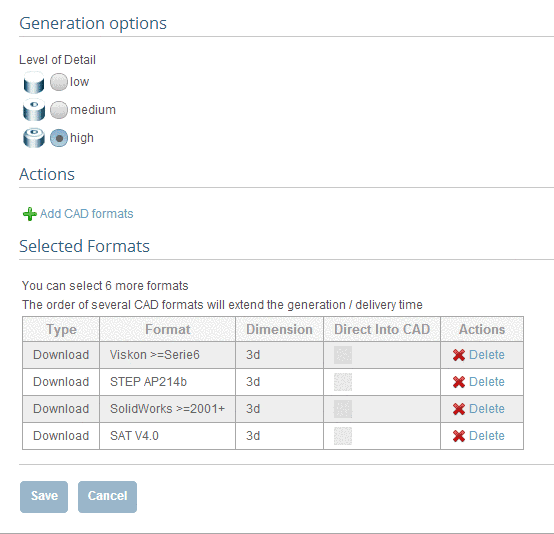
-> The view changes back to the dialog area Generation options / Selected formats.
In the dialog area Selected formats you can see your current selection.
-
Confirm your entries with Save.
Note
You can now repeat the format selection for another generation mode if desired.
Go back to Add CAD formats.
-> The current format selection is shown.
Permalink | 0 comments, 0 likes, 1,527 views0% users marked this FAQ as helpful.|1 voteWas this answer helpful? -
You can log in after successful registration and account activation. Enter your access data in the input field at the left hand ...
-
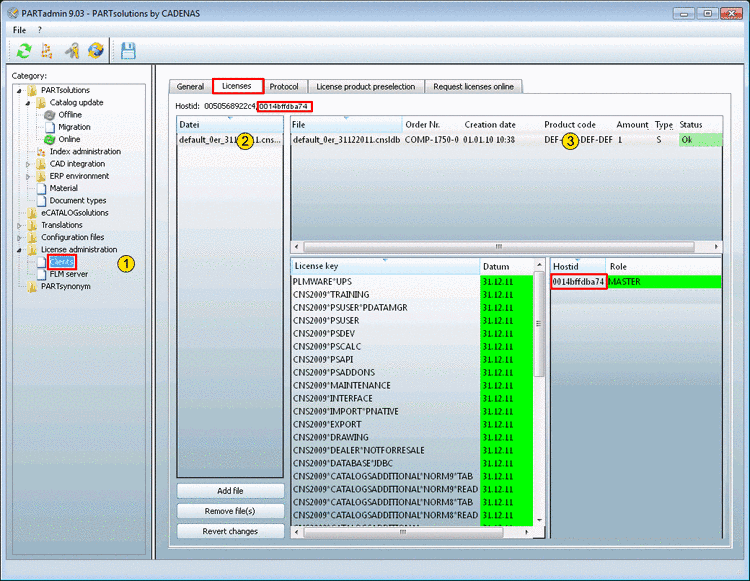
In the Category menu mark the item License administration -> Clients. Select the Licenses inde...
-
In the Category menu mark the item License administration -> Clients.
Select the Licenses index page.
Select a license product top right.
-> Now detailed license information is displayed under License key and Host ID/Role.
-
Check, whether all received licenses are listed.
If the license file „*.cnsldb“ is not listed or you have received a new license file, which you want to add to the list, then do the following:
--> Now the file is listed in the license administration.
-
Mark the License file in the dialog area top right.
--> The individual License keys with Expiration date and Status are listed.
-
Check, whether the Host ID of the license (downright) is according to one of the Host ID displayed above (see Fig. „Licenses“).
(Exception: Some products (e.g. free catalogs) have so-called zero-licenses '0000 0000 0000'). Here the hostid doesn't have to be according)
-
In order for the license to be effective for the respective module (PARTdataManager, etc.), the Status has to be OK (green).
-
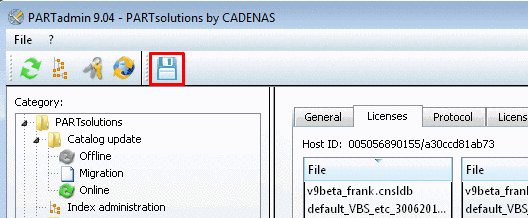
In order to finish the procedure, click on the Save changes button! (If not already happened during the license installation).
-
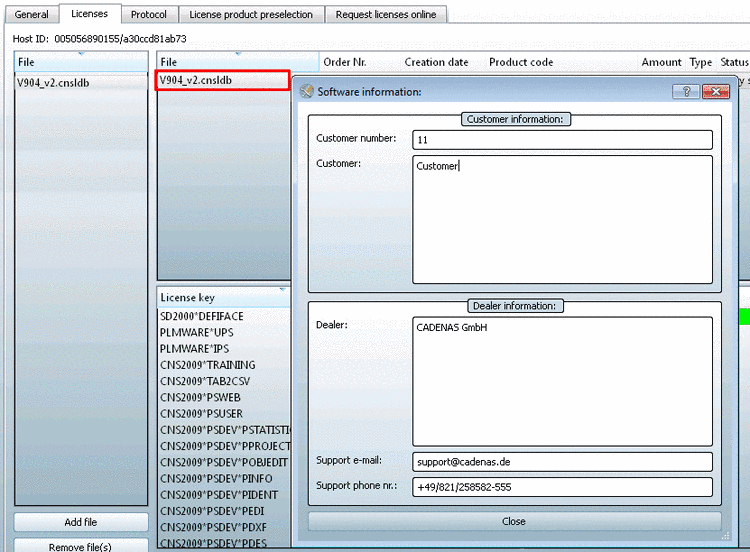
Call up software and support information
After double-click on a license file / license product (*.cnsldb) the Software information dialog box appears.
In the Customer information dialog area you can find your Customer number. Stating the number helps the support better help you.
Under Dealer information you can find the relevant dealer with Support e-mail and support phone number.
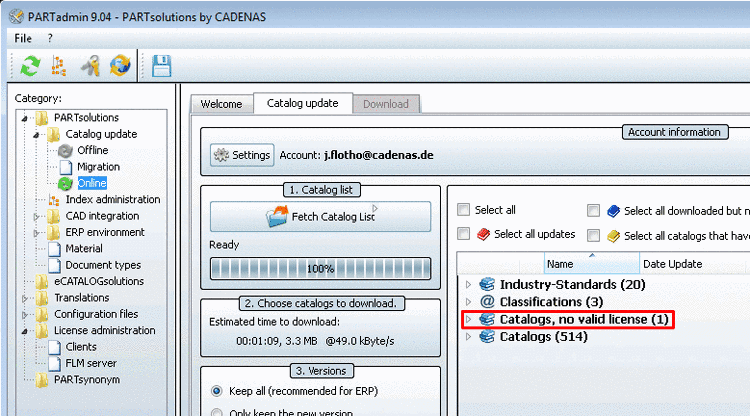
As of V9.03 catalogs without valid license are displayed in their own category under PARTadmin -> PARTsolutions -> Catalog update-> Online -> Catalogs, no valid license.
-
Get further help regarding licensing by clicking F1 within PARTsolutions

Permalink | 0 comments, 0 likes, 13,517 views0% users marked this FAQ as helpful.|1 voteWas this answer helpful? -
-
Client requirements Browser: IE >= v8 Firefox >= v3 Opera >= v10 Javascript and Cookies...
-
ActiveX viewer: ActiveX must be activated in the security settings.
-
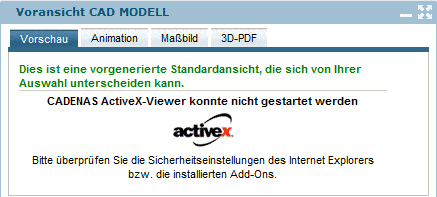
CADENAS PARTwebViewer must be installed.
Should this not be installed, the following message will show up in the CAD model preview dialog area.
-
Note
Please note the installation query in the browser window. You must click on it in order to allow for the installation of the CADENAS ActiveX-Viewer. -
Flash v10
In order to create a sketch under Search for CAD models -> Sketch 2D, you need the Flash-Player.
Permalink | 0 comments, 0 likes, 12,493 views0% users marked this FAQ as helpful.|1 voteWas this answer helpful? -
ORIGAMI SIMULATOR ( 2017 ) DEMO HERE This WebGL app simulates how any origami crease pattern will fol...
This WebGL app simulates how any origami crease pattern will fold. It may look a little different from what you typically think of as "origami" - rather than folding paper in a set of sequential steps, this simulation attempts to fold every crease simultaneously. It does this by iteratively solving for small displacements in the geometry of an initially flat sheet due to forces exerted by creases. It calculates the geometry of folded or partially folded origami using a dynamic, GPU-accelerated solver; the solver extends work from the papers Origami Folding: A Structural Engineering Approach and Freeform Variations of Origami. It also supports an immersive, interactive VR mode using WebVR. More information about the solver and the app is being compiled into a paper and will be posted here soon.
Live demo here, code on Github.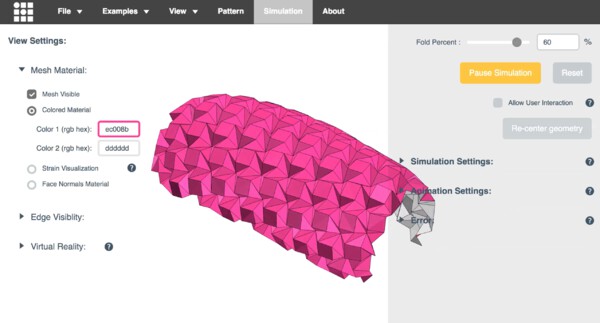 GIF
GIFThe Origami Simulator lets you simulate how any crease pattern will fold in 3D. Try it here.
 GIF
GIFFolding a traditional crane in one step in the Origami Simulator.
Crease patterns are uploaded into the app in SVG or FOLD formats. SVG crease patterns use color and opacity to set the direction and final fold angle of each crease. These patterns are triangulated and modeled as pin-jointed truss networks with additional angular constraints in the solver. At each step of the simulation, the displacements of nodes in the origami are calculated and used to update the visualization.
 GIF
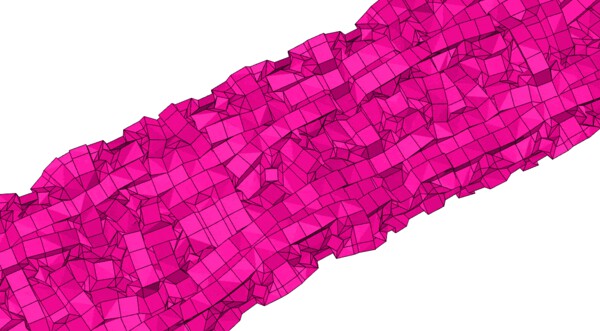
GIFThis crease pattern was generated by Maze Folder, an app by Erik Demaine, Martin Demaine, and Jason Ku that creates crease patterns for any raised maze on a square grid. Based on the paper Folding Any Orthogonal Maze by the same authors.
This app uses a compliant dynamic simulation method to solve for the geometry of an origami pattern at a given fold angle. The simulation sets up several types of constraints: distance constraints prevent the sheet from stretching or compressing, and angular constraints fold or flatten the sheet. Each of these constraints is weighted by a stiffness - the stiffer the constraint, the better it is enforced in the simulation.
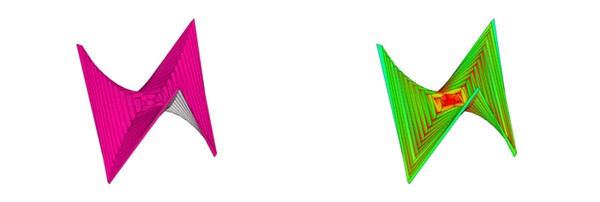
Cauchy strain or engineering strain is a unitless measurement of how much a material is being stretched or compressed under load. The app can be put into a strain visualization mode that illustrates the strain across an origami sheet by mapping it to a color from blue (no strain) to red (max strain). Visualizing strain gives a sense of how much the distance constraints in the origami pattern are being violated (i.e. how much the sheet is being stretched). The strain at each vertex is evaluated by averaging the percent deviation of all its distance constraints with adjacent vertices. This deviation is reported as a percent of the total length of the distance constraint to remove scaling effects.
Strain map of folding waterbomb tessellation. The pattern tends to curl to minimize internal strain in the material.
 GIF
GIFSix-Pointed Hypar variant with strain map. This model was triangulated in an alternating asymmetric hinge triangulation based on the paper (Non)existence of Pleated Folds: How Paper Folds Between Creases.
 GIF
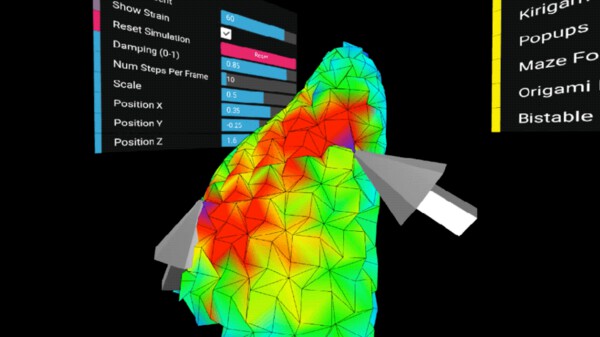
GIFDirect interaction with a Huffman Waterbomb tessellation in virtual reality. This app connects to virtual reality hardware via the WebVR api. In this mode, you can visualize the mesh folding in 3D and interact with it directly. Grab the mesh with both hands to see how it moves and watch internal strain propagate through the model. A longer VR demo video is on YouTube.
Typically, origami patterns are made from many straight creases, but by using curved creases it's possible to create more organic forms. Curved creases are simulated in the app by discretizing them into many small, straight segments - according to the paper Curved Folding.
 GIF
GIFHarmonics of a circular pleat origami, eventually resting in a low frequency configuration.
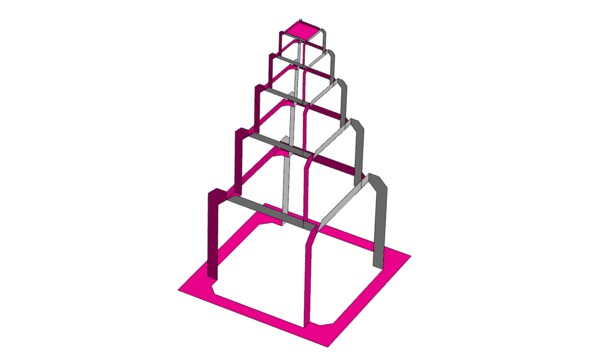
Kirigami is a variation on origami that incorporates cuts into a folding pattern. Many "popup" patterns used in cards or books are examples of kirigami. Green lines in crease patterns are treated as cuts when imported into the app. Left is a crease pattern for a Miyamoto Tower by Happy Folding, middle and right are popup designs by Popupology.
 GIF
GIFMiyamoto Tower kirigami pattern designed by Yoshinobu Miyamoto. Crease pattern from Happy Folding.
 All imagesPermalink | 0 comments, 0 likes, 10,447 viewsWas this answer helpful?
 -
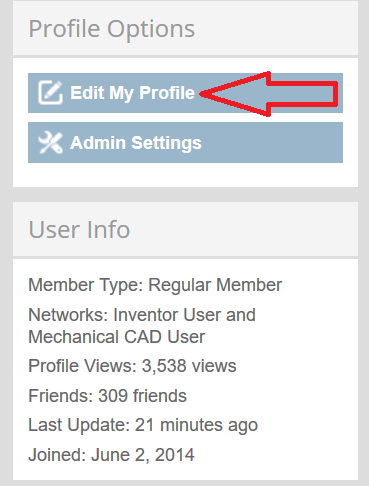
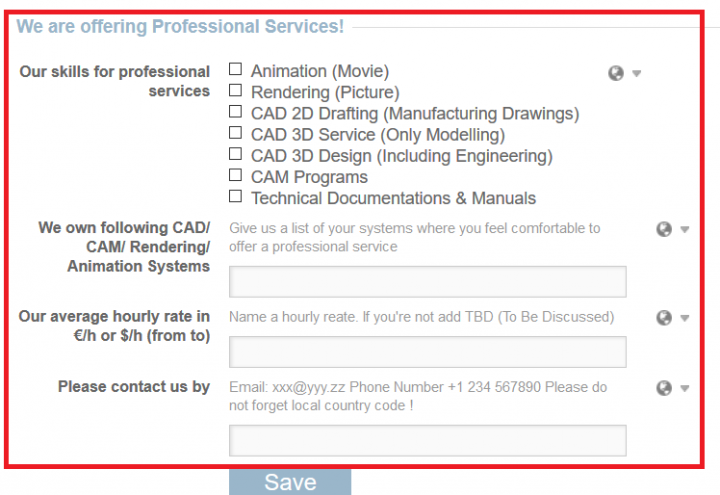
1. Go to your account/profile and click on "Edit". 2. Scroll all the way down and you will find options where you can add info...
-
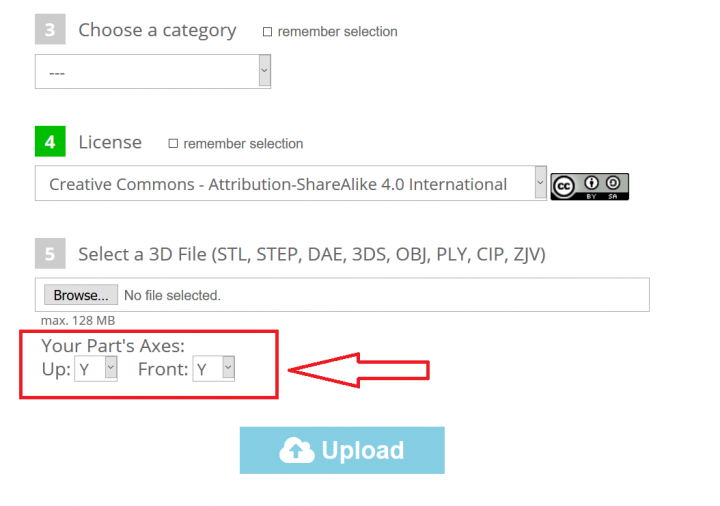
Simply choose wanted option in coordinate system while uploading your 3D model on PARTcloud.net
-
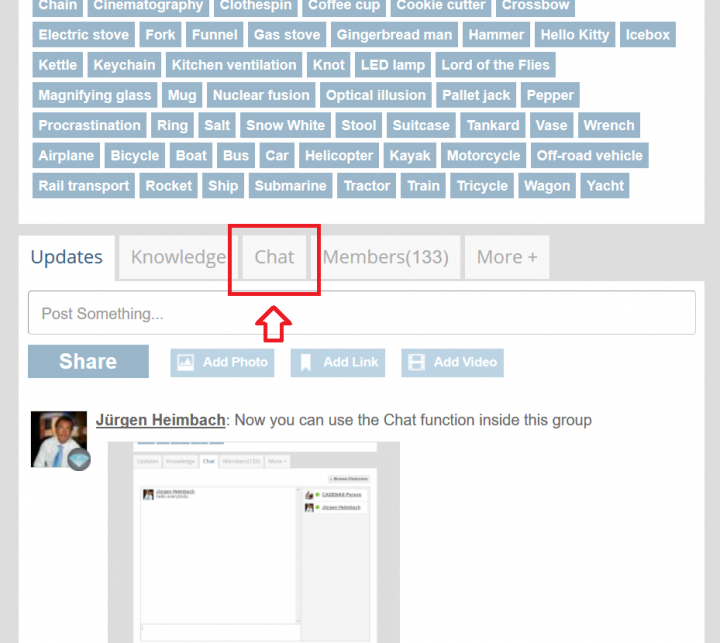
1. Go to "Weekly Challenge group" and click on "Chat" window. 2. Scroll down and you will find the place where you can write a...
-
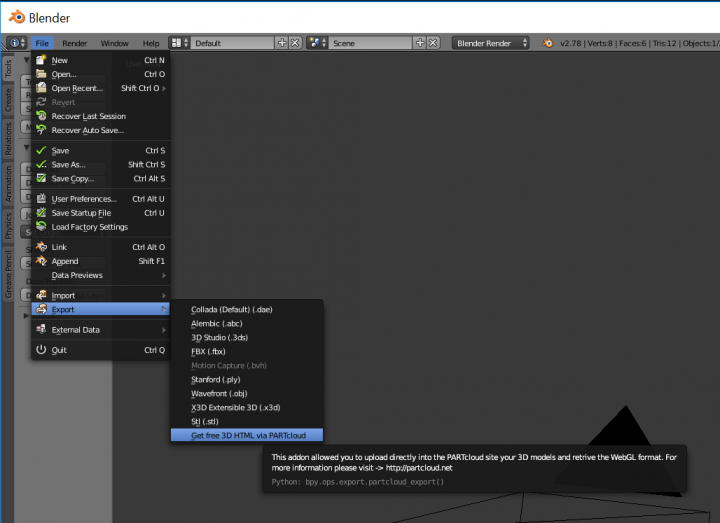
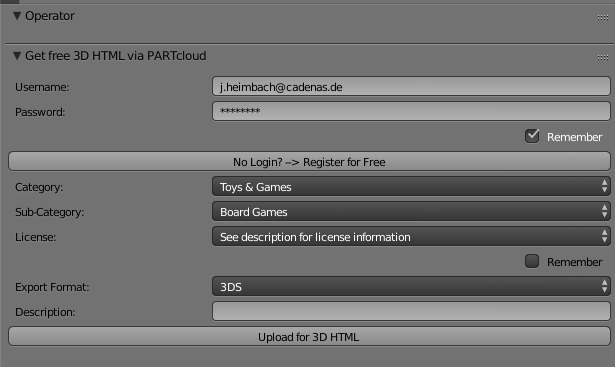
1. Download the PLUGIN (BETA) and install to BLENDER addon directory Filename: Size (KB) Expir...
-
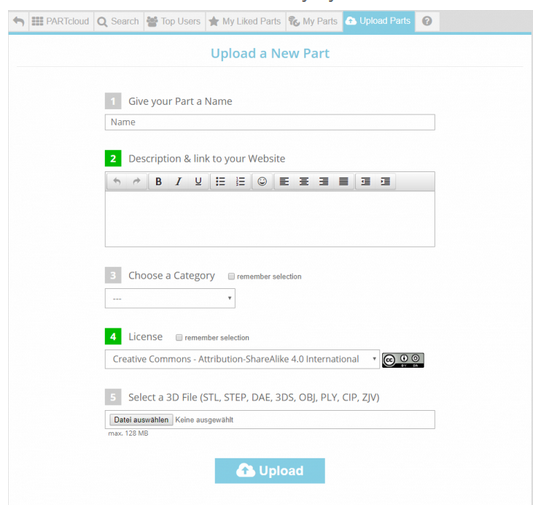
To share its 3D models with friends or colleagues, users can use the PARTcloud.net 3D Printing & Sharing Community app. Models can be upl...
To share its 3D models with friends or colleagues, users can use the PARTcloud.net 3D Printing & Sharing Community app. Models can be uploaded via PARTcloud.net on the 3D CAD models download portal PARTcommunity in STL and STEP format.
1. Users have to login at PARTcloud.net or create an account free of charge in order to enjoy all the advantages of the Sharing Community. If you are already registered for the 3D CAD models download portal PARTcommunity, this is also valid for PARTcloud.net .
The components are uploaded and the information as well as details filled in so that the 3D CAD model can be found more easily by other users.
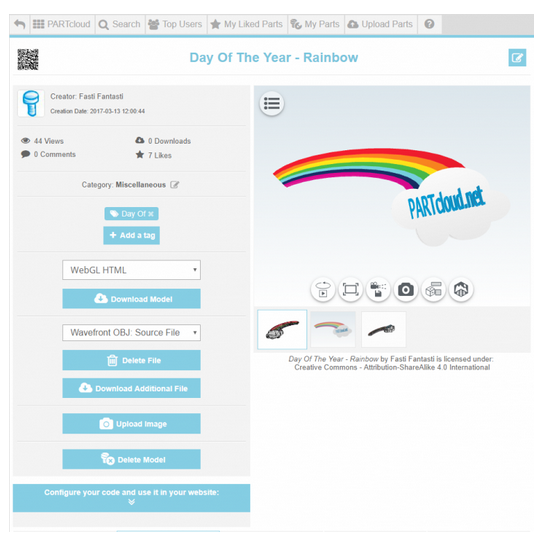
2. After uploading, the 3D CAD model appears in your own portfolio.
3. Now the app PARTcloud.net 3D Printing & Sharing Community by CADENAS has to be installed on the smartphone or tablet.
4. In the app itself, the search field is used to enter searched terms - in addition, the two filter functions "newest" and "select a category" can be used.
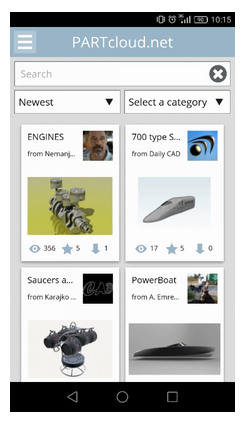
5. Once you have found the 3D model, you have a well-known features, such as downloading the model. In addition, app users have the opportunity to link model and camera function to each other. Thus, two realities can be linked for spectacular photo shots.
 Permalink | 0 comments, 0 likes, 5,509 viewsWas this answer helpful?
 -
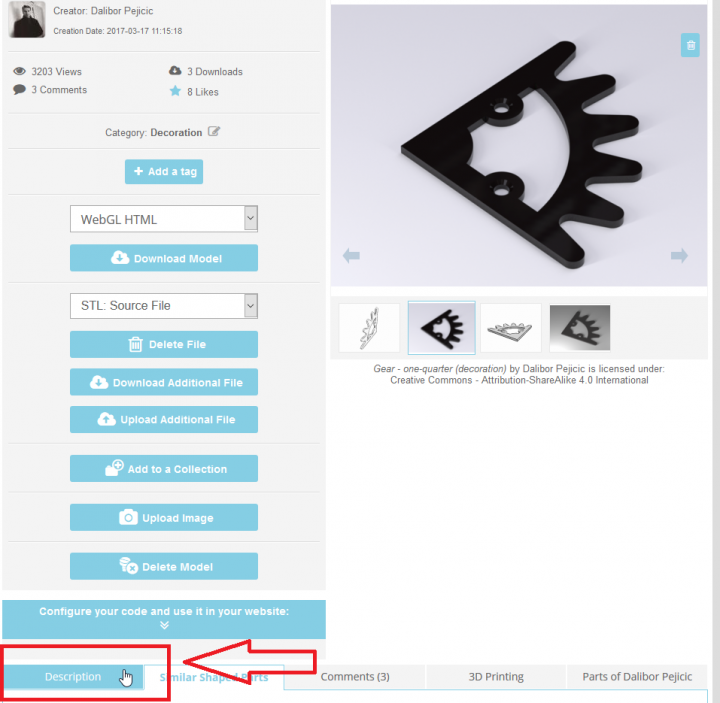
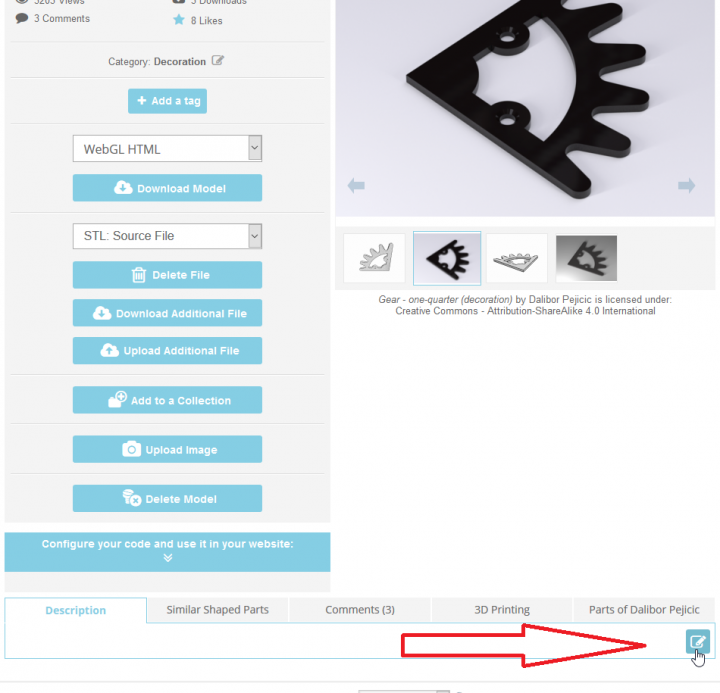
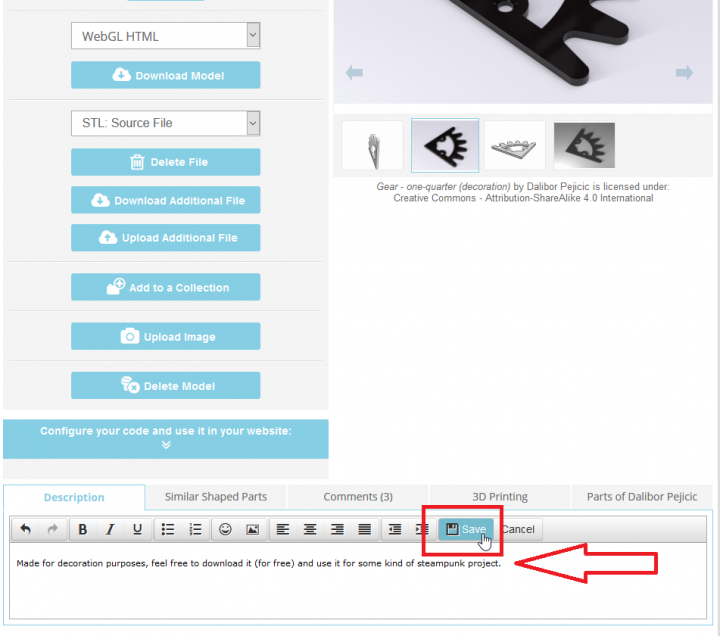
1. Go to your 3D model (3D SHARE - PARTcloud.net). Click on "Description". 2. Click on "Edit". 3. Write a text or a...
-
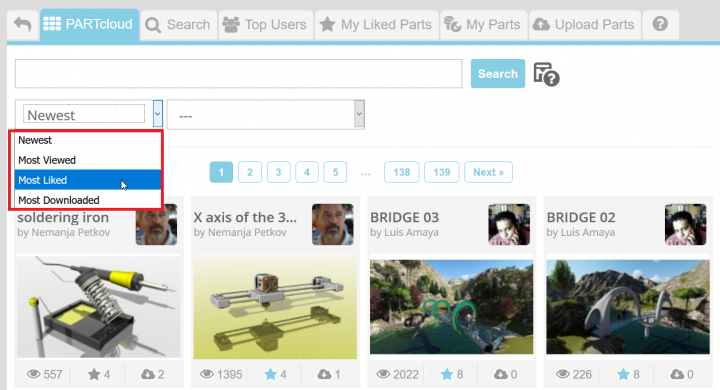
1. Go to 3D SHARE - PARTcloud.net and you will see the Newest 3D models. Click on it and other options will show up. 2. Choose...
-
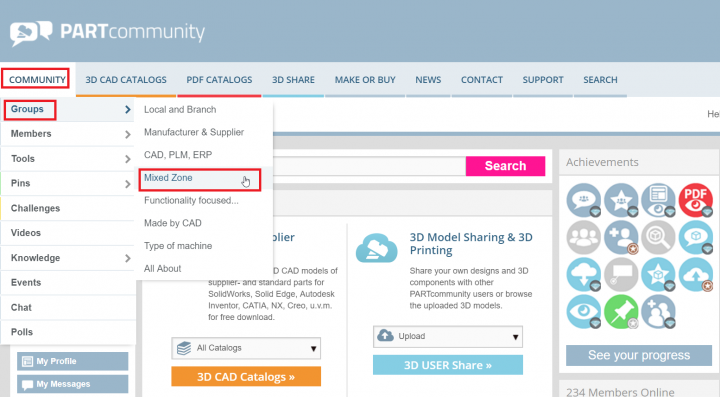
1. Search for your group. If you are not a member, you have to join in first. Click on "Community" and then "Groups". The group we are lo...
1. Search for your group. If you are not a member, you have to join in first. Click on "Community" and then "Groups". The group we are looking for, in this case, is Steampunk/Mechanical Creations and it is under "Mixed Zone".
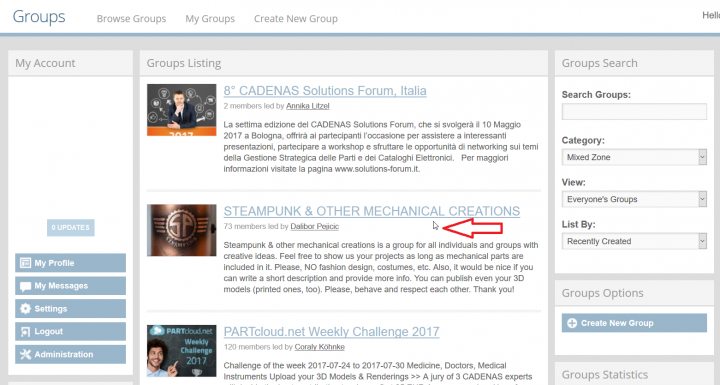
2. Click on the group you are looking for.
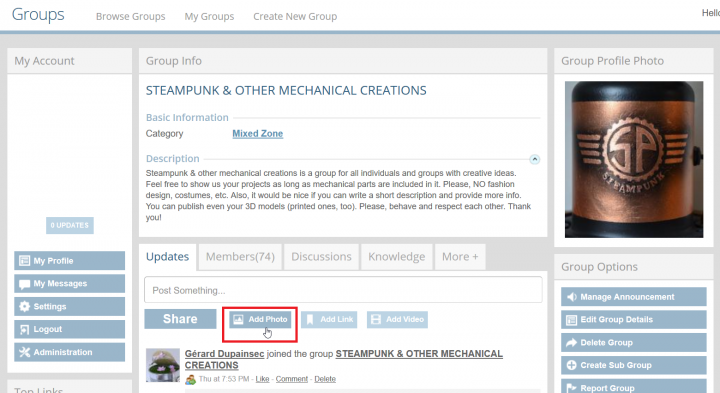
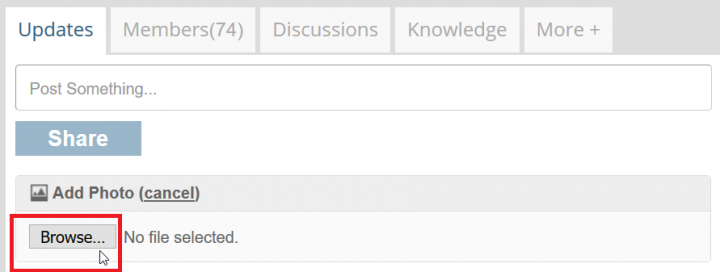
3. You are on homepage of your group now. Click on "Add Photo".
4. Click on "Browse".
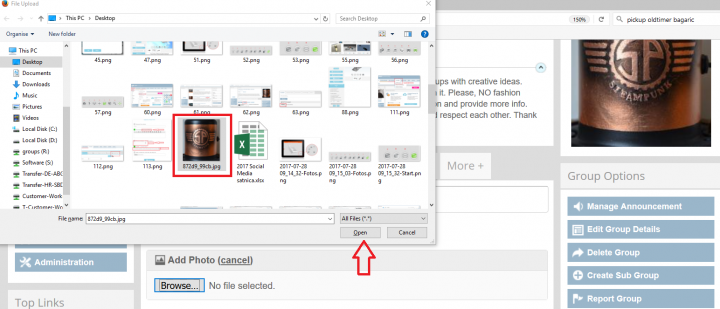
5. Find the photo you would like to publish, click on it and then click on "Open".
6. Wait for a few seconds and the photo should be uploaded. Click on "Share". You can write information/description ("Post Something...") to make it more interesting if you wish so.
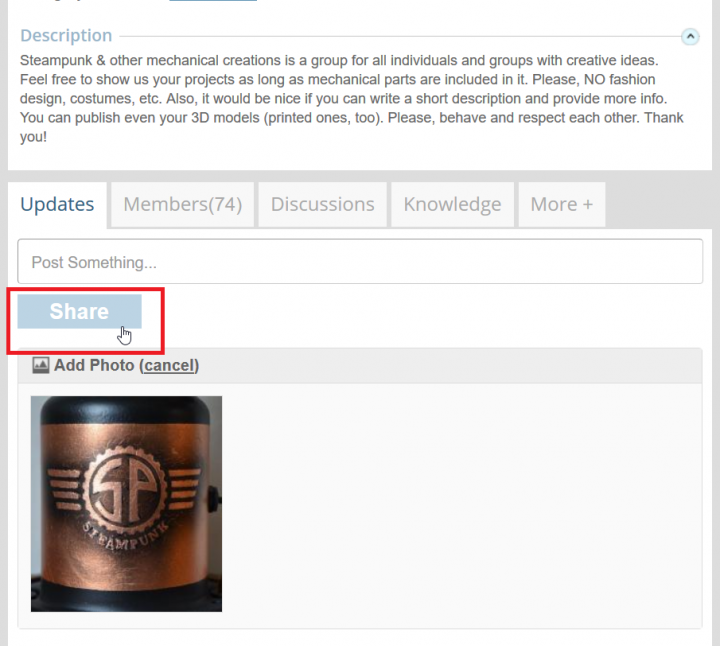
7. The photo should be published in your group now.
 Permalink | 0 comments, 0 likes, 2,632 viewsWas this answer helpful?
 -
All updates are published in PARTcloud 3D Modeling World Championship group and the winner is announced every Monday. Also, new subj...


 .
.