Manual
Login
Our 3D CAD supplier models have been moved to 3Dfindit.com, the new visual search engine for 3D CAD, CAE & BIM models.
You can log in there with your existing account of this site.
The content remains free of charge.

Top Links
Manual
 |
![[Tip]](/community/externals/manuals/%24%7Bb2b:MANUALPATH/images/tip.png)
In the following the procedure of an offline catalog update is explained.
-
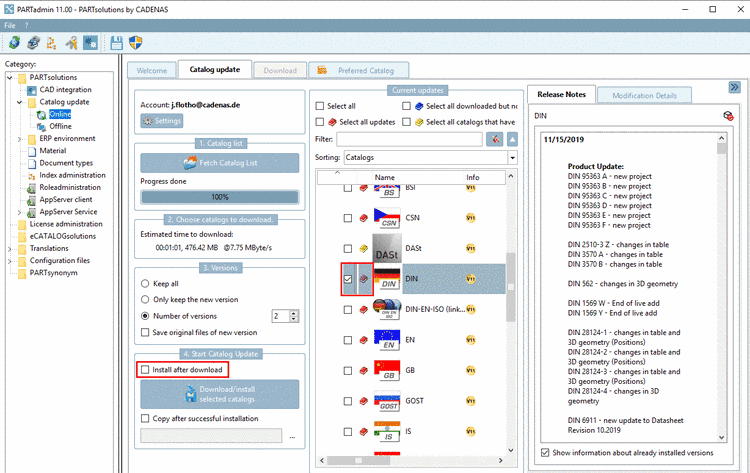
If under Catalog update -> Online, you deactivated the option Install after download, then the downloaded catalog cip files can now be found in the temporary Download directory, which you determined in the settings dialog.
Open the CIP file by clicking on (selection in an Explorer window).
-
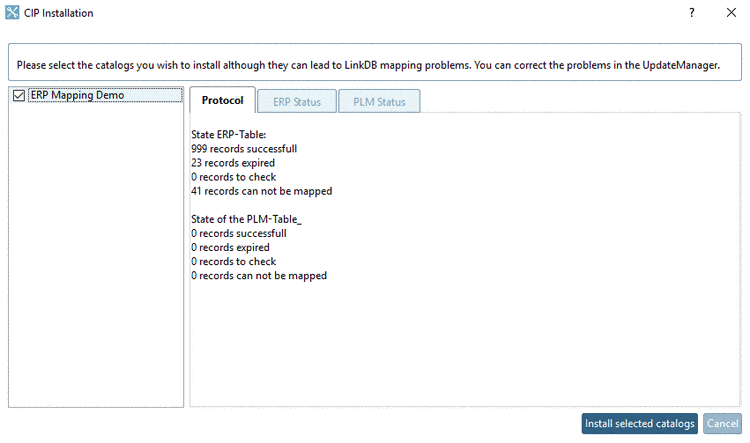
-> The dialog box CIP Installation with the options and opens:
-
It is checked whether there are datasets with status to check and/or not mapped.
-
If datasets with status to check or not mapped are found during a test run, in the dialog box CIP Installation the tabs Protocol, ERP Status and PLM Status are displayed, otherwise the installation is immediately performed.
![[Note]](/community/externals/manuals/%24%7Bb2b:MANUALPATH/images/note.png)
Note If you want to make a check in any case, do not click on but on (see below).
-
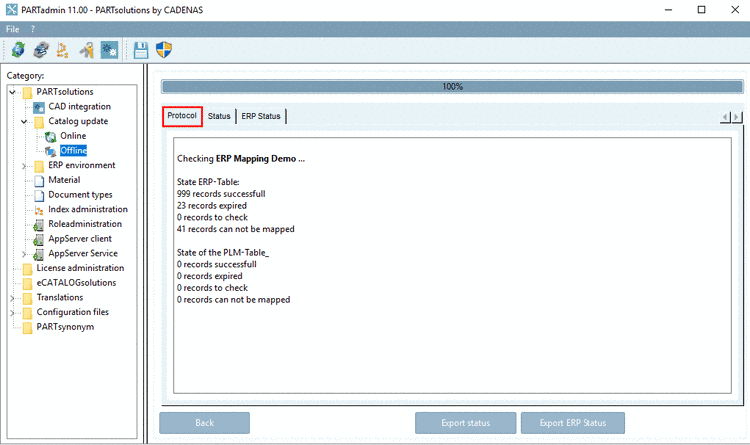
On the tabbed page Protocol the number of datasets per Status is listed (details further below): (Same result as with Simulate ERP update, compare Fig. „Tabbed page Protocol “).
-
For all affected ERP numbers the status (checked, successful, expired and not mapped) is displayed, furthermore Path, Path (new), NB and NB (new).
successful: The automatic check was successful, identifying projects which do not need to be verified. They can definitely occur in the mapping dialog. And they are all the ones without
 icon occurring because the tab
file changed but without need for mapping (e.g. new row
added).
icon occurring because the tab
file changed but without need for mapping (e.g. new row
added).to check: Actually this status should not occur, because publishing without ERP mapping is not allowed.
expired: Rows verified with a red x
 , meaning rows, which do not exist
anymore, furthermore rows which have been mapped to
"nothing" by Conditions.
, meaning rows, which do not exist
anymore, furthermore rows which have been mapped to
"nothing" by Conditions.not mapped: This status appears at faulty mapping, error during installation or missing mapping.
If in the dialog box CIP Installation, the tabs Protocol, ERP Status and PLM Status are displayed, then there are datasets with status to check [68]and/or not mapped.
That means editing via Update manager [69] is needed.
If after the check the installation shall be performed, at desired catalogs, activate the checkbox and click on otherwise on .
-
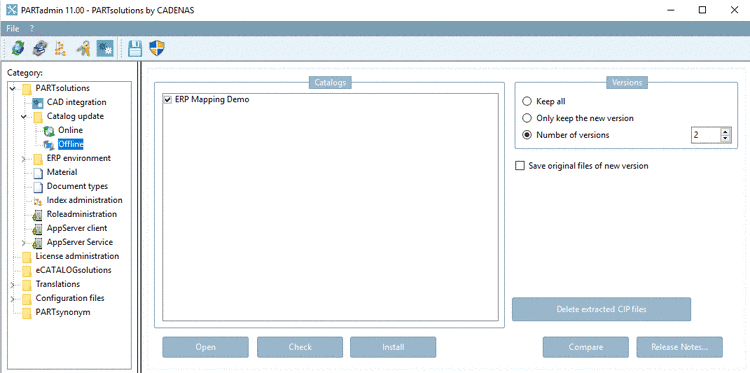
If there are no datasets with the note to check or not mapped the installations runs through without further note. Then, at the end of installation the tabs Protocol, Status and ERP Status are displayed again - this time in the standard dialog area under Catalog update -> Offline.
-
-
The installation is immediately started. At the end of the installation the tabs Protocol, Status and ERP Status are displayed - this time in the standard dialog area under Catalog update -> Offline.
-


Result after processed installation:
At the end of the installation the tabs Protocol, Status and ERP Status are displayed - this time in the standard dialog area under Catalog update -> Offline.
-
The tabbed page Protocol is opened by default.
If problems occurred, on the tabbed page Protocol, the note There were mapping problems in the LinkDB. Please correct these in the UpdateManager. is displayed.[70] At the first catalog update with V10 or V11 the mappings still have to be manually created for a last time (with them Update manager), but after this the new method is effective and manual editing is only needed in seldom exceptional cases if an automatic update is not possible.
-
On the tabbed page Status, you can find a detailed listing of the individual projects.
The following table shows the meaning of symbols (icons)
-
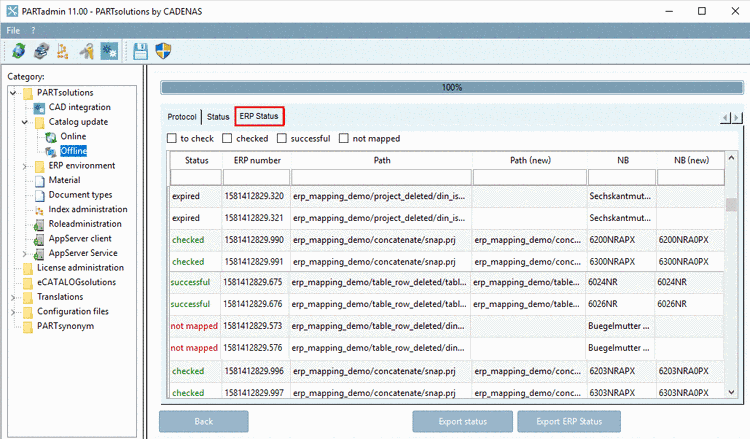
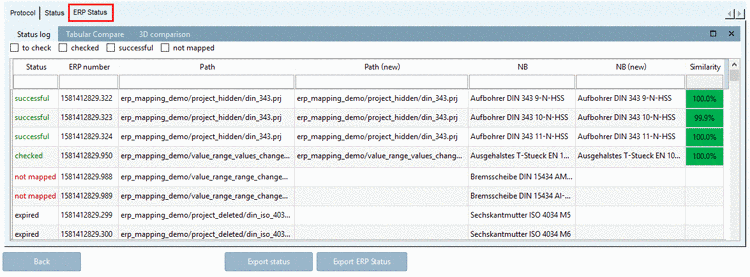
On the tabbed page ERP Status you can find a listing of all ERP numbers with its update status (successful, expired, to check and not mapped), a furthermore old path, new path, old NB and new NB. Explanations on the individual status can be found above.


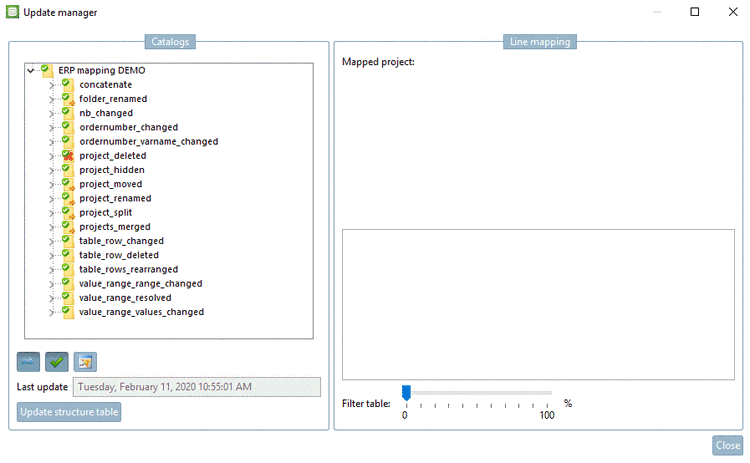
By default, on the tabbed page Protocol, the note There were mapping problems in the LinkDB. Please correct these in the UpdateManager. is displayed. When clicking on the link UpdateManager it is opened.
You can simply
check whether there is something to edit: In the Update manager, deactivate the button Show mapped lines  .
.
-> Then on the right under Line mapping, only those rows are displayed where there were changes which are not confirmed yet.
If everything could automatically be assigned, then nothing is selectable anymore. Otherwise perform the mappings with the help of the Update Manager. Details on this can be found under Section 4.16.3, “ Catalog update with ERP integration - Fix mapping problems with the Update manager ” in PARTsolutions / PARTcommunity4Enterprise - Administration Manual.
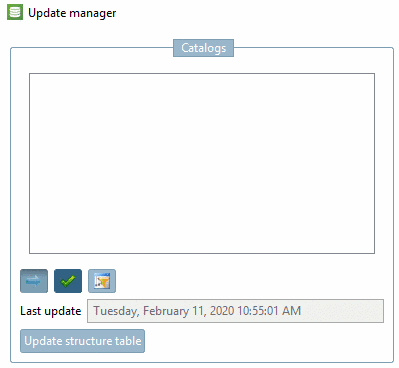
Button
"Show mapped lines" deactivated: Only
folders with icon are displayed (here in this example
none).
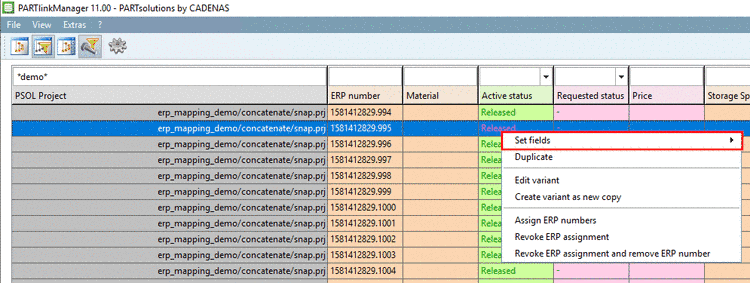
If you are using the variables ACTIVE_STATE and/or REQUESTED_STATE in the ERP set of rules, have a look on the status in the PARTlinkManager.
You will have
better overview when activating the button Hide old versions of parts  .
.
At all hidden or filtered projects ACTIVE_STATE has been automatically set on Released.
If needed you can manually set the status under Set fields.
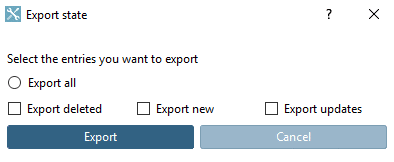
Further you have the possibility to fetch information on changes before the catalog update (even if only the status successful and/or expired occurred, meaning no editing in the Update manager is necessary.
-
-
-
Again, in the dialog box the tabs Protocol, Status and ERP Status are displayed.
-
On the tabbed page Protocol an overview is shown, subdivided by the following categories:
-
On the tabbed page Status, you can find an exact listing of the single project's status.
The following table shows the meaning of the symbols.
-
On the tabbed page ERP Status you can find a listing of all ERP numbers with their update status (not mapped, checked, successful and expired), furthermore Path, Path (new), NB and NB (new). Explanations on the individual status can be found above.
-


[68] Actually the status to check should not occur if an ERP mapping has been performed, which is mandatory for publishing.
[69] Detailed information on Update manager can be found under Section 4.16.3, “ Catalog update with ERP integration - Fix mapping problems with the Update manager ” in PARTsolutions / PARTcommunity4Enterprise - Administration Manual.
[70] On the tabbed page Status ERP you can see for which. This are the ones marked as to check or not found.
