Manual
Login
Our 3D CAD supplier models have been moved to 3Dfindit.com, the new visual search engine for 3D CAD, CAE & BIM models.
You can log in there with your existing account of this site.
The content remains free of charge.

Top Links
Manual
 |
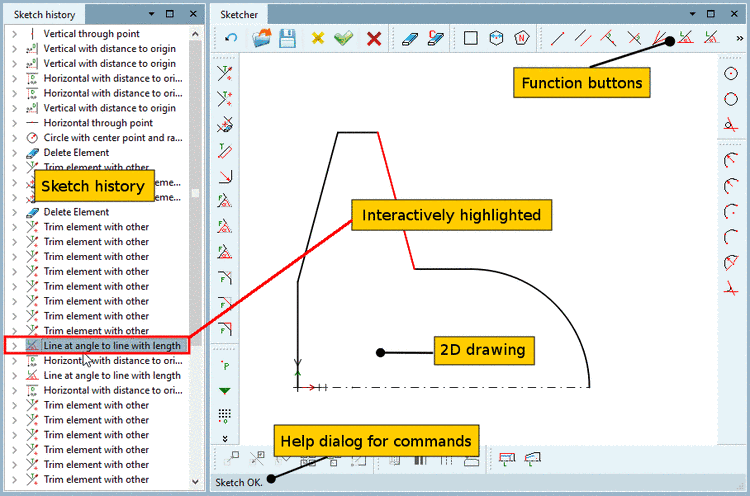
The interface of the feature based Sketcher is divided into the following areas:
-
The function buttons make the individual sketch functions available for th e graphic area. See also Section 7.9.3, “Function buttons ”.
By clicking on a button you select its function. Then you click into the sketch and carry out the respective construction step.
The construction step is displayed at the left in the History.
-
Sketch history (Feature area on the left)
The history is a list of all construction steps. You can go back to each step and make changes.
-
2D drawing (graphic area on the right)
In the graphic area, the complete sketch with (possibly a lot of) construction steps is designed.
![[Note]](/community/externals/manuals/%24%7Bb2b:MANUALPATH/images/note.png)
Note Interactive emphasis: History tree feature / 2D sketch element
2D sketches can be very complex, in other words there is a number of construction steps contained within creating one. So that you do not lose track of the situation, you have the interactive emphasis in the 2D Sketcher.
Interactive emphasis means that between each sketch element in the 2D sketch a connection to a specific construction step in the history tree exists. This connection is clear as soon as you touch a sketch element with your cursor. Then it will become highlighted in color and at the same time, in the history tree, the respective feature row is highlighted in dark. Exactly the opposite, when you click into a feature row the corresponding element will be marked in the 2D sketch. See Fig. „Sketcher user interface“.
-
In the status bar at the bottom left, a help dialog for commands is shown.
