Manual
Login
Our 3D CAD supplier models have been moved to 3Dfindit.com, the new visual search engine for 3D CAD, CAE & BIM models.
You can log in there with your existing account of this site.
The content remains free of charge.

Top Links
Manual
 |
In order for a user to be able to class products semi-automatically, Training-Sets have to be determined for classes initially. For this, a product to be used as Training-Set is drawn via Drag & Drop to "Structure" or added via context menu command Add product to Training-Set.
Semi-automatic classing works both on PARTwarehouse catalogs under Workspace and directly on PARTsolutions catalogs under Data sources. The following description is based on classing under Data sources.

In the following the single steps are explained:
-
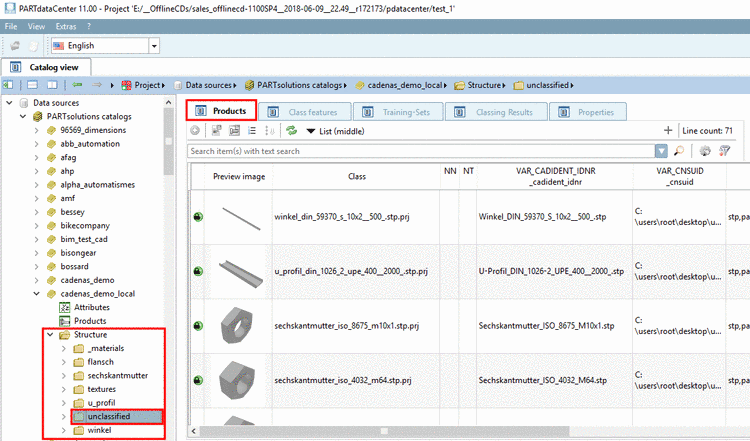
Folder with unclassified parts and structure in order to include the parts to be classified.
-
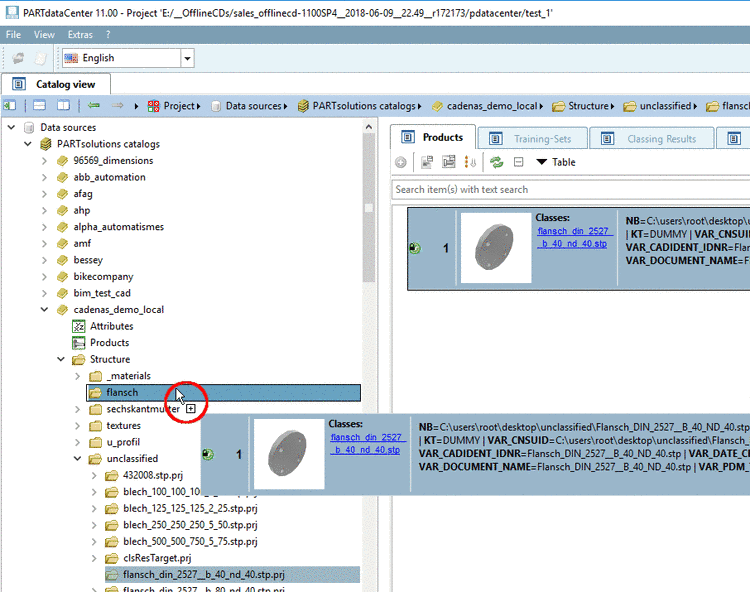
Create Training-Sets. For this, select a suited part and draw it into the desired directory under Structure via Drag&Drop.
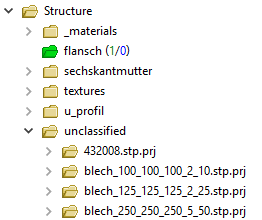
The green directory signalizes that the directory contains Training-Sets.
The green number shows the number of contained Training-Sets.
The blue number shows existing class suggestions. In this exemplary case there aren't any yet.
-
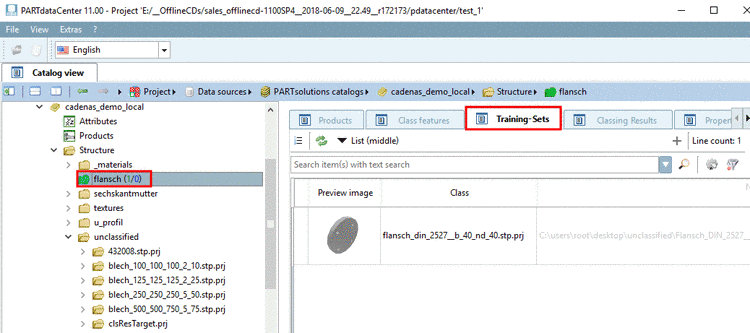
On the tabbed page Training-Sets, the stored part is now visible with all its attributes as Training Set.
-
For each directory (class) determine at least one Training-Set.
-
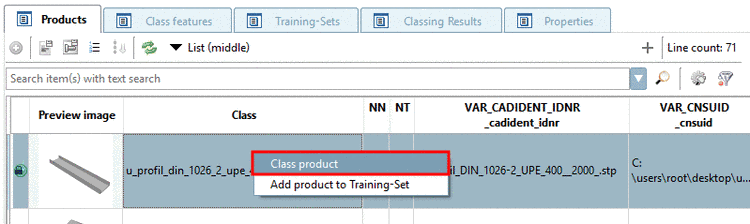
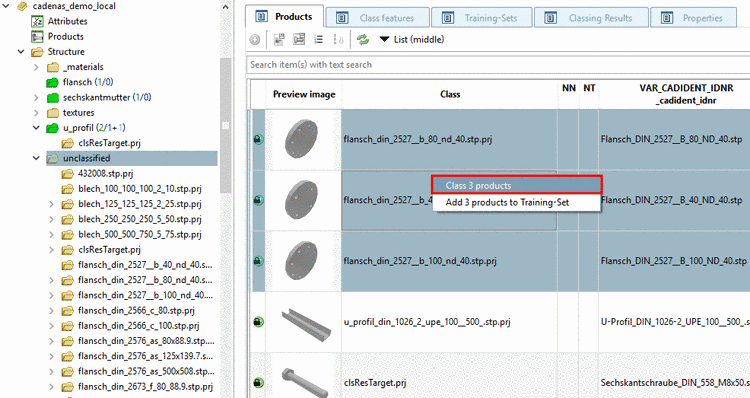
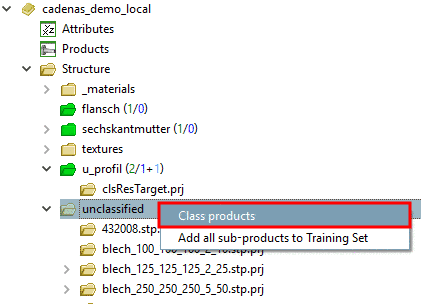
You may class a single product, several or all products at once.
Once clicking on Class products the procedure starts.
-
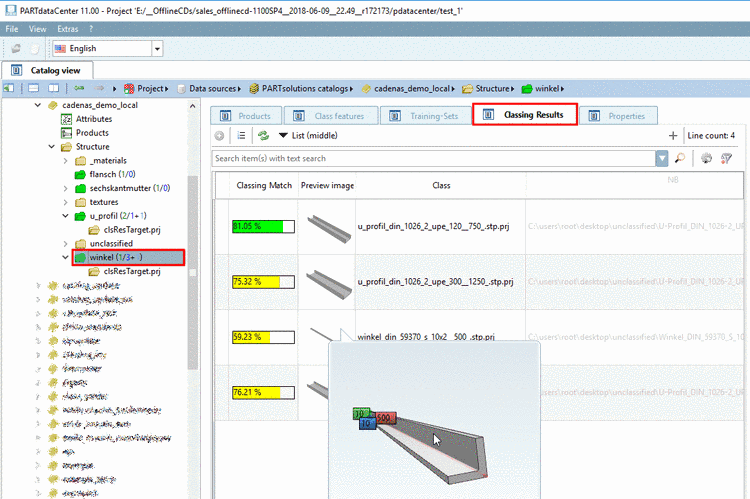
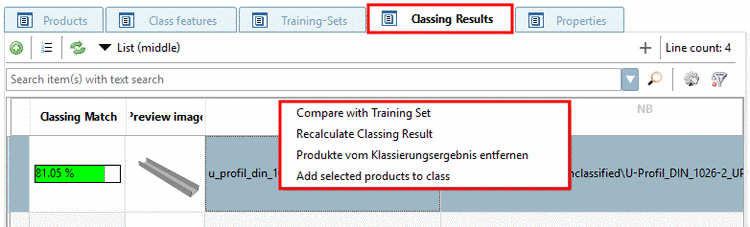
Change to tabbed page Classing Results.
Once the classing procedure is finished, classing suggestions can be viewed on the tabbed page Classing Results.
The following figure shows the result, after a classing process has been conducted for a certain U profile.
1/3+1
Meaning: 1 Training Set (green), 3 existing class suggestions (blue), 1 new class suggestion after last run (light blue).
![[Note]](/community/externals/manuals/%24%7Bb2b:MANUALPATH/images/note.png)
Note In configuration file, it can be set, that all parts without class are assigned to a common project / class (see above).
-
Finally class suggestions can be checked, removed, approved or a new run can made.
-
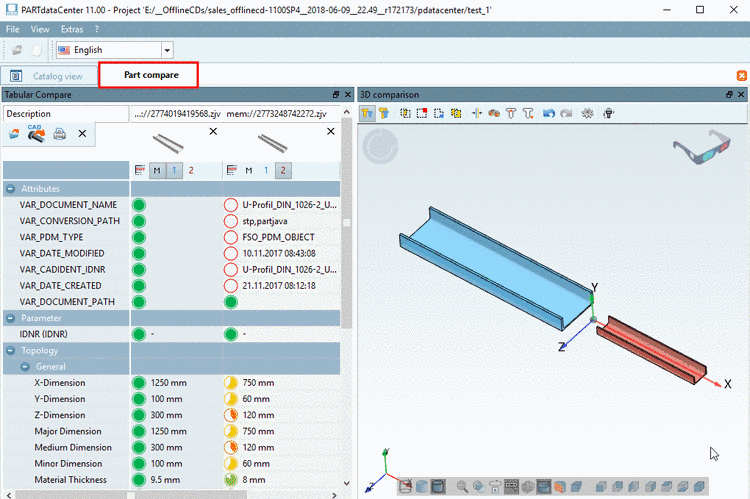
Compare with Training Set -> Load Classing Match and Training Set into the Part comparison
Beside the 3D view, you can comfortably compare attributes and topological parameters.
Recalculate Classing Result -> Running the process again, may be because further Training Sets or Classes have been created / changed.
-
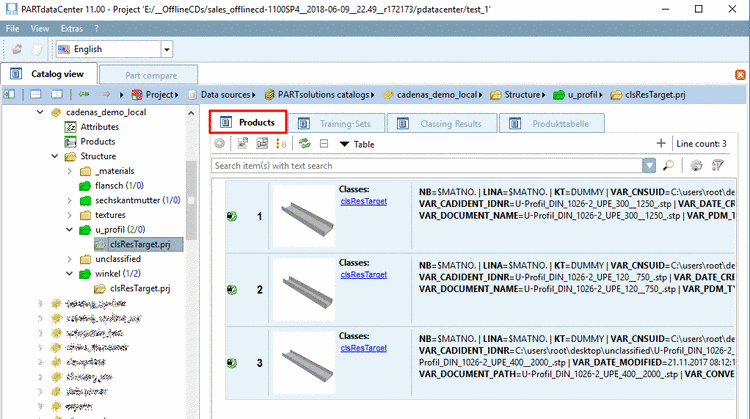
Add selected products to class -> Confirm class suggestion for the product.
Once a product has been added to the catalog with the command Add selected products to class, the product is created on structure level and the link Product/Class is created.
View the result on the tabbed page Products.
-
-