Manual
Login
Our 3D CAD supplier models have been moved to 3Dfindit.com, the new visual search engine for 3D CAD, CAE & BIM models.
You can log in there with your existing account of this site.
The content remains free of charge.

Top Links
Manual
 |
Dimensioning views are integrated in the project, in the form of pra files in PARTproject and then later displayed in the PARTdataManager, in the docking window Technical details or in tooltips of preview images.
![[Note]](/community/externals/manuals/%24%7Bb2b:MANUALPATH/images/note.png) |
Note |
|---|---|
|
For the
training example the *.pra files "Draufsicht" (top view) and
"Seitenansicht" (side view) have been stored under Detailed information on the creation of *.pra files can be found under Section 4.12.2, “External creation and import/conversion of Dimensioning views ”. | |
Copy the pra files from
.../partdesigner/finishedto.../partdesigner/part.-
Click the name of the project file capnut.prj (hutmutter.prj).
In the dialog area Edit project, open the tabbed page 3D project.
For the Dimensioning views first click in the View field and select the desired view and then click into the field File with dimensioning in order to set up the associated 2D file (*.pra).
-
Repeat this for all needed files. To create a new line, click the button New
 .
.--> The view files have now become part of the project.
Once clicking on a view (here the side view), the respective Picture file is displayed as Preview.
-
In PARTproject, in the context menu of the desired project, click on Open with PARTdataManager.
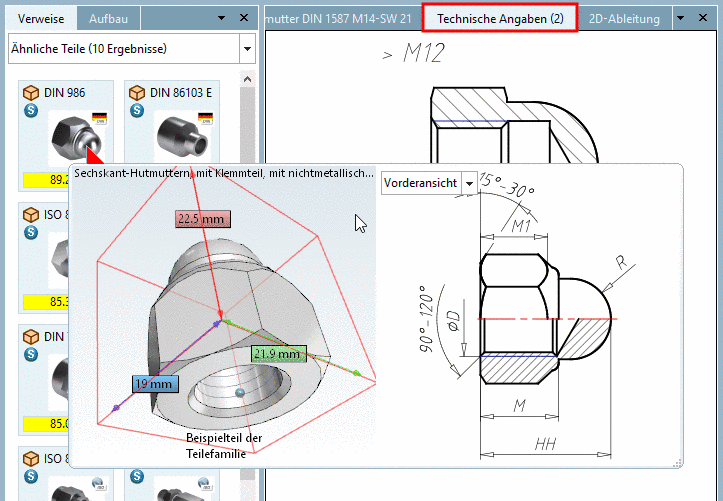
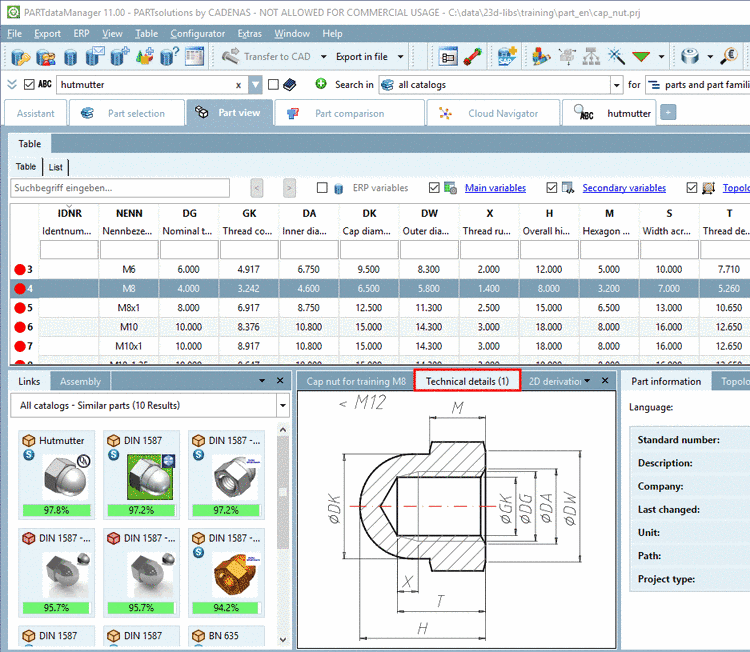
In PARTdataManager, in the docking window Technical details, you can find the added dimensioned 2D views of the cap nut.


Alternatively or additionally dimensioning views can be provided as 3db or tif files:
-
With PARTdesigner, you can create Dimensioning views from Standard views, create the dimensioning text against different sets of requirements and make additional versions available for PARTdataManager.
Details on this can be found under Section 4.12.1, “Create Dimensioning views with PARTdesigner ”.
-
*.tif files can be created from paper catalogs by scanning, for example.
Details on this can be found under Section 4.12.3, “*.tif files ”.
