Manual
Login
Our 3D CAD supplier models have been moved to 3Dfindit.com, the new visual search engine for 3D CAD, CAE & BIM models.
You can log in there with your existing account of this site.
The content remains free of charge.

Top Links
Manual
 |
|
The most important characteristic in PARTdataManager with activated ERP integration is the Link database toolbar (or the ERP menu with normally identical functions). |
|

In the following the single buttons are explained:
|
|
|||||
|
|
Select group : A defined user can select different views on the datasets (if provided). |
||||
|
|
|||||
|
|
Send selection to Link Manager / Cancel selection Via double-click on a line in PARTlinkManager the view switches to PARTdataManager. Now you
can select any line in PARTdataManager. By
clicking on These two icons are only active, when a call has been performed in PARTlinkManager, otherwise these are inactive and dimmed. |
||||
|
|
|
||||
|
|
|||||
|
|
Add dataset to link database (variant) Choose a data set, which is the very next to the variable to be changed.
When variants are created, possibly these are not sorted correctly in PARTdataManager (see fig. above). However you can determine the scheme of sorting for the currently opened project in a special dialog. So a manual editing of the PRJTABLE is not necessary. On this see under Section 3.1.11.14, “Line sorting in PARTdataManager ”. |
||||
|
|
Define sorting sequence for this project: On this see under Section 3.1.11.14, “Line sorting in PARTdataManager ”. |
||||
|
|
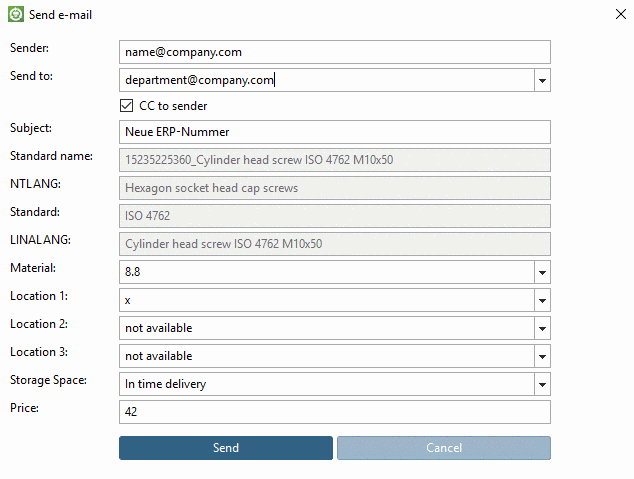
After clicking the button the Edit/delete dataset window shows up.
The data view is divided into Link-data and ERP data.
|
||||
|
|
show database-data for this part : The window shows geometric data as well as ERP data.
|
||||
|
|
On this see under Section 3.1.11.5, “ Classify project ”.
|
||||
|
|
|||||
|
|
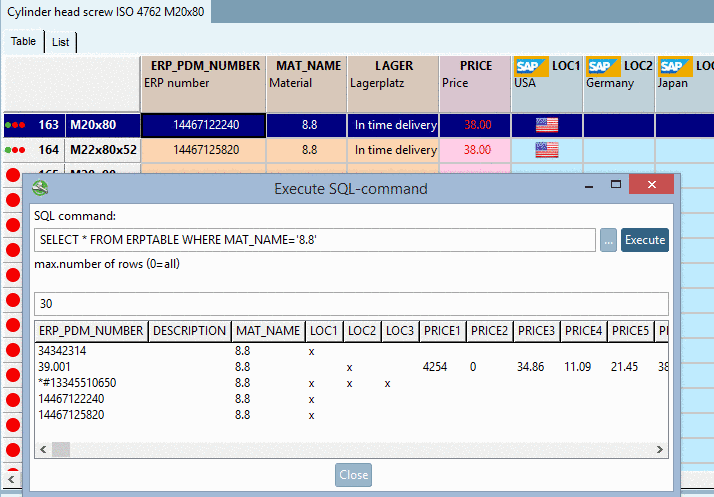
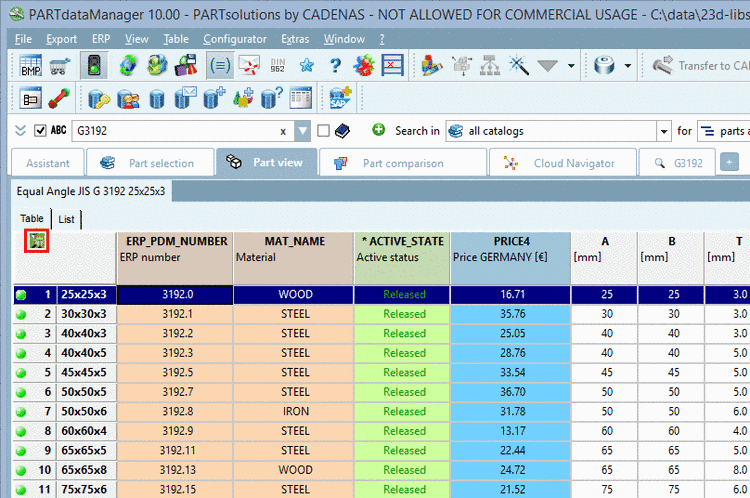
This function controls both the display of catalogs, directories and projects in the in the index tree and the display of characteristics in the table. Furthermore the search results are filtered, when this button is activated. If the button Preferred rows on/off is activated, then only a) only "green"[a] catalogs, directories and projects are displayed and b) only lines, which have an entry in a defined column (often this is the column for the article number). In other words: In the table, only green lines are displayed. The red lines are hidden.[b] you can recognize the table restriction at the filter icon  . By clicking on the icon the filter is
removed and all lines are displayed. . By clicking on the icon the filter is
removed and all lines are displayed. In the table only lines with ERP number are displayed. In the table only lines with ERP number + status = 'released' are displayed. Information on definition of conditions are found under Registerseite Allgemein -> Preferred ranges.
|
||||
|
[a] Green refers to the standard definition. Analogously this statement applies for every other definition of preferred rows. [b] Green/Red again concerns the standard definition. | |||||


![[Note]](/community/externals/manuals/%24%7Bb2b:MANUALPATH/images/note.png)