Manual
Login
Our 3D CAD supplier models have been moved to 3Dfindit.com, the new visual search engine for 3D CAD, CAE & BIM models.
You can log in there with your existing account of this site.
The content remains free of charge.

Top Links
Manual
 |
The following describes how you can insert single 3D parts from the Standard and supplier parts library into your 3D CAD system.
![[Note]](/community/externals/manuals/%24%7Bb2b:MANUALPATH/images/note.png) |
Note |
|---|---|
|
The default procedure is described. For some CAD systems you can find further information in the CAD specific chapter. | |
|
-
In the Part selection choose the desired parts.[7]
-
Determine the desired characteristic in the Part view .
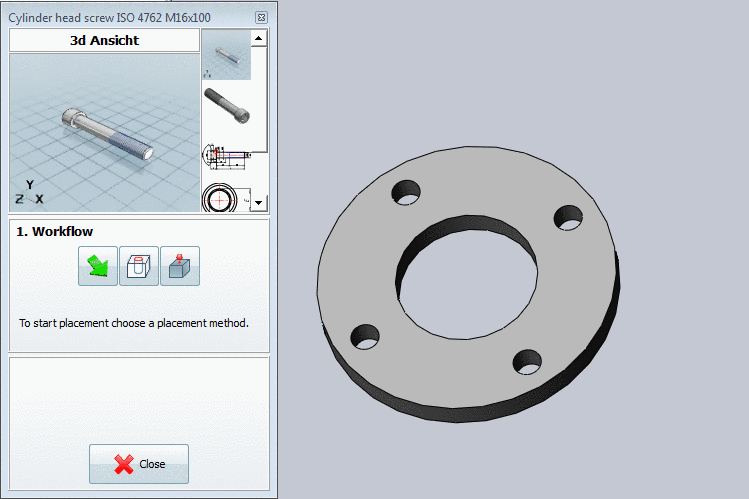
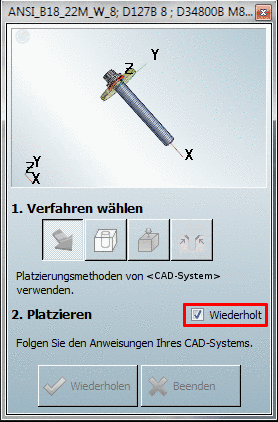
Click on
 .[8]-> The display switches back to the CAD system.
-
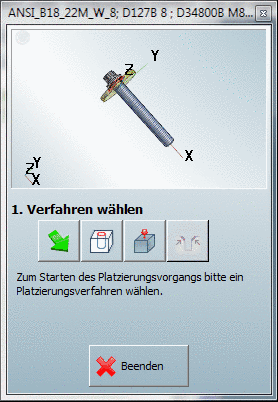
The PARTsolutions placement dialog appears.
The placement methods available in a certain case depend on the part type.
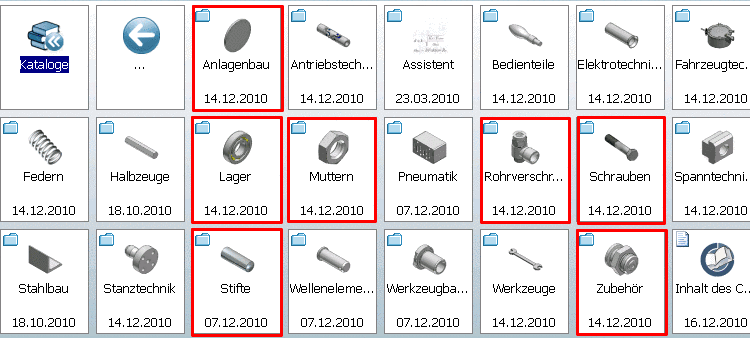
Not all parts in the standard catalog have all the attributes needed for additional PARTsolutions intelligent placement methods. The method "Default placement"
 is always available. Currently the CAD interfaces
enable the additional intelligent placement methods for rotationally
symmetric parts such as bolts, nuts, rings and bearings for
example.
is always available. Currently the CAD interfaces
enable the additional intelligent placement methods for rotationally
symmetric parts such as bolts, nuts, rings and bearings for
example.
The following figure gives an overview about the parts which enable intelligent placement in addition.
The activation of the Repeating checkbox enables the repeated placement in the CAD without having to use the [9] button.
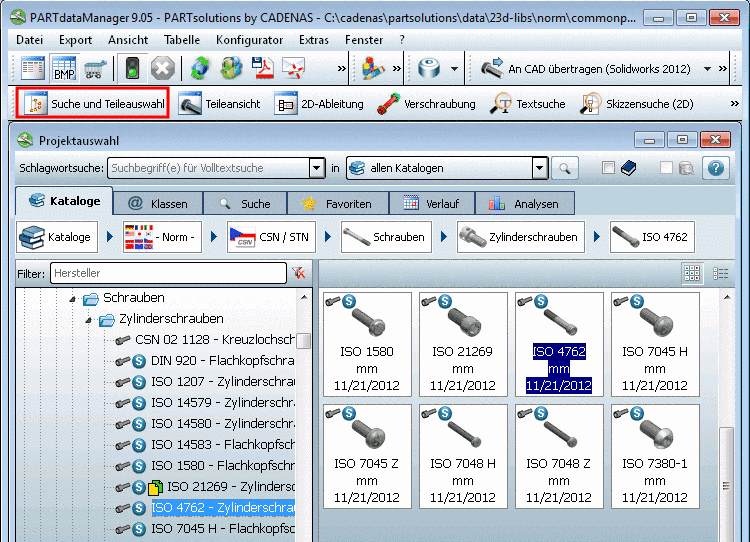
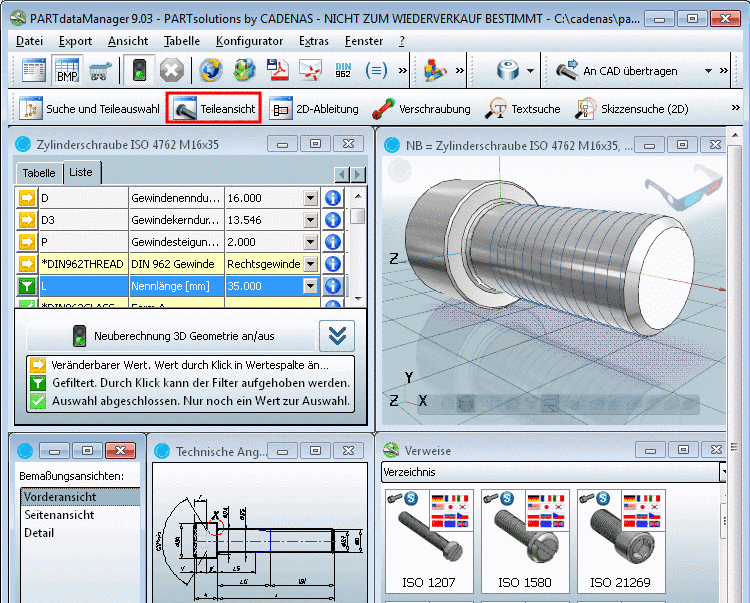


[7] A detailed description of PARTdataManager can be found under Section 3.1, “ PARTdataManager ”.
[8] You can also export the part via "Export in file". More detailed information can be found under Section 3.1.2.1.2, “ Export to CAD systems without PARTsolutions interface - Export in file ”.
[9] At certain CAD systems the function is available for all placement methods, at others only for the Standard CAD placement method. If the function is not available, then the checkbox is grayed out.
