Manual
Login
Our 3D CAD supplier models have been moved to 3Dfindit.com, the new visual search engine for 3D CAD, CAE & BIM models.
You can log in there with your existing account of this site.
The content remains free of charge.

Top Links
Manual
 |
You can use SSL encryption for all requests to the PARTapplicationServer [17].
If the checkboxes HTTPS-Port and/or SSL-Service-Port are activated, the dialog area SSL is also activated.
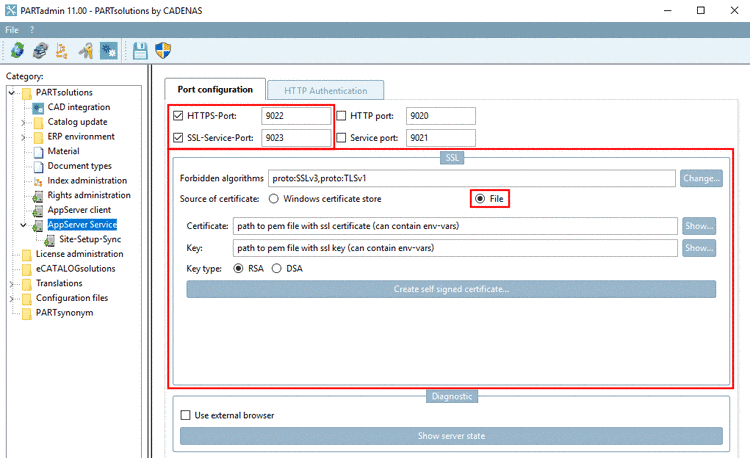
For Source of certificate there is a choice of two options:
-
With this option you have the Microsoft Standard SSL-Library available. So that the standard Microsoft certificate management is supported, meaning the regular management interface is displayed.
Already created certificates can be selected in the list field under Hostname.
Detailed information on this can be found under Section 1.3.9.9.3.3.1, “Make certificate available via Windows certificate store ”.
-
File (default): After selection of File under Source of certificate, you can manually set the desired certificate.
Detailed information on this can be found under Section 1.3.9.9.3.3.2, “Make certificate available via file”.
After selection of Windows certificate store in the list field under Hostname, you can select administratively provided certificates.

In addition you can also request new certificates, which then also will be displayed in the list field under Hostname.
-
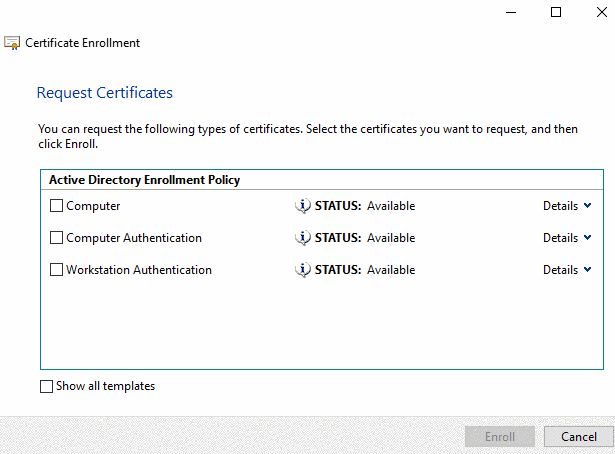
On the right, open the context menu and there, under "All Tasks" click on the command "Request New Certifcate...".
-
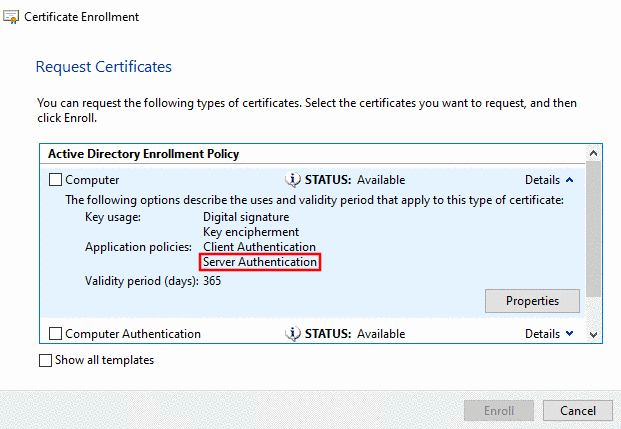
Then on the page "Active Directory Enrollment Policy" select a certificate and pay attention that under "Details" -> "Application Policies" the entry "Server Authentication" is available.

You can make certificates available via file. This can be self-signed or official[18] certificates.
In the following the creation and the import of a self signed certificate is described:
Create certificate on the AppServer
-
In PARTadmin, select the category AppServer Service.
-
Activate the checkboxes for HTTPS-Port and/or SSL-Service-Port. Normally the others are deactivated. That means, unencrypted access to the server is not possible.
-
The dialog box Generate certificate... is opened.
-
Alternate Names: Both DNS names and IP addresses can be allowed. At the desired alternate names, activate the checkbox.
By default, a certificate is issued to the CommonName. If, for example, several websites are hosted, only one certificate is sufficient when using Alternate Names. The client will check whether the used hostname corresponds to one of the alternate names.
-
Protect key with standard password:


![[Note]](/community/externals/manuals/%24%7Bb2b:MANUALPATH/images/note.png)

Import certificate on the client
-
Activate the checkbox Use SSL.
-> HTTP port and Service port are deactivated and HTTPS-Port and SSL-Service-Port are activated.
Tunnel services via web sockets (optionally):
You can use this option, if you want to bind only one port or if you want to connect via HTTP proxy (if websockets are possible).
When using this option the input field for SSL-Service-Port grayed out.
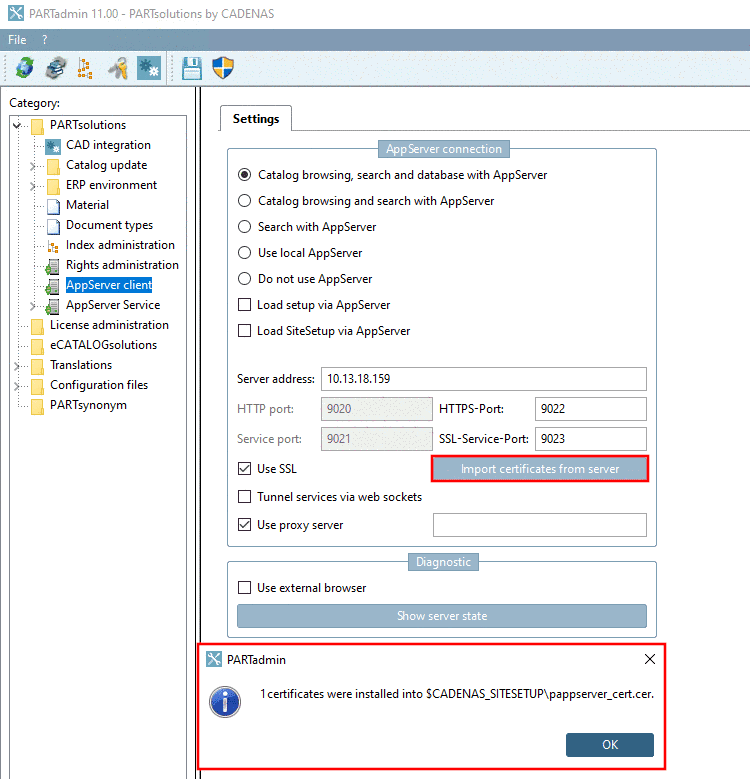
Little testing if everything is working properly: Make sure that Use SSL is activated. Click on . If the certificate is properly stored on the client, the server state is displayed, otherwise an error message is displayed.
