Manual
Login
Our 3D CAD supplier models have been moved to 3Dfindit.com, the new visual search engine for 3D CAD, CAE & BIM models.
You can log in there with your existing account of this site.
The content remains free of charge.

Top Links
Manual
 |
In the chapter in hand you will get an overview on classification of threaded connections (e.g. own company standards) in "PCon classification", including the correct arrangement of connection points.
In this way the connections are prepared for the use under PARTdataManager -> Connections, that then a placement in an assembly can be performed.
In the following all important steps are explained:
-
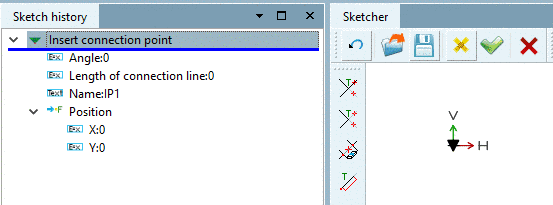
Creation of the connection points in PARTdesigner:
-
Position, orientation, number and naming (overview)
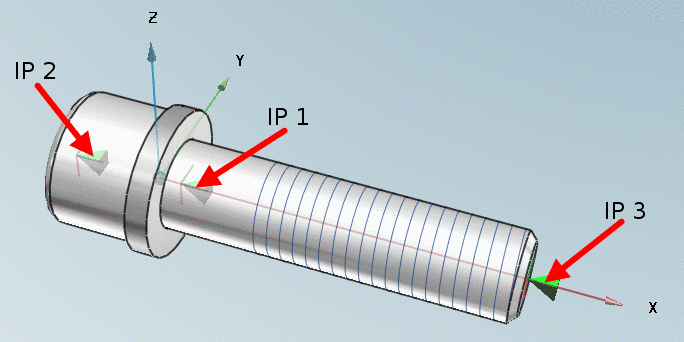
The following figure shows, which connection points have to exist, how they have to be oriented and where they have to be positioned, using the example of a cylinder head screw.
Detailed information on all threaded connections are found under Section 5.13.9.1, “Connection points at threaded connections ”.
More information on connection points in general are found under Section 7.9.3.2.1, “Connection points for assembly construction ”.
-
Orientation: The top of the connection point (green pyramid) points to the contact face. Further possibly available connection points are oriented in the same way. The long axis corresponds to the X-axis.
-
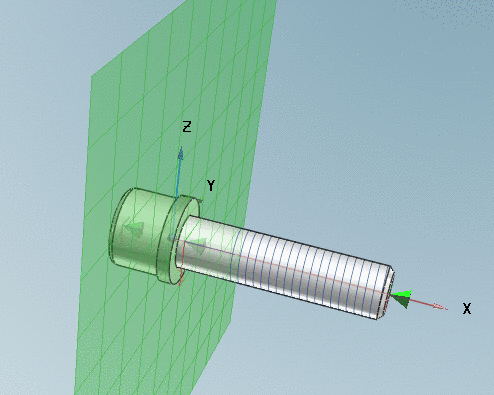
The sketch is on a plane vertically to the X-axis.
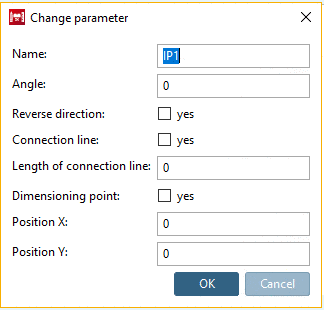
Insert the name in the dialog box Change parameter, otherwise leave the settings.
-
-
Classification of the part in PARTproject
-
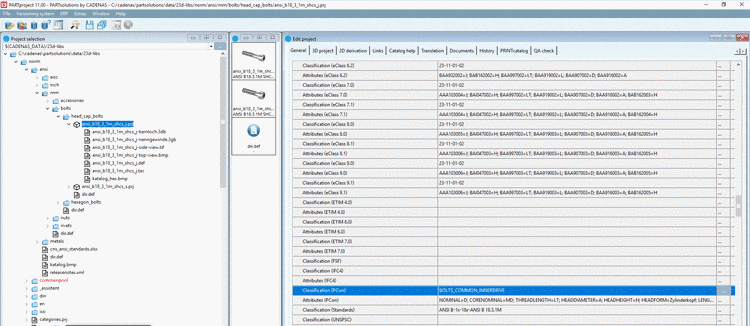
Select the tabbed page General.
-
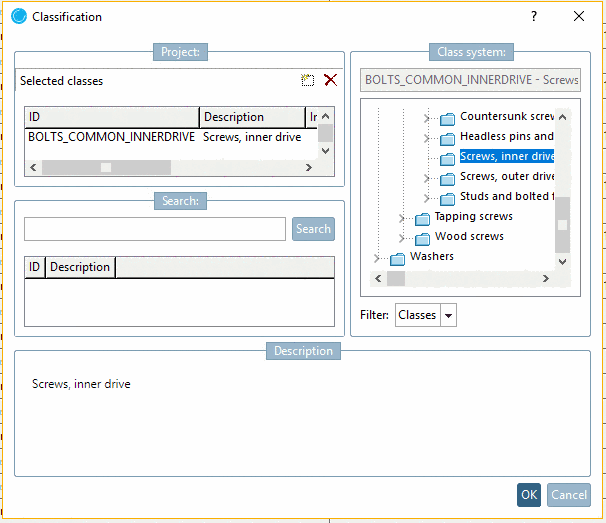
In the line Classification (PCon), open the dialog box Classification via double-click on the search button ....
For the classification of threaded connections you have the following main classes available (with diverse subclasses):
Select the desired class and assign it via double-click.
-
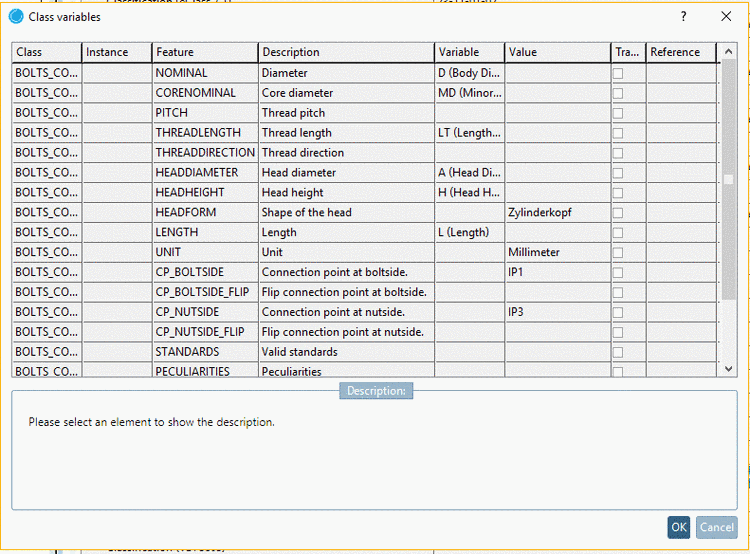
In the line Attributes (PCon), open the dialog box Class variables via double-click on the search button ....
Assign the correct variables or fixed values to the individual attributes.
![[Note]](/community/externals/manuals/%24%7Bb2b:MANUALPATH/images/note.png)
Note Especially pay attention on the correct assignment of the connection points.
The name, inserted here, has to match the correct connection point in the part.
In the example in Fig. „Cylinder head screw with connection points“ the connection point IP1 (the connection point on the screw side) is assigned to the attribute "CD_BOLTSIDE" .
-
-
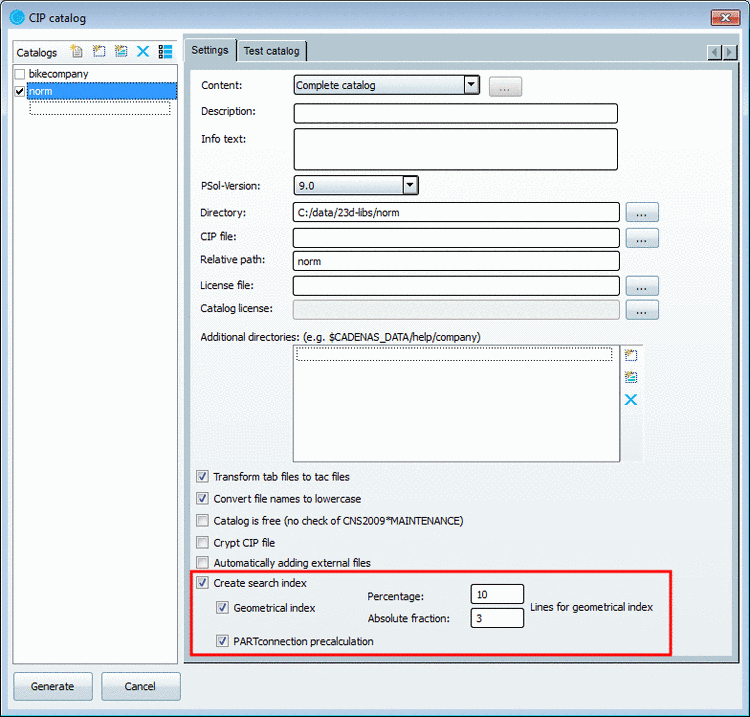
When you cip the catalog please regard that the options Create search index and PARTconnection precalculation are activated.
Details on this dialog box are found under Section 5.8.2.1.14.1, “ CIP catalog ”.
-
After successful generation you receive a confirmation message.
-
-
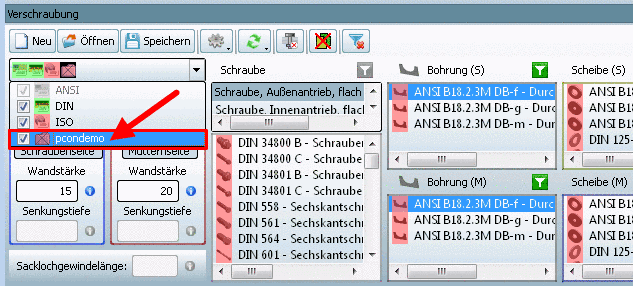
Once you open the list field for the catalog selection in PARTdataManager, in the dialog area Connection, you will see your own catalog.
Now the newly created threaded connections are also displayed.
A detailed description of the "Connections" functions in PARTdataManager is found under Section 3.1.12, “ Connections ” in PARTsolutions / PARTcommunity4Enterprise - User manual.