Manual
Login
Our 3D CAD supplier models have been moved to 3Dfindit.com, the new visual search engine for 3D CAD, CAE & BIM models.
You can log in there with your existing account of this site.
The content remains free of charge.

Top Links
Manual
 |
With the help of VDI 3805 importer, manufactures from the TGA field [35] (building services for heatings, pipes, pumps, etc.) can import their VDI catalog and create a PARTsolutions catalog, which then can be provided on PARTcommunity portals. Provided download formats currently are the neutral formats STEP/IGES (3D) and DWG/DXF (2D).

Geometry and meta data specific to certain sheets are imported.
Currently only the import of static data is supported.
Data can be updated constantly.
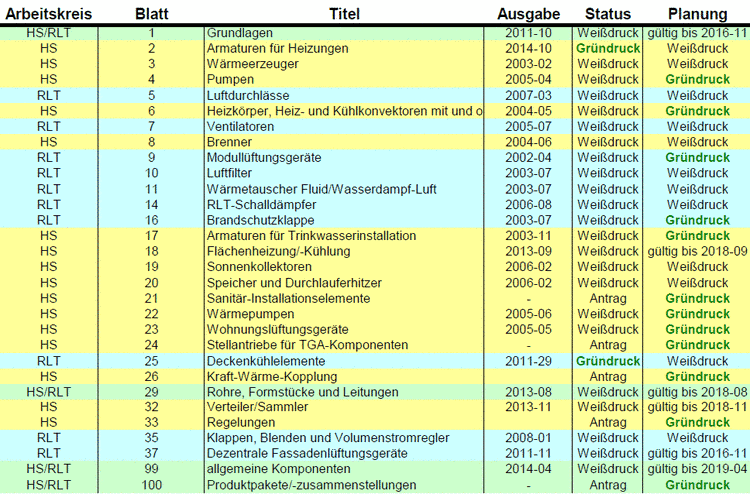
VDI 3805 controls product data exchange in the TGA by different data sheets. Each sheet defines a specific product range with details on all attributes and detailed product descriptions.
PARTsolutions supports a range of sheets. Details on this are available on request.
The following figure shows the current editing status[36] of data sheets.
In the following you can find a description on how to simply create your own VDI catalog with the help of the VDI Wizard.
-
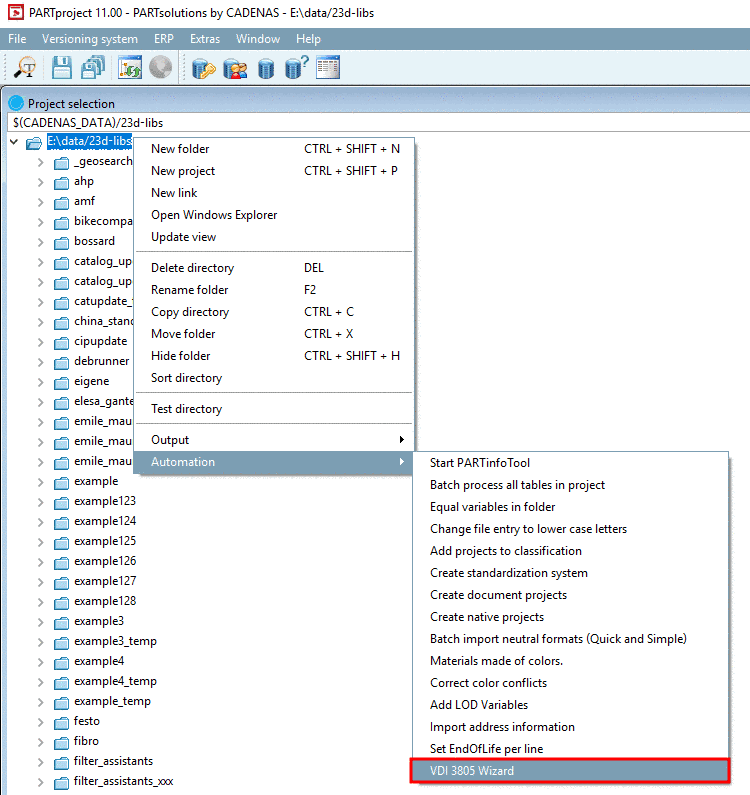
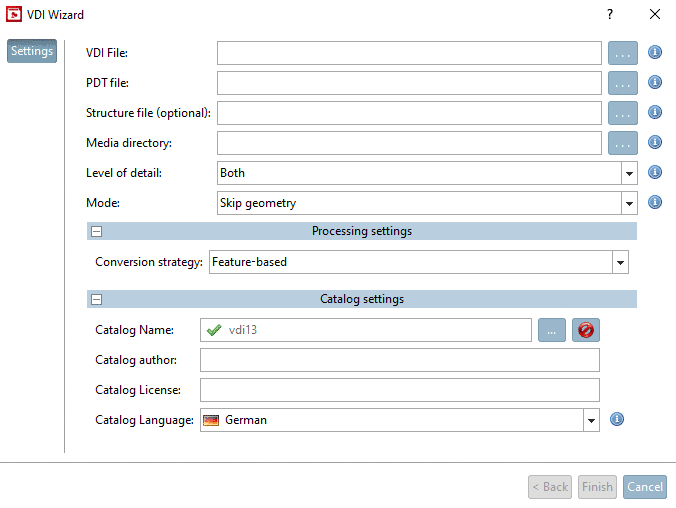
Open the Wizard in PARTproject, in the Project selection via context menu under Automation -> VDI 3805 Wizard.
-
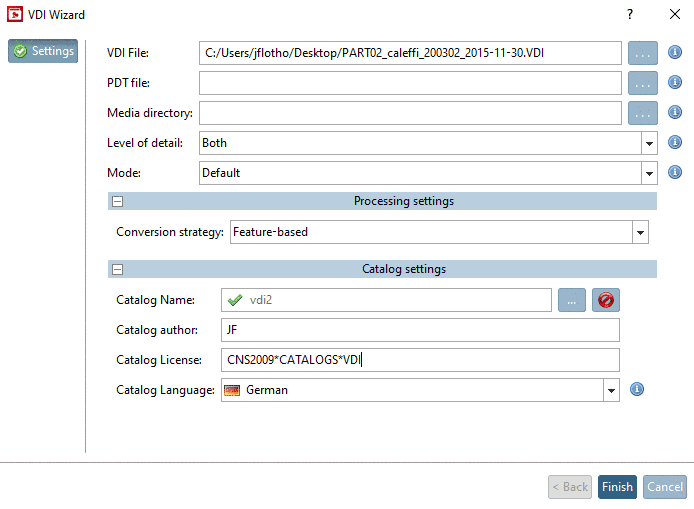
VDI File: Determine the directory of the VDI files to be imported via search button .
-
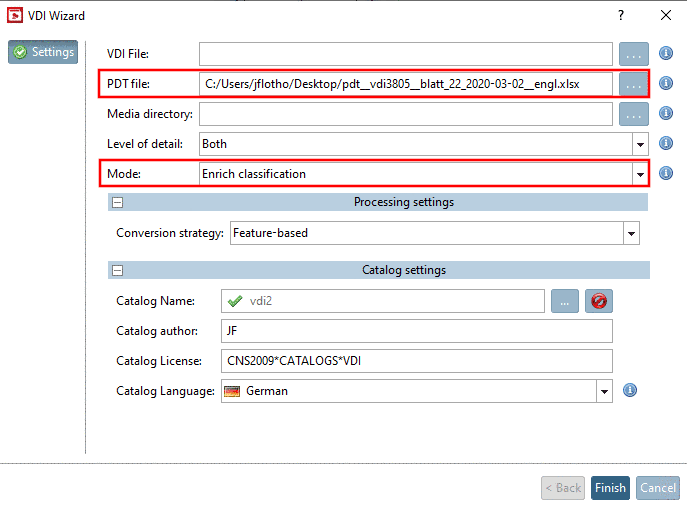
PDT file [37]: When specifying a PDT file you can enrich the classification subsequently. For this, under Mode, select the option Enrich classification.
Classification data is shown in PARTdataManager under Part information.
Single attributes in the PDT file can also be translated.
If you have "Pressure reducer" in the attribute SA100ID04 and want to translate this term, the entry in the Excel file (PDT file) looks like this:
#gbr#Pressure reducer#fra#Réducteur de pression#ita#Riduttori di pressione
The country code has to be according to ISO 3166 ALPHA-3 and the values have to be stated in one line.
Translating of single attributes in the PDT file should only be used if translating via configuration file doesn't make sense. The configuration file (
CADENAS_USER/vdi/vdi3805import.cfg) is written in the first run of the VDI Wizard.Media directory (optionally): If no preview images (png format) are provided, they will be automatically generated (as with Quick & Simple or PLMsynchro as well).
-
Level of detail: Determine the level of detail (Low Quality | High Quality | Both | None).
This concerns quality and structure of geometry to be imported. Default is Both. Depending on how complex data are, with Low Quality more data can be imported as with High Quality (tolerances, accuracy, compatibility).
-
Mode: Determine the import mode:
-
Default: Catalog creation by importing a VDI or PDT file (one of the two has to be specified).
(Currently the creation of geometry is only possible via VDI file.)
Skip geometry: Same procedure as under "Default", but when importing into already existing catalogs, in no case correct 3db files can be overwritten (and in error case no dummy.3db files will be created and attached). Furthermore the process is faster.
-
Enrich classification: With this option, values of a PDT file can be written into the classification of an already existing catalog, (which then are also shown in the Part information.
-
-
Processing settings –> Conversion strategy:
Default: An attempt is made to create a standard 3db file. If this fails an attempt is made to write a STP file as fallback (corresponds to Quick and Simple).
Feature-based: There is only an attempt to create standard 3db files. This is meant as premium method. Possibly same geometries cannot be created, the rest however, is of the highest quality (3db). If the scope is on just producing content, select Default).
-
Catalog name: Catalog name is automatically set on that catalog where the Wizard had been started from, however, it can be changed (), whereby a new catalog is created or the import goes into another catalog. If the Wizard started on the root node the field remains empty.
-
Catalog license: As usual when importing a catalog a license has to be inserted, if required:
CNS2009*CATALOGS*CATALOGNAME
-
-> The import and the catalog creation are started. Depending on size of source file and chosen settings (preview images, LOD) this may last some minutes or hours.
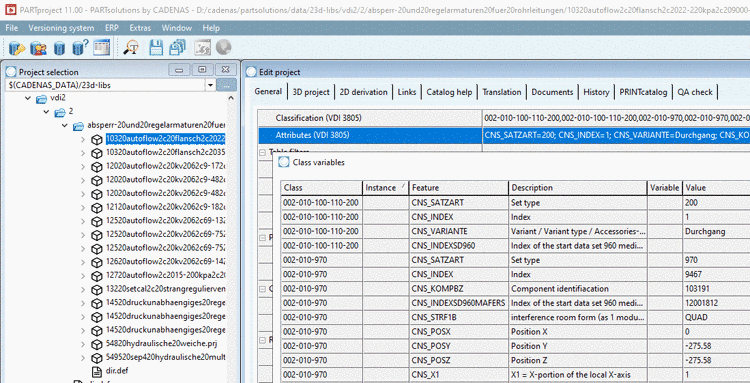
-> Classes and features have been inserted under Classification (VDI 3805) or Attributes (VDI 3805).
-
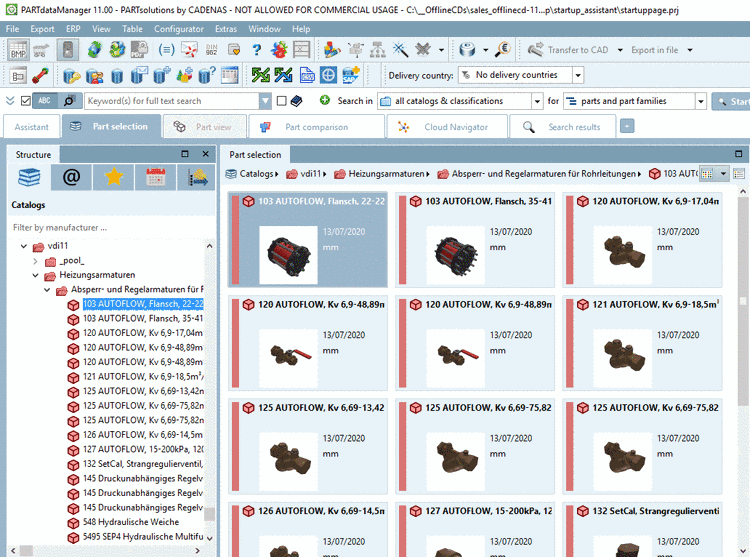
Open the VDI catalog in PARTdataManager, in the Part selection.
-
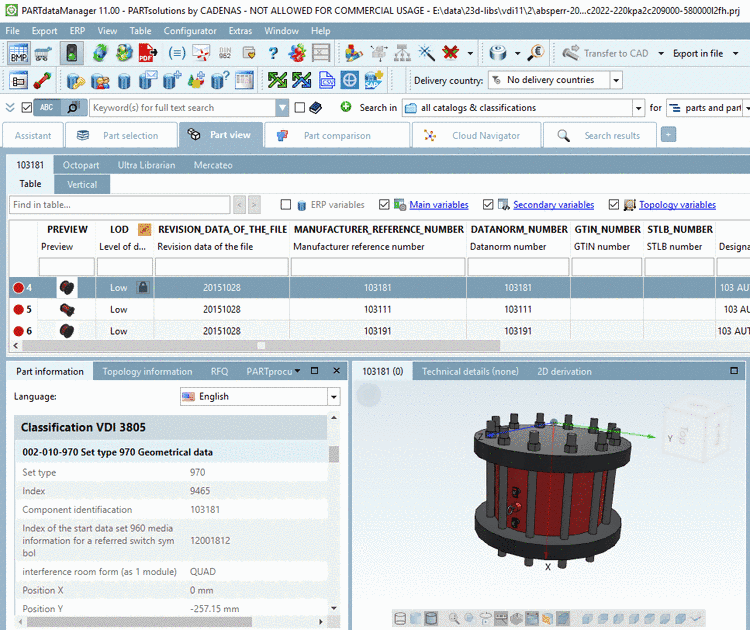
Open a project in PARTdataManager, in the Part view.
All existing attributes have been applied and filled in the Classification VDI 3805, 3D view and line preview images have been automatically created. If preview images had been stored in the Media directory these are used.
![[Note]](/community/externals/manuals/%24%7Bb2b:MANUALPATH/images/note.png)


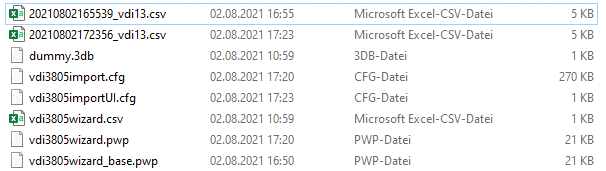
Process files are
initially created during first start of the Wizard under $CADENAS_USER/vdi.
-
<Date>_<Catalog name>.csv: CSV showing import state. Here, you can quickly detect, which files have been successfully supported and for which the import failed.
-
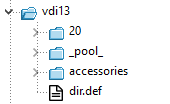
Structure: The configuration file is subdivided in blocks showing the corresponding sheet number as name. For example, block 20 is relevant for sheet 20.[38]
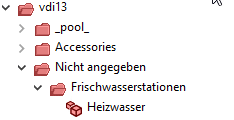
The sheet numbers are mirrored in PARTproject and in PARTdataManager in the index structure.
The names of the folder structure in PARTdataManager correspond to the statements in the key "_NAME" or other translations.
Each block contains the following keys:
-
Standard at first position is the statement of sheet number, then superordinate product description, then description of a single product.
(Theoretically, most diverse attributes can be used in order to individually assemble an path with any depth.)
-
_NAME: Translation of path. As many parts can be stated as available under path.
_PATH= $SA010ID02. /       $SA100ID04. / $SA110ID04.
_NAME= Heating fittings  / Folder1/      Subfolder1
In this example, the folder is internally named according to the value under $SA100ID04., but the user would see "Folder1".
Normally only the translation for the sheet number is stated, so that the folder would not be named with "2" according to the sheet number, but with "Heating fittings".
Sheet catalogs built in this way will be compatibly synchronized during a new import/update. Other sub-structures may not be created manually in order for updates to be working.
-
_SORT: Sort sequence of variables
You can explicitly determine the variables' sort sequence as is should then be displayed in the characteristic attribute table.
[20]
_PATH=$SA010ID02./$SA100ID04./$SA110ID04.
_NAME=Speicher und Durchlauferhitzer
_SORT=SA010ID04,SA010ID03,SA010ID05
SA010ID03={"desc":{"deu":"Ausgabedatum (Monat) der Richtlinie","eng":"Issue date (month) ...
SA010ID04={"desc":{"deu":"Herstellername","eng":"Manufacturer’s name"}}
SA010ID05={"desc":{"deu":"Revisionsdatum der Datei","eng":"Revision data of the file"}}
#SA010ID06={"desc":{"deu":"Webadresse des Herstellers","eng":"Manufacturer’s web address"}}
#SA010ID07={"desc":{"deu":"Kommentarfeld","eng":"Comment"}}
[20]
_PATH=$SA010ID02./$SA100ID04./$SA110ID04.
_NAME=Speicher und Durchlauferhitzer
_SORT=SA010ID05,SA010ID04,SA010ID03
SA010ID03={"desc":{"deu":"Ausgabedatum (Monat) der Richtlinie","eng":"Issue date (month) ...
SA010ID04={"desc":{"deu":"Herstellername","eng":"Manufacturer’s name"}}
SA010ID05={"desc":{"deu":"Revisionsdatum der Datei","eng":"Revision data of the file"}}
#SA010ID06={"desc":{"deu":"Webadresse des Herstellers","eng":"Manufacturer’s web address"}}
#SA010ID07={"desc":{"deu":"Kommentarfeld","eng":"Comment"}}
In each block there is a listing of the single variables (attributes). Attributes, which should not be visible can be commented out by "#".
-
-
Here, optionally translations can be saved.
text;deu;eng
-
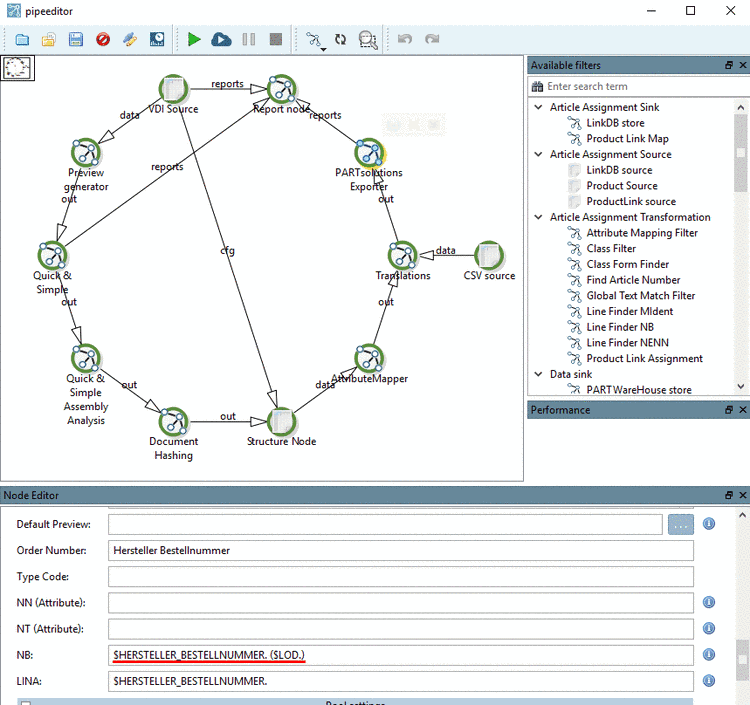
The .pwp file is a XML file with all pipeline settings. You can open it with PARTdataCenter or the Pipe editor.
By selecting individual nodes in the Node Editor, you can access multiple settings. After changes save the file and execute the Wizard again.


![[Tip]](/community/externals/manuals/%24%7Bb2b:MANUALPATH/images/tip.png)
Standard eCATALOGsolutions/PARTproject system requirements. See Chapter 2, System requirements in Installation Manual.
[35] Technical building services
[36] https://www.vdi.de/fileadmin/vdi_de/redakteur_dateien/gbg_dateien/VDI_3805_Bearbeitungsstand-05-21-2015.pdf
[37] A Product Data Template (PDT) is a machine-readable template, which serves to structure information in the form of attributes for any kind of objects in the building sector and make it exchangeable.
[38] The sheet numbers can also be found in the VDI or PDT file right at the beginning.
See following example of a VDI file:
010;20;200602;Company 08/2015;20150810;Company.de;Armaturen aus Rotguss undEdelstahl, Revision by www.....de, Stand 01/2015;;;;;;DEU;DE; 100;5;5;Durchflusstrinkwassererwärmer;;;20120405; 110;1;1;Heizwasser;;;20120405; 200;4;nicht rostender Stahl; 300;3;wandhängend; 400;1;Geschlossen/druckfest; 450;1;monovalent;
