Manual
Login
Our 3D CAD supplier models have been moved to 3Dfindit.com, the new visual search engine for 3D CAD, CAE & BIM models.
You can log in there with your existing account of this site.
The content remains free of charge.

Top Links
Manual
 |
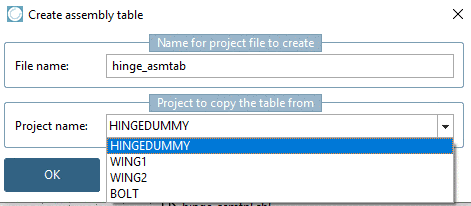
Now create the Assembly Table Project.
-
Under Project selection -> context menu of hinge_asmtpl.prj, click on the command Create assembly table project.
-
In the list field, select that project which contains the table by which you want to control the assembly . In this example here this is "HINGEDUMMY".
-
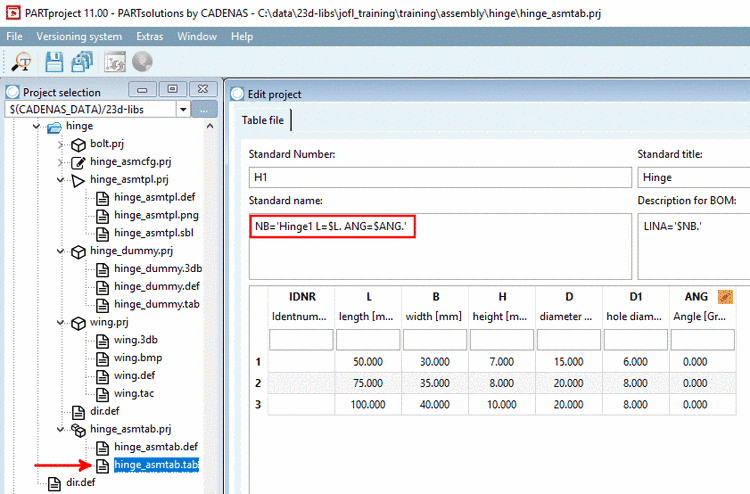
So far you already adjusted the table of "hinge_dummy.tab/tac" the Standard name is correct.
Otherwise assign a unique standard name to the assembly.
In order for only the Assembly Table Project to be visible in the PARTdataManager, and not the "intermediary steps" assembly template and assembly configuration, hide these with Hide project in the context menu of the directory tree. And also hide the dummy project in this way.
-
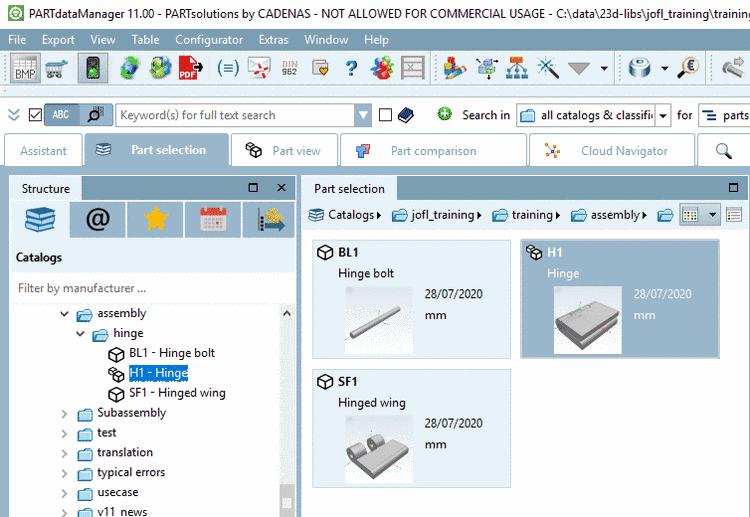
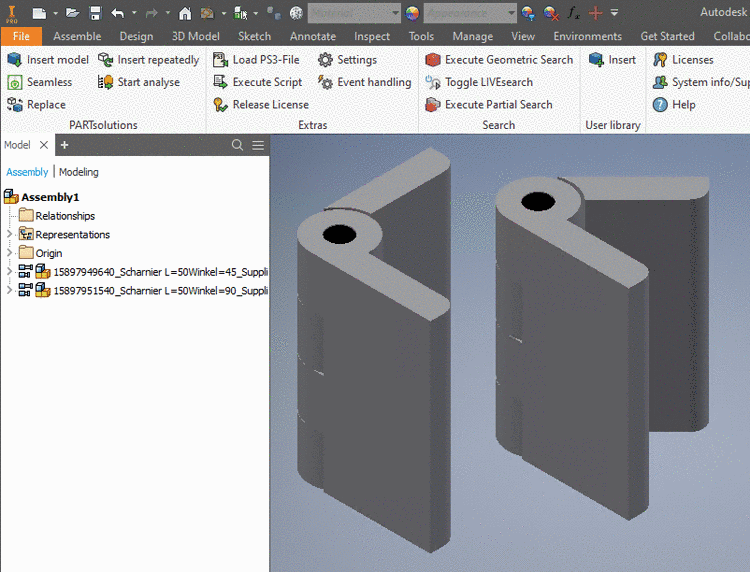
-> Now you can select the single parts "Wing" and "Bolt" and the Assembly Table Project "Hinge" in PARTdataManager.
-
-
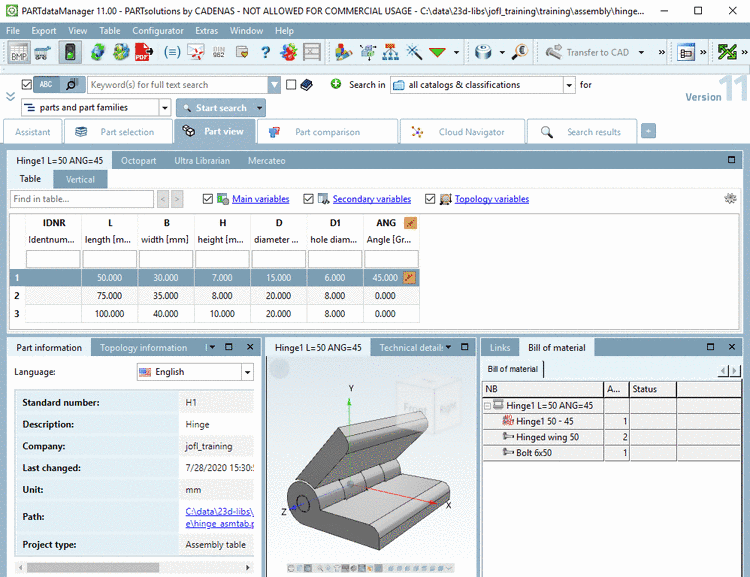
Transfer the assembly to a CAD system (as in the example below with two different angularities).