Manual
Login
Our 3D CAD supplier models have been moved to 3Dfindit.com, the new visual search engine for 3D CAD, CAE & BIM models.
You can log in there with your existing account of this site.
The content remains free of charge.

Top Links
Manual
 |
Electrical connections have a lot of attributes. But they don't have to be explained because the most are self explanatory (e.g. cable cross section, number of connection, etc.).
In the following we will show how to classify connection points as Electrical Connection in principle.
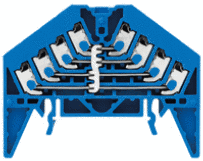
For this example the Weidmüller terminal "1267910000" is used.
The attribute values to be entered can be taken from the datasheet.
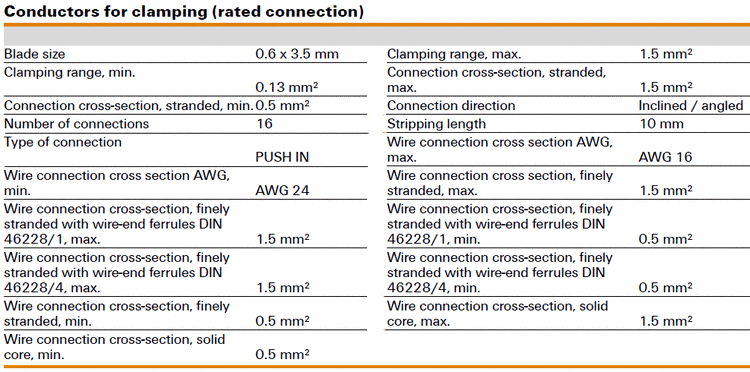
Weidmüller Terminal, Order-No. 1267910000 - Extract from data sheet: Conductors for clamping (rated connection)
In PARTproject, under Project selection, select the desired 3db file.
-
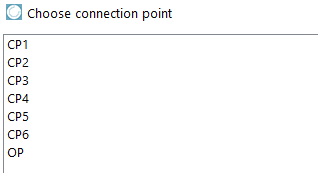
Under Edit project -> Preview, click on the context menu command Choose connection point.
➝ The same named dialog box is opened with all available connection points.
-
Select the connection point to be classified and confirm with .
-> Below the Preview, a dialog is opened where you can select the class to be assigned. There on the right side, the related attributes are displayed.
-
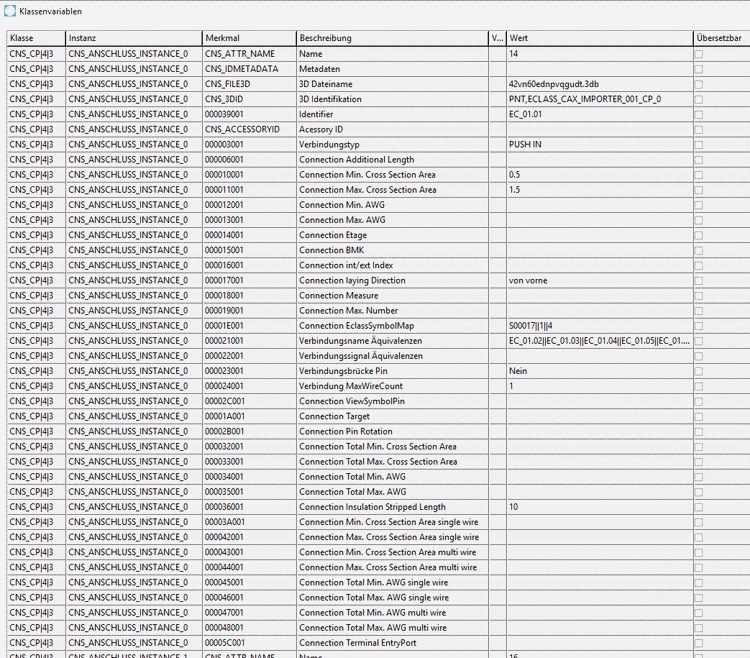
Select the class Electrical Connection (=CNS_CP|4|3), set the checkmark in the beginning of the line and fill out the values of the displayed attributes.
-
Name: Will appear in the ECAD software.
Connection type: "Cage clamp" (Not all CAD programs support the same connection type names!)
Connection EclassSymbolMap: See Section 5.13.10.15.5, “Class "Electrical Connection" (CNS_CP|4|3) -> Attribute "Connection EclassSymbolMap"”
Connection Name Equivalences: See Section 5.13.10.15.6, “Class "Electrical Connection" (CNS_CP|4|3) -> Attribute "Connection Name Equivalences"”
Alternatively you can save and then edit the attributes of Electrical Connection in the dialog Class variables.
-
Save in PARTproject and update the index
 . Afterwards the attributes are also visible in
PARTdataManager in the part information.
. Afterwards the attributes are also visible in
PARTdataManager in the part information.

![[Important]](/community/externals/manuals/%24%7Bb2b:MANUALPATH/images/important.png)

![[Note]](/community/externals/manuals/%24%7Bb2b:MANUALPATH/images/note.png)