Manual
Login
Our 3D CAD supplier models have been moved to 3Dfindit.com, the new visual search engine for 3D CAD, CAE & BIM models.
You can log in there with your existing account of this site.
The content remains free of charge.

Top Links
Manual
 |
Have a look on
this little example: You can get first insights on how easy it is to create
a template, which can be made available in PARTdataManager, for example via the 3D PDF data sheet
function  .
.
In this chapter the procedure is explained as a whole. All details are found in the then following chapters.
![[Note]](/community/externals/manuals/%24%7Bb2b:MANUALPATH/images/note.png)
-
Create a directory "
_templates" at catalog main level. -
Start the PARTtemplateDesigner under
$CADENAS/bin/x86/64via double-click on the fileptemplatedesigner.exe.-> The dialog box New/Open is opened.
Alternatively you can open the dialog box New/Open anytime via File menu -> New.
-
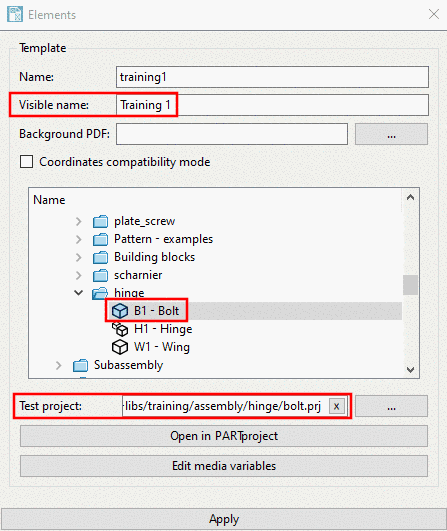
In the directory tree, determine the test project / example project.
The chosen project defines the destination catalog and the example project.
The test project is used for the depiction during the template creation. It can be changed anytime.
-
Create new catalog template -> input field Name
Specify a unique name and click on .
-
-
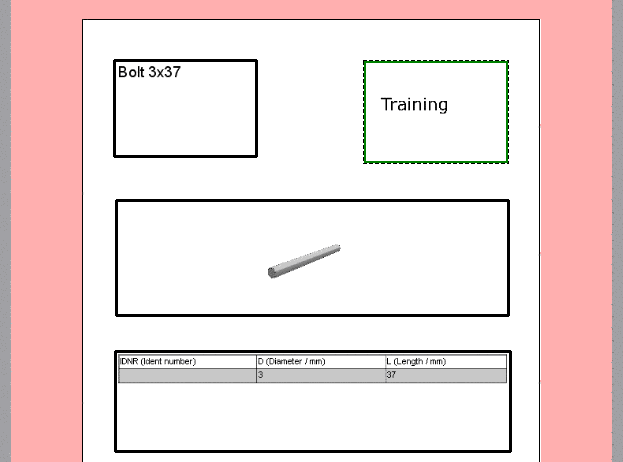
Determine the desired Elements.
If you just want to get an overview on the whole procedure at this place, then only apply the elements Text (with "$NB."), Image (company logo), 3D view and Table for example as a rough draft.
Detailed information on all elements is found under Section 10.4, “"Elements" toolbar ”.
-
Click on the button Save as catalog template.
Thereby the template is saved in the created directory "
_templates". Once with<name>.templateand once with "<name>.ptdef".[110] -
A configuration file
media.cfgshould be automatically created with the following content in the directory "_templates".[TMPLATETYPES] DIR=Verzeichnis PRJ=Projekt BOM=Stückliste PDF=Datenblatt-PDFOnce the entry "PDF=Datenblatt-PDF" exists, in PARTproject, in the section Templates, the entry Datenblatt-PDF (Datasheet PDF) is displayed.
-
Creating the datasheet PDF template in PARTproject:
-
For this, open the module PARTproject via PARTtemplateDesigner -> Settings menu -> Template configuration -> .
-
-
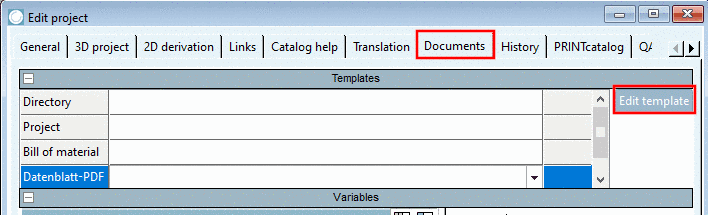
Click on the button Edit template.
-> The dialog box Templates for PARTmedia is opened.
Click on the icon New
 and enter the template name[111] in the input field with the file extension
 .pmt. Close the dialog box.-
In the line Datenblatt-PDF, open the list field and select the just created entry.
-> By this selection, the file
<name>.pmt(here in the example "training1.pmt") is created in the directory "_templates"
-
-
-
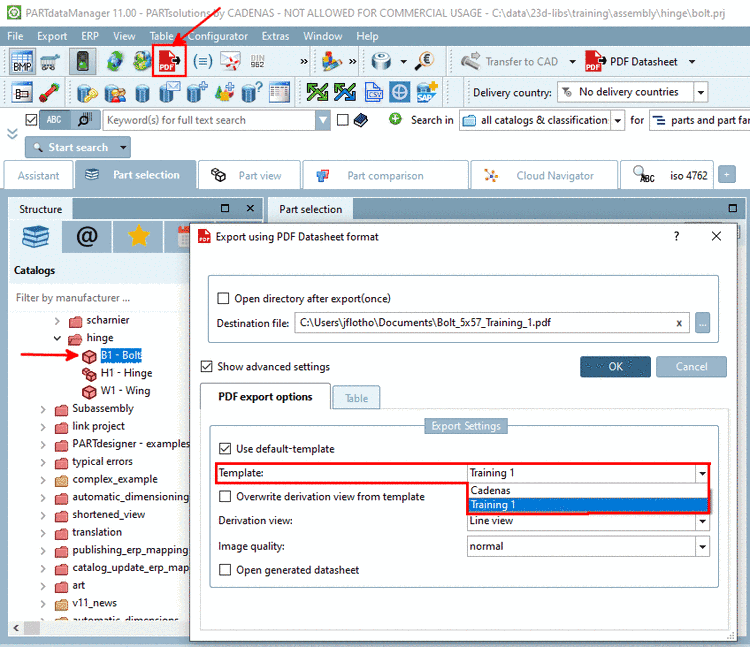
In the directory tree, select the Test project (here in the example "B1 - Bolt").
In PARTdataManager, call the dialog box Export using PDF Datasheet format via icon PDF Datasheet
.-
In the list field at Template select the created template.
-
-> The desired template is not displayed yet, because it is only assigned to the Test project.
-
-
In order to make the template available for the whole catalog, proceed as follows:
-
In the PARTtemplateDesigner, in the settings dialog for Template, click on the button .
-
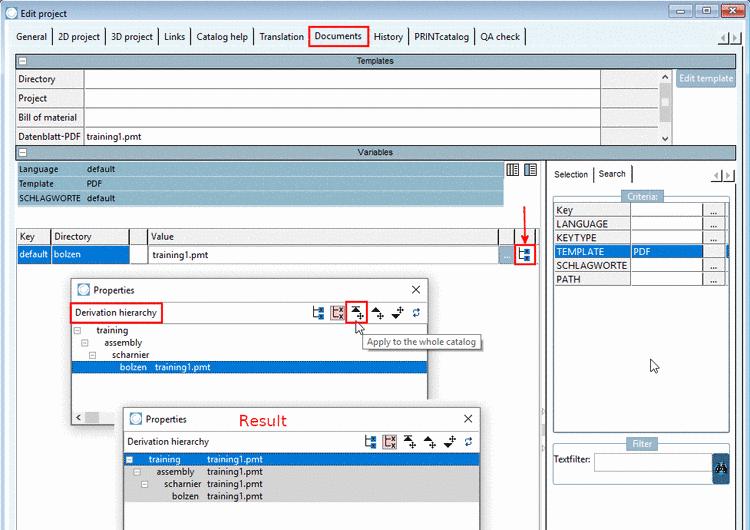
In PARTproject, select the tabbed page Documents.
-
At the end of the line, click on the symbol for derivation hierarchy
 .
. Select the test project "bolt" and via Apply to the whole catalog pass on the template from there to the catalog root element.
-
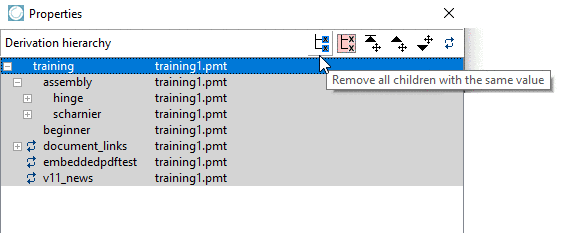
Select the catalog root element, again open the derivation hierarchy
and then click on Remove all children with the same value. This ensures that all children will use the
catalog root element's value and do not have own values.-> Now the catalog root element is pink and all children are gray, meaning the template is available for all children's projects and is used by them.
Details on this can be found under Dialogbereich "Ableitungshierarchie".
Test in PARTdataManager, whether the template is available for all projects now.
-

![[Tip]](/community/externals/manuals/%24%7Bb2b:MANUALPATH/images/tip.png)


[110] The file
<name>.ptdef can contain
two sections:
At catalogs, which are using a datasheet for the first time, the second declaration can be omitted.
The second declaration can optionally be used for catalogs, which are using both a datasheet according to the old standard and one to the new standard.
[111] Exactly that name, which you used in the template settings under "Name".
