Manual
Login
Our 3D CAD supplier models have been moved to 3Dfindit.com, the new visual search engine for 3D CAD, CAE & BIM models.
You can log in there with your existing account of this site.
The content remains free of charge.

Top Links
Manual
 |
With the help of the following example you can comprehend the use of a cylindrical thread.[99]
Here, a simple pin is used as an example:
-
Apply the following variables:
-
Pull a rectangle onto the variables D and L.
-
-
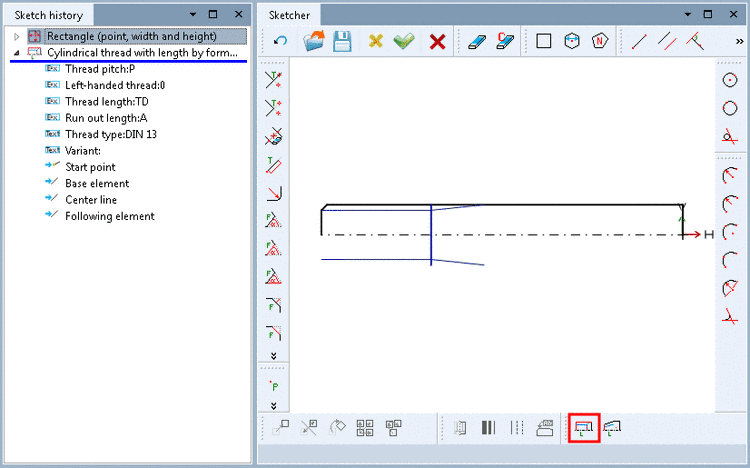
Follow the information in the footnote:
Click on the following sketch elements and areas.
-
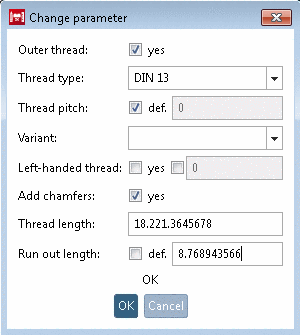
The Change parameter window opens.
-
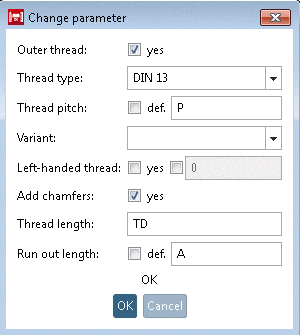
Adjust your entries in the Change parameter window. Set the applied variables.
-
Per default, the checkbox "def." is set. A pitch thread according to the set standards is created.
If you want to create a fine thread with defined thread pitches, deactivate the checkbox and enter the variable name for the thread pitch ('P').
![[Note]](/community/externals/manuals/%24%7Bb2b:MANUALPATH/images/note.png)
Note For a fine thread the variable 'P' must be applied for the thread pitch in the table!
On this also see Section 7.9.3.11.1.1.2, “Different pitches and derived automatic calculations for e.g. Row Label and Core diameter ”.
-
Used for certain threads, enables further specification.
Note If the option exists in the thread table, the value has to be set.[a]
[a] If the option exists, the values should be offered in the list field. However, you can manually take the desired value from the thread table under
$CADENAS_DATA\datasetup\threadsand enter it manually. -
If you activate the second checkbox, you can carry out the query of whether left or right thread via the table as well. In this case, enter the respective variable name into the input field.
-
-
-
-
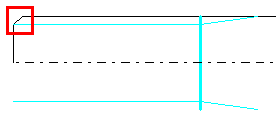
-> The thread is automatically marked as cosmetic element (blue lines).
-
Close the sketch by clicking
 .
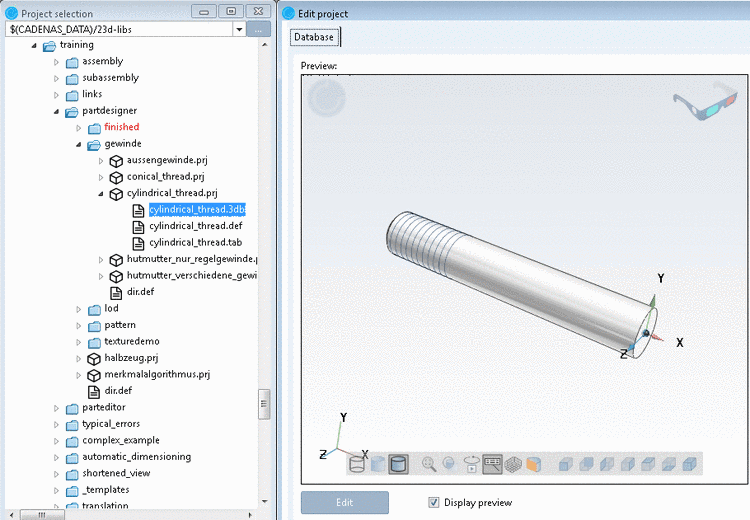
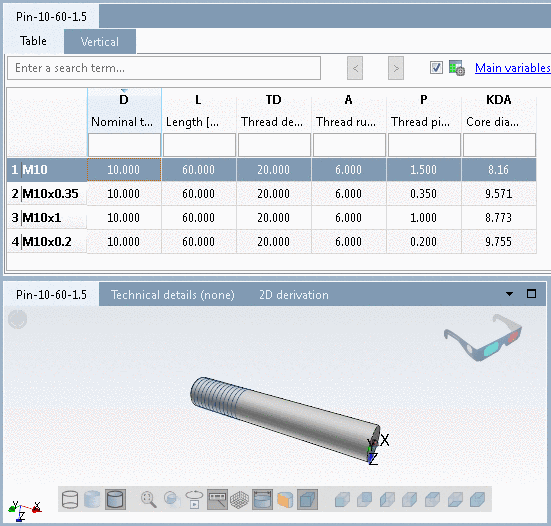
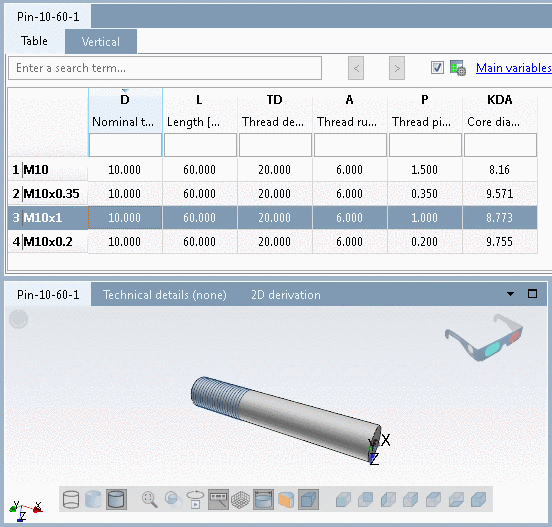
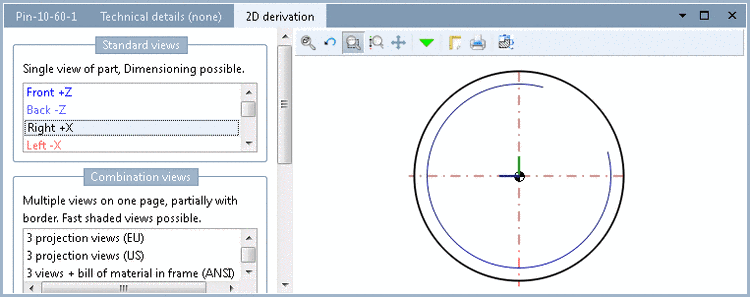
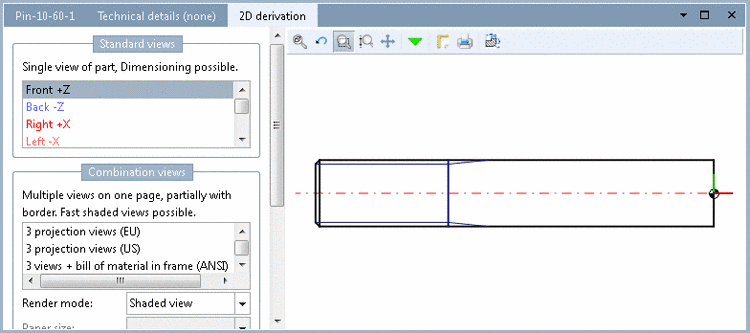
.-> In PARTproject, after selecting the 3db file you can see the part in the preview.
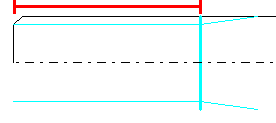
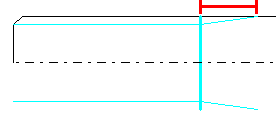
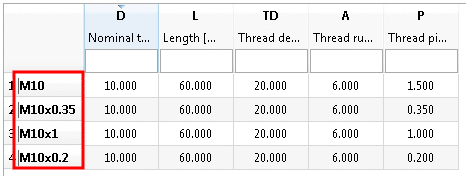
The following figures show the pin with different thread pitches and the 2D derivation in PARTdataManager.

![[Important]](/community/externals/manuals/%24%7Bb2b:MANUALPATH/images/important.png)

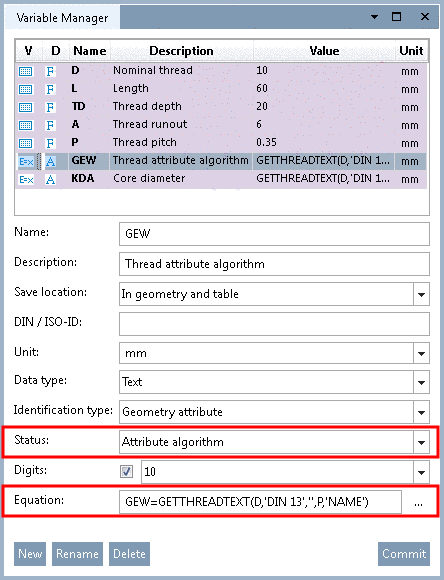
With the help of the expressions GETTHREADTEXT or GETTHREADVALUE different output can be created by little adjustments. GETTHREADTEXT returns text, GETTHREADVALUE a number (double). The functionality is equivalent.
With the help of the first four parameters a row is specified, the fifth parameter specifies the variable whose value shall be returned.
VARIABLE = GETTHREADTEXT(D,'DIN 13','',P,'NAME')
|
Note |
|---|---|
|
In the case of GETTHREADTEXT the data type of VARIABLE has to be text. In the case of GETTHREADVALUE the data type of VARIABLE has to be a number. | |
Return value

NAME  =  GETTHREADTEXT(D,'DIN 13','',P,'NAME') // e.g. results in M10x1
TYPE  =  GETTHREADTEXT(D,'DIN 13','',P,'TYPE') // e.g. results in M
KDI   =  GETTHREADTEXT(D,'DIN 13','',P,'KDI')  // Core diameter inner thread
KDA   =  GETTHREADTEXT(D,'DIN 13','',P,'KDA')  // Core diameter outer thread
SIZE  =  GETTHREADTEXT(D,'DIN 13','',P,'SIZE') // e.g. results in 10x1
|
Note |
|---|---|
|
Any table variable can be used for the last parameter. The above mentioned (NAME, TYPE, KDI, KDA, SIZE) are always available normally.
| |
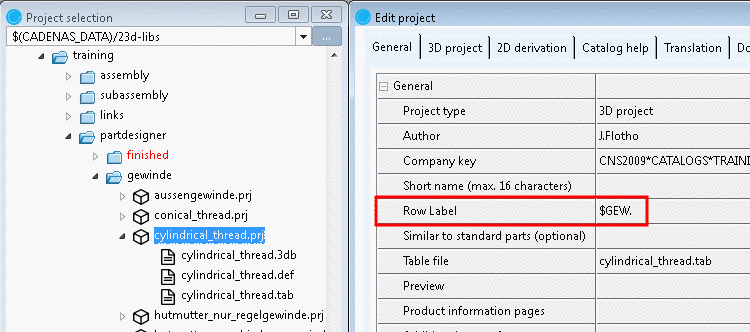
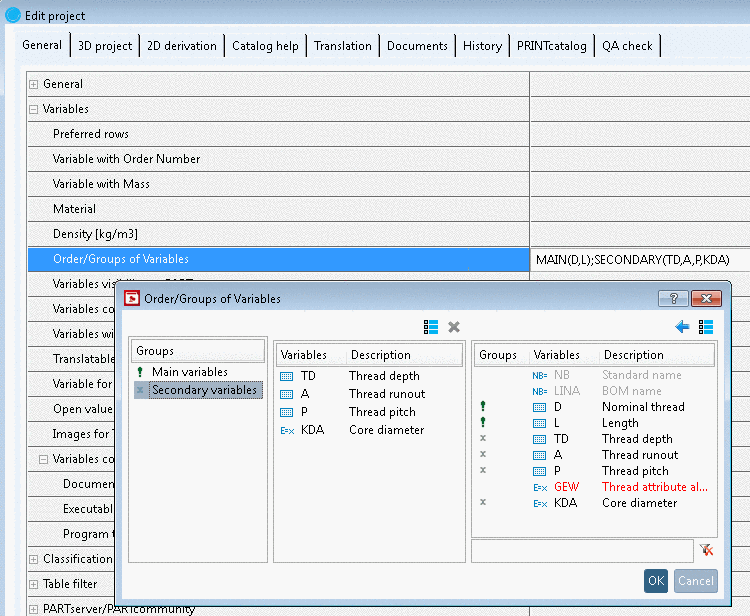
-> The content of the field "NAME" of table "DIN 13" is returned to variable GEW as text.
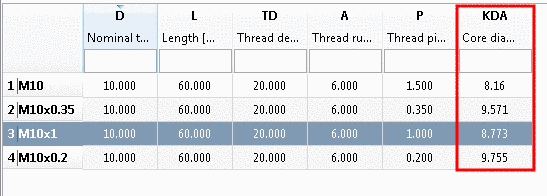
Core diameter Outer thread: Automatic calculation and display in PARTdataManager
KDA = GETTHREADTEXT(D,'DIN 13','',P,'KDA')
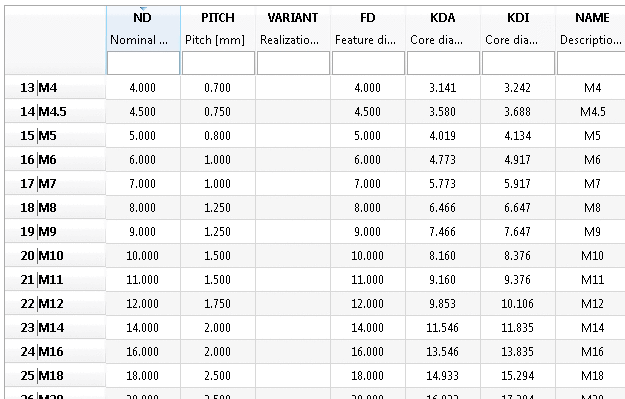
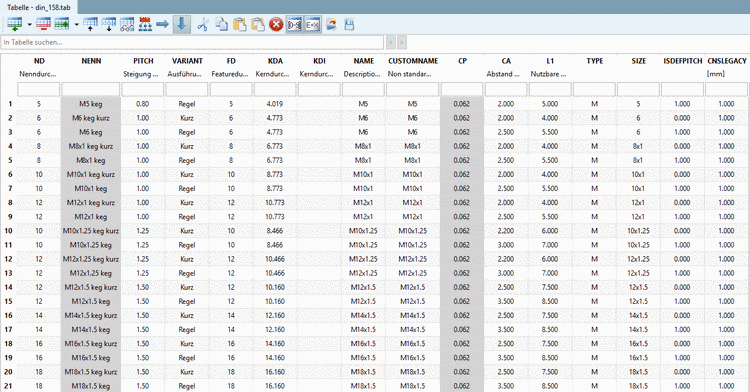
GET=GETTHREADTEXT(ND,'DIN 158',VARIANT,PITCH,'NENN')
Compare Fig. „Example: Thread table of DIN 158“.
X=GETTHREADVALUE(ND,'DIN 158','Kurz',PITCH,'L1')
-> The value for ND is taken and set as filter for the nominal diameter in table "DIN 158".
-> The value of PITCH is taken and set as filter for the pitch in table "DIN 158".
-> The filter "variant = 'Kurz' is set in table "DIN 158".
-> The content of field 'L1', of table "DIN 158" is returned as number.
[99] With
installed training catalog, an example can be found under $CADENAS/Training/PARTdesigner/Threads/cylindrical_thread.prj.
