Manual
Login
Our 3D CAD supplier models have been moved to 3Dfindit.com, the new visual search engine for 3D CAD, CAE & BIM models.
You can log in there with your existing account of this site.
The content remains free of charge.

Top Links
Manual
 |
Edit: ...opens the Create tables window. There you can influence and define the basic structure of the current table.
![[Important]](/community/externals/manuals/%24%7Bb2b:MANUALPATH/images/important.png)
In the dialog box there are three tabbed pages, which are described in the following.
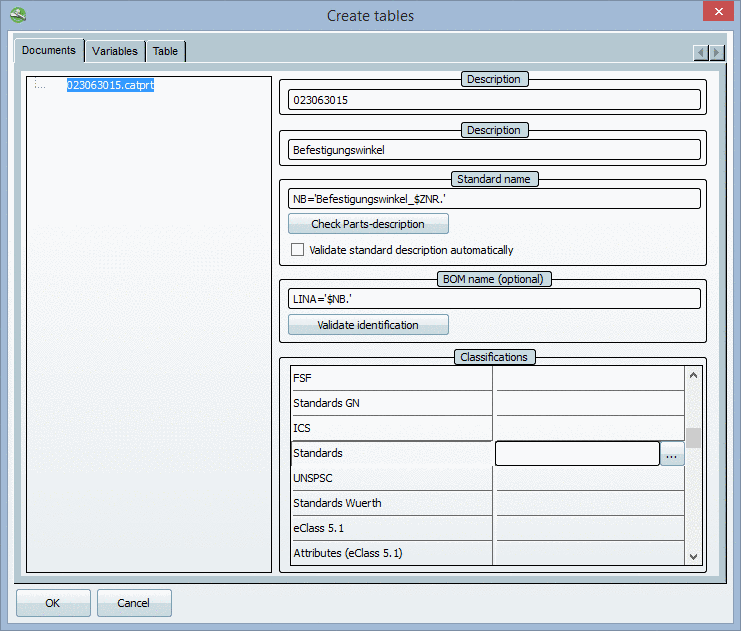
Dialog box Create tables - tabbed page Documents
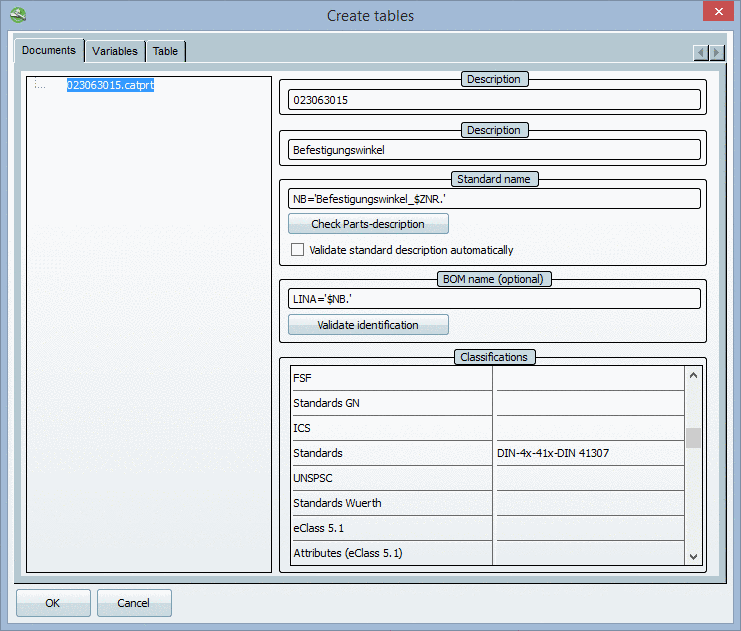
The identification text is the first half of the project name in the directory tree.
The identification text shows up under Symbols, for long texts sometimes only with mouseover.
The description text is the second half of the project name in the directory tree. It can be individually set.
Change Description and Description in the Create tables window (normally only with native parts) (see above).
|
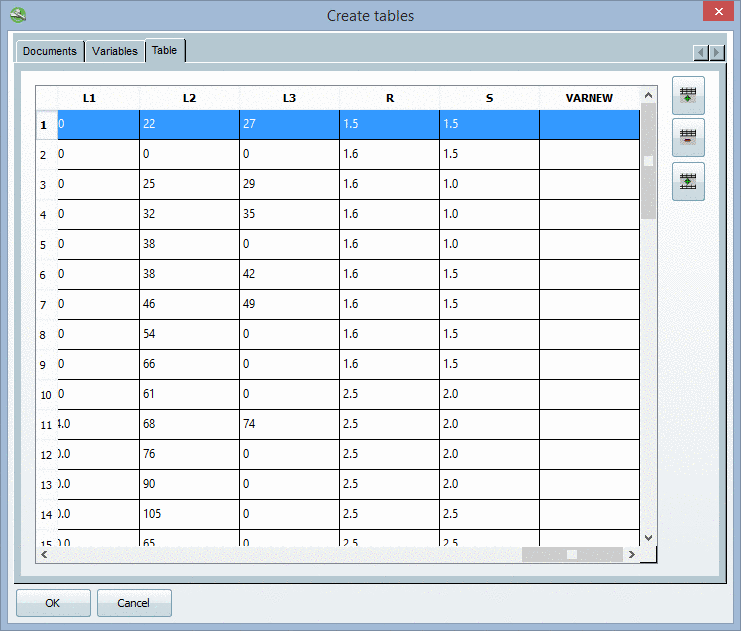
Standard name: ...is displayed in the table headline and consists of the Standard Name and the relevant variant: e.g. 'Angle DIN 41307 - 2 L 5'. |

...checks your entries for syntax errors and completeness. In case errors are present, you will be notified with an according message.
Validate standard description automatically: Erroneous entries are automatically corrected by the program.
![[Note]](/community/externals/manuals/%24%7Bb2b:MANUALPATH/images/note.png) |
Note |
|---|---|
Individual display preferences are not taken into consideration by the automatic correction function. Only mandatory data is inserted. | |
BOM name (optional): Alternative to the Standard Name. Is also transferred to the CAD system during export and shows up there in the Bill of Material list. .
...checks your entries for syntax errors and completeness. In case errors are present, you will be notified with an according message.
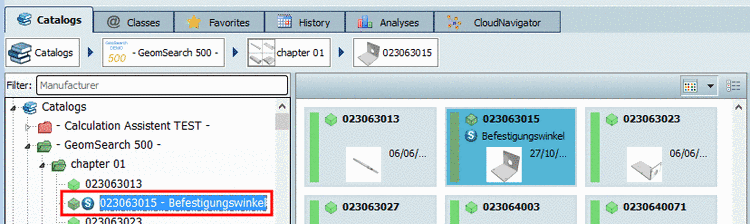
Classifications : To assign the current project to a classification ...
-
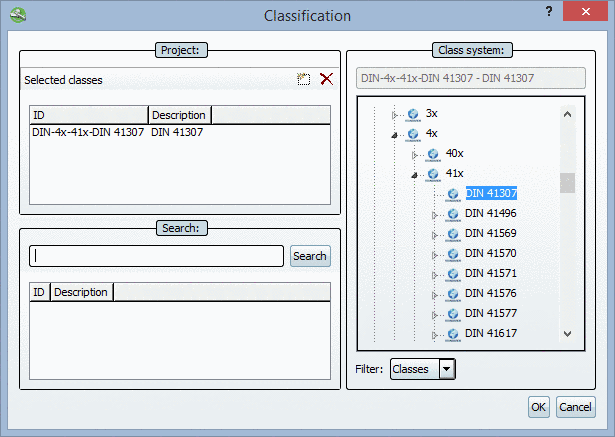
Under Classifications, in the desired classification, click on the search button .
-
Under Class system open the tree and double-click on the class, where you want the project to be added.
-> The class is inserted on the left side under Selected classes.
-
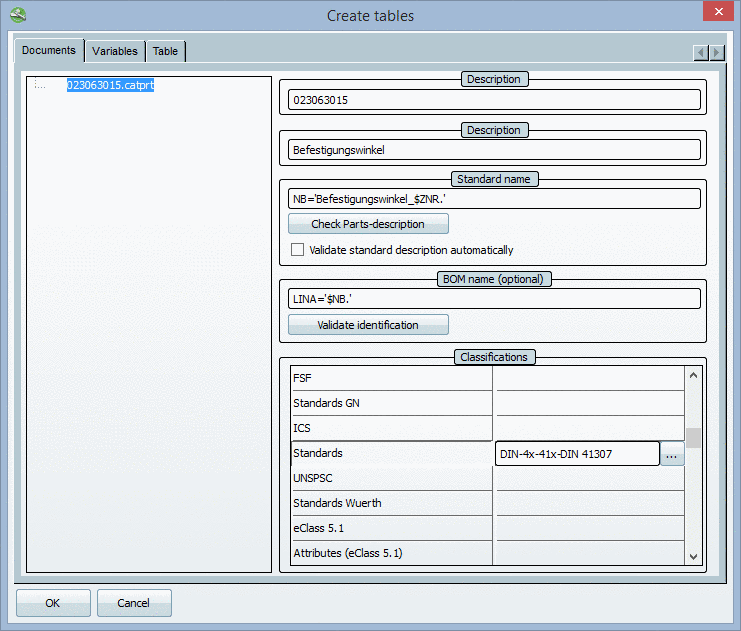
-> The class is inserted in the Classifications area in the desired class line.
-
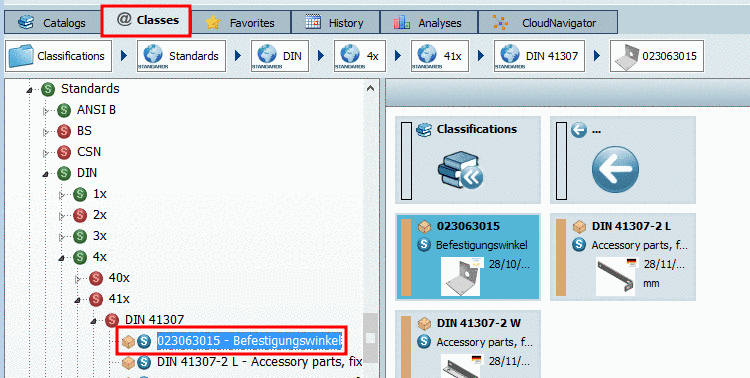
-> Now the part is available in the Project selection on the tabbed page Classes in the chosen class.
Dialog box Create tables - tabbed page Variables
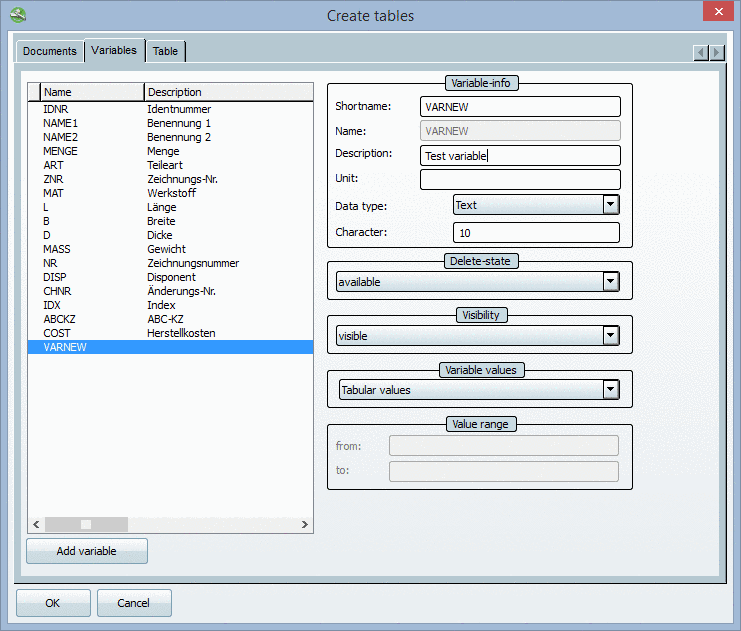
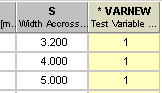
Shortname and Description: This value defines the text of the relevant column header.
Unit: ...appears in brackets after the description in the column header (optional).
Data type: You may choose from Textand Number. With the Text option selected, you can define the number of characters and thus the column width in the Symbol field. With the Number option, you can define in this field how many decimal digits are shown.
|
Note |
|---|---|
The Delete-state is considered when exporting to CAD. With the combination of Delete-state and Visibility the visibility in the PARTdataManager and the export to CAD can be adjusted separately. | |
|
Note |
|---|---|
The Visibility is considered when exporting to the CAD. With the combination Delete-state and Visibility the visibility in the PARTdataManager and the export to CAD can be adjusted separately. | |