Manual
Login
Our 3D CAD supplier models have been moved to 3Dfindit.com, the new visual search engine for 3D CAD, CAE & BIM models.
You can log in there with your existing account of this site.
The content remains free of charge.

Top Links
Manual
 |
The following describes how to transfer a part (or assembly) created with CoCreate Modeling to PARTsolutions into the My parts library.
Optionally you can transfer the part with an explicitly created coordinate system and later export it with this orientation from PARTsolutions.
-
Now you have two possibilities:
-
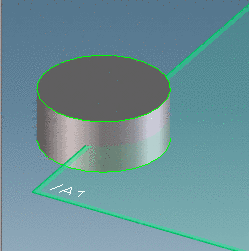
Select the part / assembly under Part/Assembly (Teil/Baugruppe) and directly confirm via
 .
.The coordinate system of the part is centered in the middle of its bounding box.
The part is displayed in the 3D preview in PARTdataManager, saved and later exported exactly according to this orientation.
-
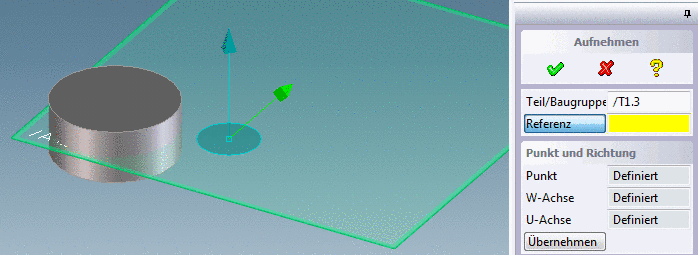
Optionally you have the possibility to explicitly define an own coordinate system.
Click on the button (Reference).
-> The dialog "Aufnehmen" (Insert) is enhanced.
Click into the drawing and determine Point, W axis and U axis in order to define an own coordinate system.
The part is displayed in the 3D preview in PARTdataManager, saved and later exported exactly according to this orientation.
-
-
The view returns to PARTdataManager and the window Select folder opens.
-
--> The part is transferred and is now stored in the My Parts library. The coordinate system is also saved, so that the part can be inserted anytime later again correctly.
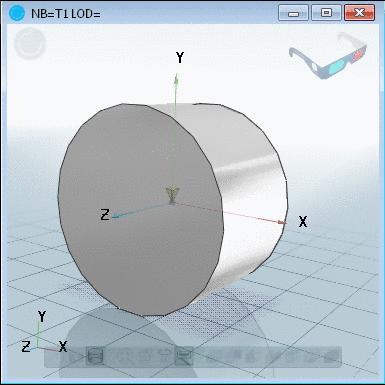
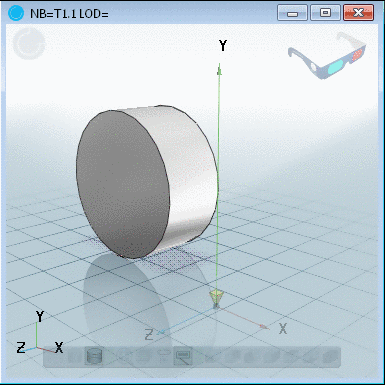
In the 3D preview you can recognize the difference: With and without explicitly applied coordinate system.


Insert assemblies into My Parts library
The procedure with Assemblies is the same.
Export own parts from PARTdataManager
Export of your "own" parts from PARTsolutions: When exporting own parts from PARTdataManager -> My parts library, proceed the same way as with standard and purchased parts. (See Section 2.6.2, “ Insert 3D from the Standard and supplier parts library ”)
The later reinserted part from My parts has the original orientation.