Manual
Login
Our 3D CAD supplier models have been moved to 3Dfindit.com, the new visual search engine for 3D CAD, CAE & BIM models.
You can log in there with your existing account of this site.
The content remains free of charge.

Top Links
Manual
 |
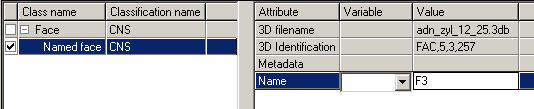
The creation of a published element on a face will be exemplified below.
|
In PARTproject, mark the 3db file in the Project selection. --> To the right the 3D preview opens. |
|


Continue with further elements.
![[Important]](/community/externals/manuals/%24%7Bb2b:MANUALPATH/images/important.png) |
Important |
|---|---|
|
If a face is published, there is a chance that it may no longer be able to be displayed at a lower Level of Detail. In order to avoid this, the LODs must be defined manually and not automatically. For more information, see: Section 7.5.1.2.10.1.3, “ Special adjustments”. | |
