Manual
Login
Our 3D CAD supplier models have been moved to 3Dfindit.com, the new visual search engine for 3D CAD, CAE & BIM models.
You can log in there with your existing account of this site.
The content remains free of charge.

Top Links
Manual
 |
Up to now a customer administrator had to perform a mapping for LinkDB datasets at each catalog update, if projects or variables had been changed, which led to lots of effort on the customer side and less upgrades to latest catalogs.[30]
In order to relieve the customer side, as of V10, mapping information is integrated directly into the catalog. That means these tasks are now done by the modeller of the catalog before it is published.
![[Note]](/community/externals/manuals/%24%7Bb2b:MANUALPATH/images/note.png) |
Note |
|---|---|
|
For each new catalog release ERP mappings have to be created by the modeling in PARTproject. Publishing without these mapping information is not possible. | |
At the first catalog update with V10 the updates still have to be manually performed (with the Update Manager), but from then on this will only be necessary in exceptional cases where an automatic assignment is not possible.
At catalog xy the latest status is from 01/01/2015 and still without mappings. A customer with V10 has exactly this catalog status.
Now a new version is released on 06/01/2015. In this, the modeling has already added the mapping information, namely at the last released status from 01/01/2015.
When the customer installs the latest status now, these mappings are automatically processed.
However, if the customer has an installed status from 10/01/2014 then therefor no mappings exist and if he installs the status from 06/01/2015 then he has to do the mapping himself (for this last time). However, parts which have not been changed between 10/01/2014 and 01/01/2015 can automatically be mapped.
Add ERP-Mapping... and Edit ERP-Mapping...
-
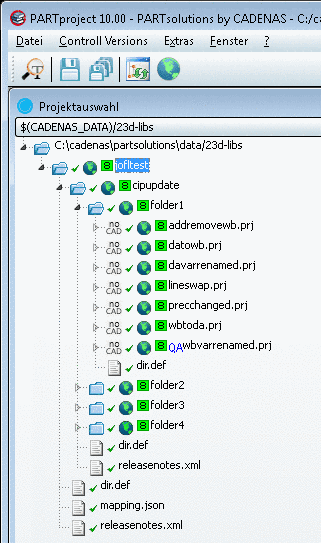
Initial situation: Finished SVN status (ready for publishing, everything checked in) or a CIP file based on this status
-
On the catalog root directory, call up the context menu in PARTproject. Under Publication, click on the command Add ERP-Mapping....
-
Either select the option Search for a published catalog version or the option Load CIP file.
Optionally you can select the option Use order numbers to create mappings in addition. Advantage: With an unique ID the mapping should be created completely automatically.
-> The mapping is created and displayed as log.
-
In PARTproject, on the catalog root directory, call up the context menu. Under Publication, click on the command Edit ERP-Mapping....
-> If several mappings had been created the dialog box Select source version opens. Here, select which mapping you want to edit.


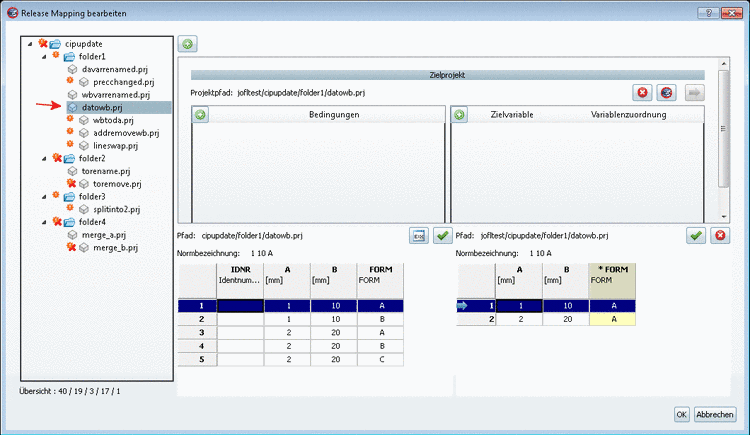
UI of the dialog box Edit release mapping
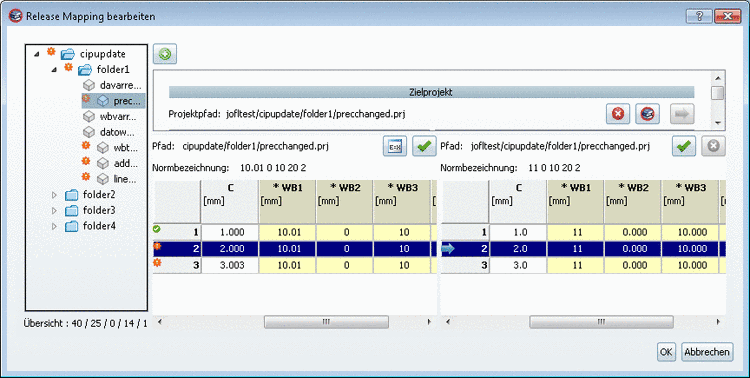
The UI is subdivided in index tree on the left side and table with functions on the right side.
In the index tree you can see at a glance which projects have automatically been mapped (these do not show icons) and which projects have to be edited manually.


|
This assignment has been confirmed by the modeler |

|
This line is expired. This was confirmed by the editor |
When moving the mouse over the icons tooltips are displayed.


|
On this see ???. |

|
Generate algorithm matching the selected line and copy it to clipboard |

|
|

|
|

|
Open project: When clicking on the icon the respective project is selected in PARTproject. |

|
|
For complex mappings such as resolving value range variables (yellow fields) into fixed variables you can use algorithms based on Fortran code. On this see splitinto2.prj.

|
Note | ||||||||||||||||||
|---|---|---|---|---|---|---|---|---|---|---|---|---|---|---|---|---|---|---|---|
|
The examples
can be found in the SVN, in the catalog " Locally
install
| |||||||||||||||||||
Examples with manual assignment

-
Here, the precision of numerical values (decimal places) has been changed.
-
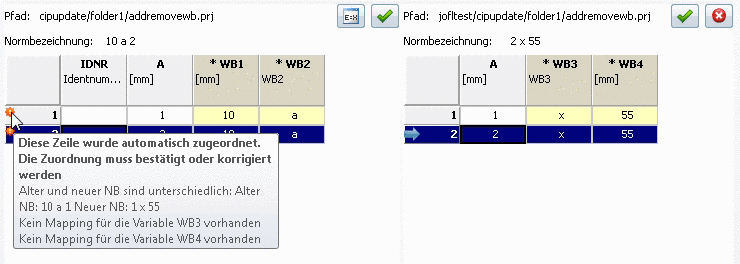
Here, the variables WB1 and WB2 have been removed and the variables WB3 and WB4 have been added. Confirm the assignments by clicking on the green checkmark (either single or all at once).
-
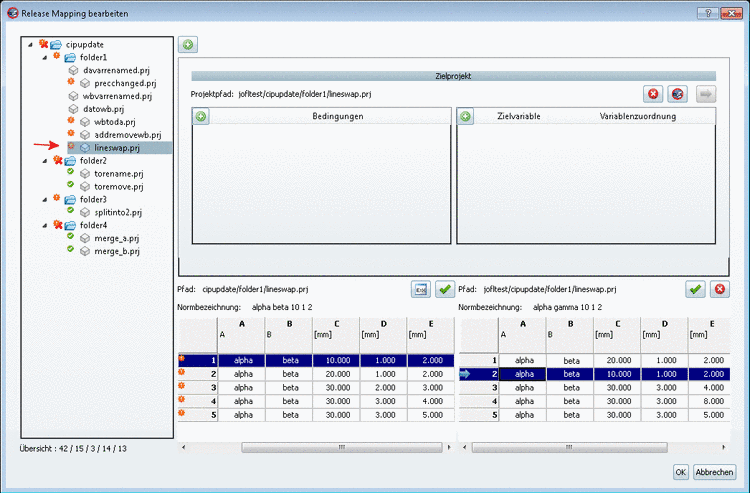
Here, the lines 1 and 2 have been changed. Confirm the assignment by clicking on the green checkmark (either single or all at once).
-
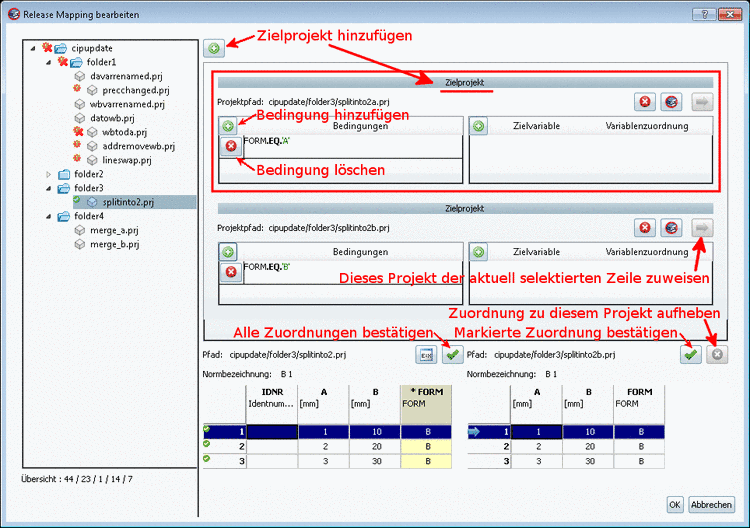
The old project
splitinto2.prjwith the value range variable FORM shall be splitted into 2 target projectssplitinto2a.prjandsplitinto2b.prjwith a fixed variable FORM.-
On this select the respective two target projects via Add target project
.-> The dialog box Search or select project opens.[31]
-
Via Add condition
, for the one project add the condition
FORM.EQ.'A' and
for the other project add the condition FORM.EQ.'B'. See Fig. „splitinto2.prj“.When now changing the value of the value range variable FORM in the left table (old version) then in the right table (new version) the respective project with the adequate fixed variable FORM is selected.
-

![[Tip]](/community/externals/manuals/%24%7Bb2b:MANUALPATH/images/tip.png)
Examples with automatic assignment
|
Note |
|---|---|
|
At projects which do not show any icons in the index tree assignments have been automatically performed.
| |

-
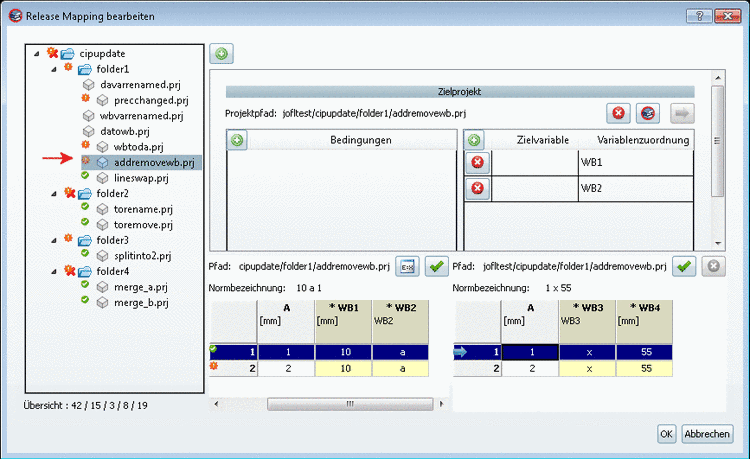
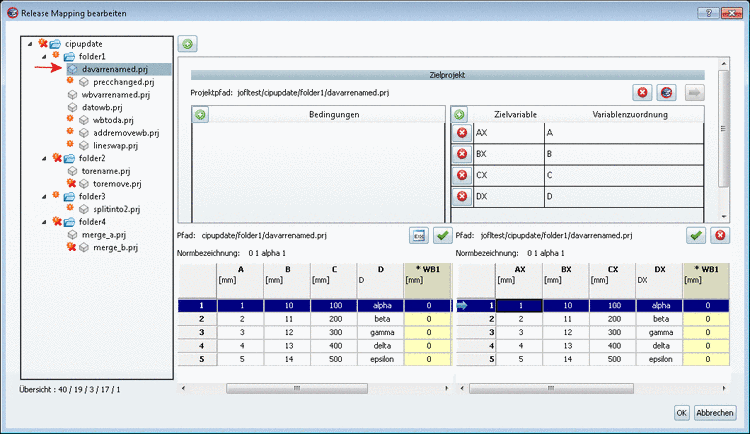
Here, fixed variables have been renamed. Top right you can see the variable assignment of old and new version as a check.
-
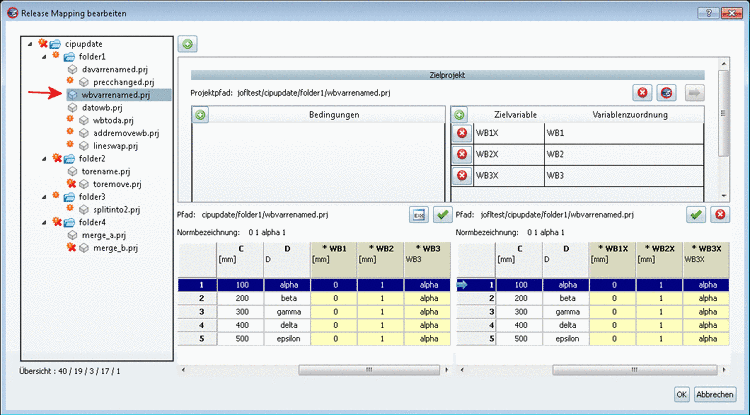
Here, value range variables have been renamed. Top right you can see the variable assignment of old and new version as a check.
-
Here, the values of the fixed variable FORM have been combined in a value range variable FORM.
-
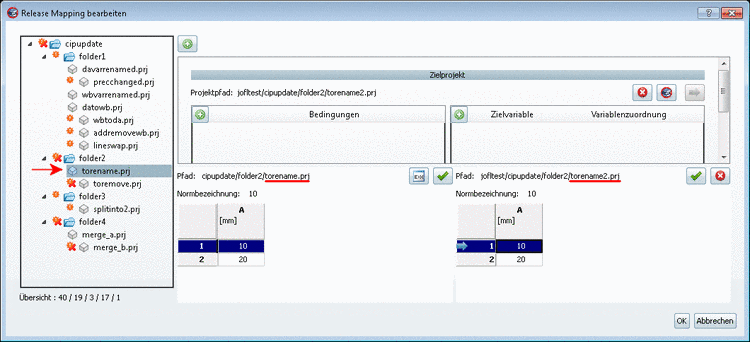
Here the project
torename.prjhas been renamed totorename2.prj. -
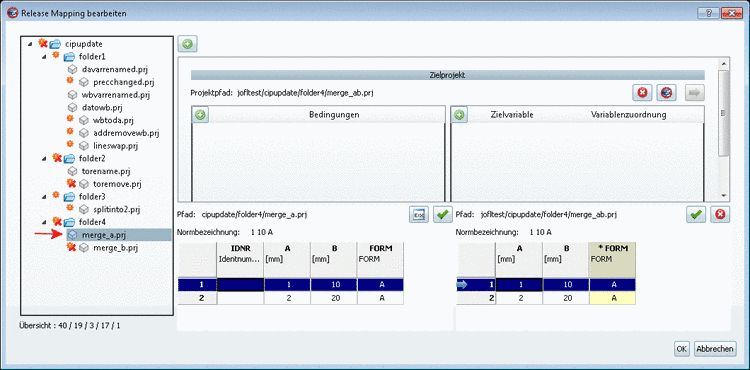
Here, the project
merge_b.prjhas been resolved. At the fixed variable FORM it contained other values thanmerge_a.prj. In the new version the new the new projectmerge_ab.prjcontains a value range variable FORM, which incorporates the values of the removed project.
[30] Hereto the Update manager is used. Call up via PARTlinkManager -> Extras menu -> Update manager. Details on this can be found under Section 5.15.2, “ Catalog update with ERP integration - Update manager ” in PARTsolutions / PARTcommunity4Enterprise - Administration Manual.
[31] For searching the full-text index has to be created.
