Manual
Login
Our 3D CAD supplier models have been moved to 3Dfindit.com, the new visual search engine for 3D CAD, CAE & BIM models.
You can log in there with your existing account of this site.
The content remains free of charge.

Top Links
Manual
 |
If we are talking about the first object concerning the export part, which is exported in the frame of an assembly, or you are working in Solid Edge part or draft mode, placement occurs automatically.
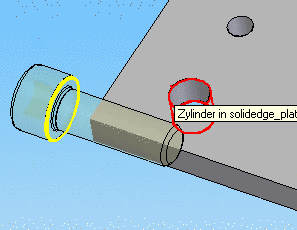
If the part was exported in order to insert it into an assembly, further steps for integration are necessary.
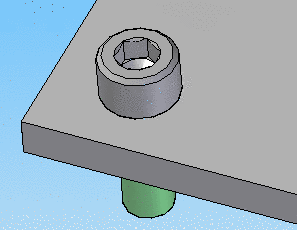
Here in this example, a screw was exported in order to be inserted into the boring of a disc.
![[Note]](/community/externals/manuals/%24%7Bb2b:MANUALPATH/images/note.png)

|
The final adjustment is to be carried out with the usual Solid Edge functions (for example, moving, rotating, etc.). |
|