Manual
Login
Our 3D CAD supplier models have been moved to 3Dfindit.com, the new visual search engine for 3D CAD, CAE & BIM models.
You can log in there with your existing account of this site.
The content remains free of charge.

Top Links
Manual
 |
-
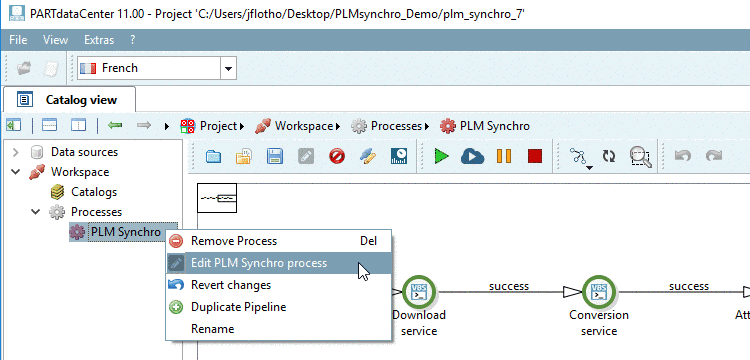
Start PARTdataCenter and click on PLM Synchro.
-> The PLM Synchro Wizard is opened.
This wizard guides you through the PLM Synchro setup process.
-
Choose the desired Project path via search button .
-
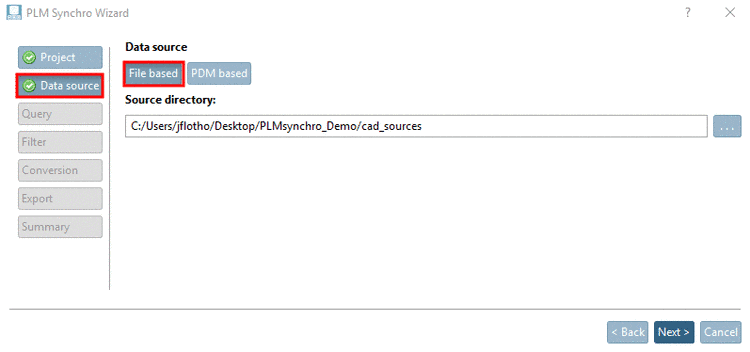
You can create the process File based or PDM based.
-
Choose the source path via search button .
(The interface PdmProxyFSOPdmIfaceC is automatically used.)
-
In the list field, select the desired interface and with the search button , choose the Download folder.
The PDM interface can be configured directly from the Wizard.
-> PARTadmin is opened and the respective block in the configuration file is already preselected.
-
-
Click on in order to create a query.
-
Simply example with only on single condition:
In order to import all source files, for example, choose the following setting:
"Document name like anything"
-
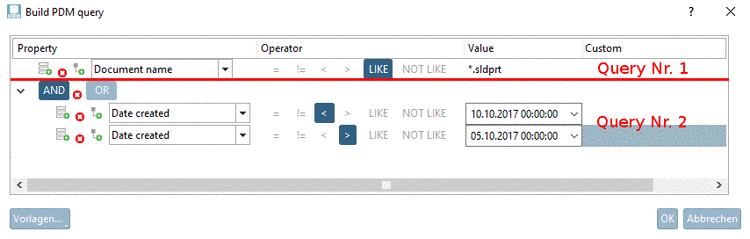
Complex example with a combination of queries
When clicking on the respective icon, you can create several queries:
The following example shows two queries:
Query No. 1: All parts with file extension *.sldprt are imported. Conditions of query 2 are not considered here.
Query No. 2: All parts created between 10/05/2017 and 10/10/2017, are imported. The condition of query 1 is not considered here. Query 2 also imports parts with file extension .sldasm in this example.
-
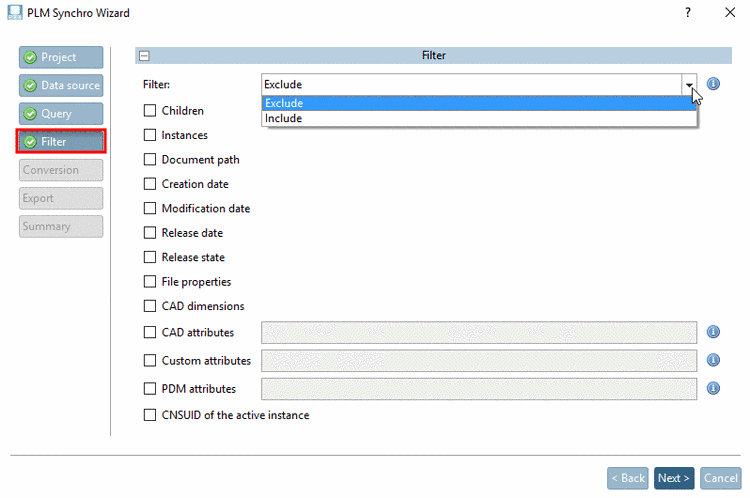
-
There are the two filter modes _EXCLUSIVE / _INCLUSIVE
The filter can be used both for filtering CAD models and for filtering meta data:
-
-
-
Output: In the list field, select the desired output format
-
PARTjava (with topology [CAPVIDIA]):
![[Note]](/community/externals/manuals/%24%7Bb2b:MANUALPATH/images/note.png)
Note This list item is only displayed if the respective CADENAS license is available.
Make sure that the respective CAPVIDIA license is also available and CAPVIDIA is completely set-up (see Section 1.2.4, “Running PLMsynchro with CAPVIDIA”).
-
-
-
-
Generate preview: If preview images shall be automatically created, activate the check box.
In the pipeline you can make specific adaptions. On this see Section 1.2.2.2, “Distributed services”.
-
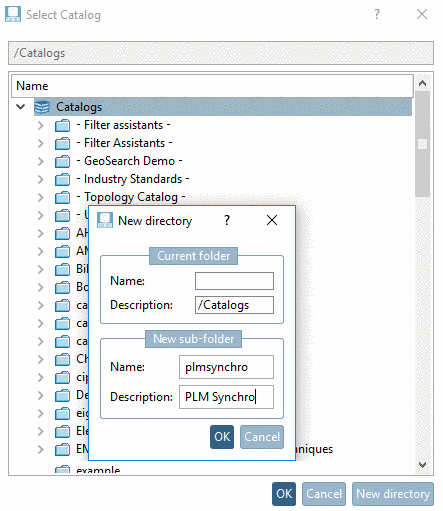
Catalog name: Determine catalog or directory as destination for imported parts.
-
-
-
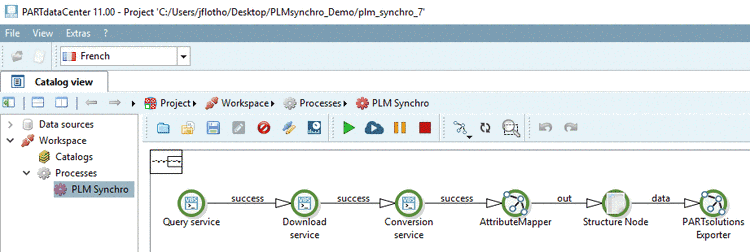
When clicking on , the wizard is finished and the process view with pipeline is displayed in PARTdataCenter.
-
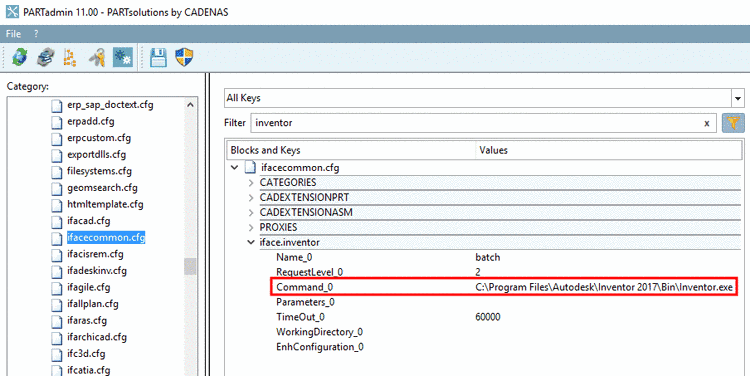
Before starting the PLM Synchro process, please make sure that the path of the exe file of the used CAD system is entered under configuration file
ifacecommon.cfg-> blockiface.<cadname>-> keyCommand_0. -
Now you can click on the start button
 in order to execute the PLM Synchro
process.
in order to execute the PLM Synchro
process.The process can be paused
 or stopped
  anytime.
Note In the Dashboard, you can see detailed information on all processes (finished, cancelled, running or failed). See Section 1.2.2.2.3, “Dashboard”.
-
Open PARTdataManager. In the Part view, under Structure -> Catalogs, now your catalog created by PLM Synchro is displayed.
Meta data have been transferred to the characteristic attribute table.
Under Topology information the respective information is displayed.


![[Tip]](/community/externals/manuals/%24%7Bb2b:MANUALPATH/images/tip.png)


If problems arise, you will be informed via docking window Messages.

In PARTdataCenter -> Catalog view, via context menu command under Workspace -> Processes -> Add PLM process, you can open the Wizard window anytime.
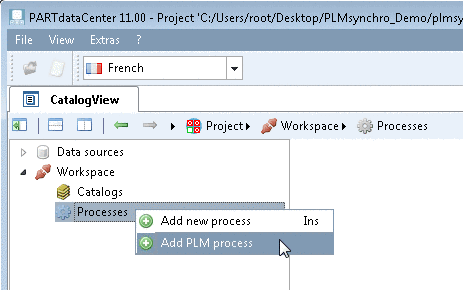
For an existing process you can call the Wizard with the Edit PLM Synchro process command.