Manual
Login
Our 3D CAD supplier models have been moved to 3Dfindit.com, the new visual search engine for 3D CAD, CAE & BIM models.
You can log in there with your existing account of this site.
The content remains free of charge.

Top Links
Manual
 |
In the following you can see how to create a sketch by importing a picture.
-
-> The same-named dialog box opens.
-
Click on the icon Import drawing
 and insert the desired image via Explorer.
(Possible image formats are image formats are jpg, gif and png.) Just as well
you can insert the image directly with Ctrl+V
and insert the desired image via Explorer.
(Possible image formats are image formats are jpg, gif and png.) Just as well
you can insert the image directly with Ctrl+V -
Mark the inner area with a first freehand line:
-
Mark the outer area with a second freehand line:
-> As soon as you release the mouse key the result is displayed.
-
If the result is satisfying click on , otherwise on .
-> The selection is overtaken into the sketcher.


If desired, you can modify the sketch now. Compare Section 3.1.6.4.5.5, “ Drawing Tools”.
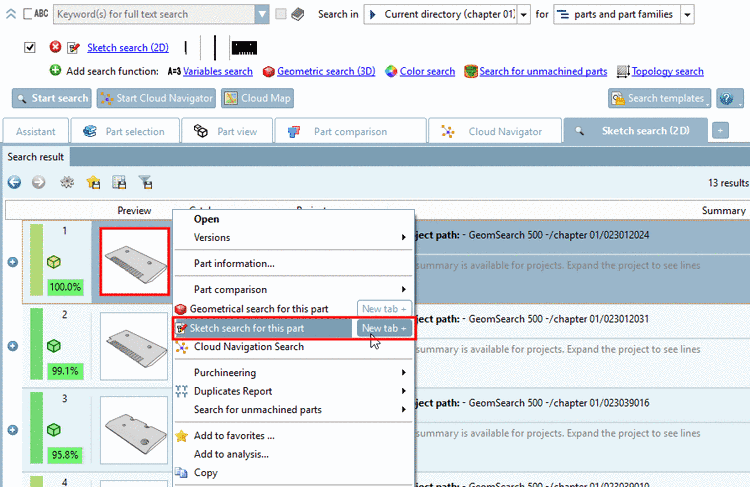
You can automatically create the sketch views from any part of the index tree or a result list, afterwards modify in the sketcher and then use for a sketch search.
-
Start: Click on the Sketch search for this part context menu command.
You can find the command in the context menu of projects (in the index tree or result lists).
-
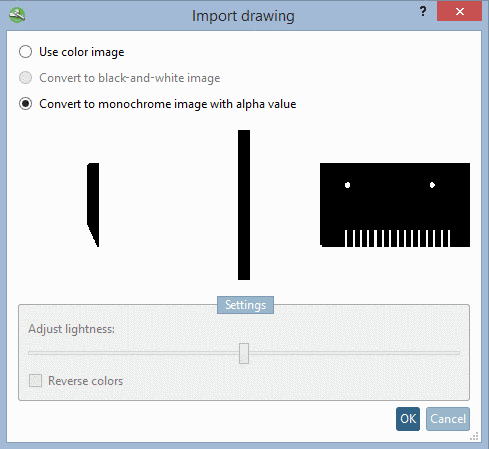
3 sketch views are automatically generated and displayed in the Import drawing dialog box.
If the Convert to black-and-white image option is activated, you can optionally use the Reverse colors and Adjust lightness function before the import.
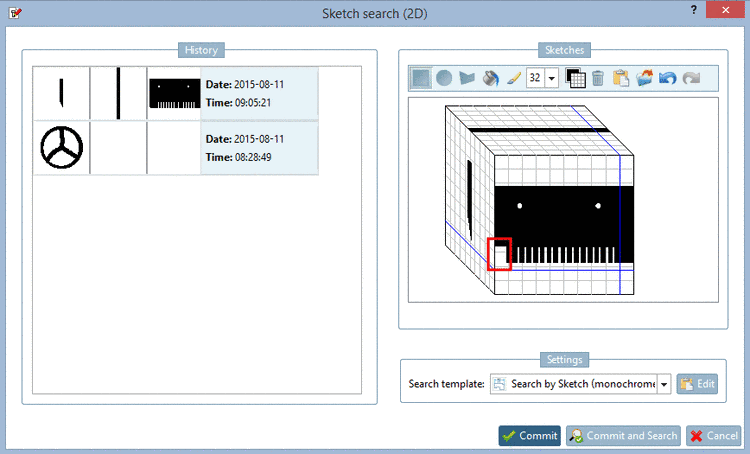
With the drawings are overtaken and displayed in the list of search methods.
-
When clicking on the link Sketch search (2D) the dialog box to edit the sketches opens. Now you can use the sketches in the current state or optionally modify them first and then use them for the "Sketch search (2D)".
You can find details on the sketcher under Section 3.1.6.4.5.5, “ Drawing Tools”.

Create sketches manually in the sketcher. See Section 3.1.6.4.5.5, “ Drawing Tools”.
