Manual
Login
Our 3D CAD supplier models have been moved to 3Dfindit.com, the new visual search engine for 3D CAD, CAE & BIM models.
You can log in there with your existing account of this site.
The content remains free of charge.

Top Links
Manual
 |
So that the mapping works, you must undertake more steps.
-
Define attributes for transfer to CAD/PDM (These are not the default attributes, but those defined explicitly in block "CadDocumentAttributes".)
Open the configuration file
$CADENAS_SETUP/ifproewildfire.cfg.-
In block [CadDocumentAttributes] enter the desired attributes, which you want to export via the CAD system to PDMLink.
[CadDocumentAttributes]
NB=NB
NB.custom=DESIGNATED
NT=NT
NT.custom=DESIGNATED
LINA=LINA
LINA.custom=DESIGNATED
NN=NN
NN.custom=DESIGNATED
ERP_PDM_NUMBER=ERP_PDM_NUMBER
ERP_PDM_NUMBER.custom=DESIGNATED
MAT_NAME=MAT_NAME
MAT_NAME.custom=DESIGNATED
-
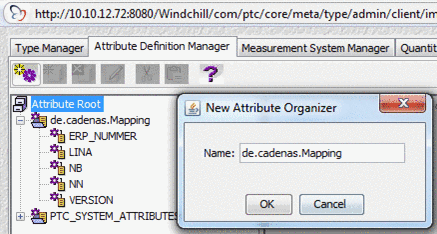
Apply attributes on Windchill server:
-
Apply new organizational point:
-
-
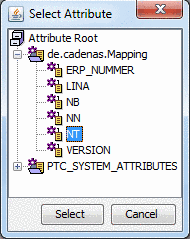
Switch into the Type Manager tab and click under EPM Document -> Workgroup Manager CAD Document onto the button for checking out
 .
.-> The Select attributedialog opens.
Once all desired attributes have been selected, this type must be checked in again.
-
-
Attribute in Windchill PDMLink
After export from the PARTdataManager,check whether the attributes were properly transferred to Windchill PDMLink:
![[Note]](/community/externals/manuals/%24%7Bb2b:MANUALPATH/images/note.png)