Manual
Login
Our 3D CAD supplier models have been moved to 3Dfindit.com, the new visual search engine for 3D CAD, CAE & BIM models.
You can log in there with your existing account of this site.
The content remains free of charge.

Top Links
Manual
 |
![[Hinweis]](/community/externals/manuals/%24%7Bb2b:MANUALPATH/images/note.png) |
Hinweis |
|---|---|
Zu verwendende Exporttabelle is role dependent, so has to be defined for each role separately. | |
Die Funktion erlaubt die Exportfreigabe für Verzeichnisse und Projekte unabhängig von anderweitigen Einschränkungen.
When using ERP integration only directories or projects containing an ERP_PDM_NUMBER are displayed in green. (A standard entry under PARTadmin -> Rolle category -> Allgemein tabbed page -> Exportbedingung is "ERP_PDM_NUMBER.NE.'' for example). This is the standard case.
Using Export tables you can set on "green" any further directories or projects, meaning they are exportable independently from any other restrictions. For example, this could be directories, which only contain PDFs and for reasons of information shall be marked or directories, which indeed do not contain parts with ERP_PDM_NUMBER, but anyhow shall be exportable.
In order to use Export tables do the following:
-
At first open
plinktemplates.cfgand specify the Admin user for the used database. (If the entry is missing the respective message will show up in PARTlinkManager when attempting to add an export table.)#Excerpt from configuration file
[Microsoft SQL Server]
USER=sa
-
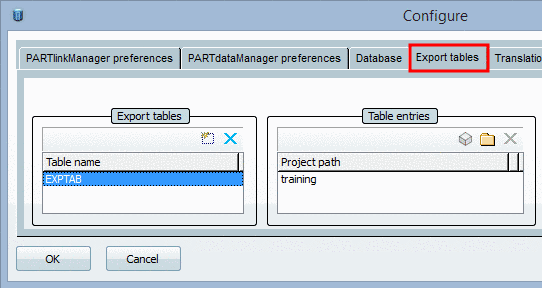
In PARTlinkManager under Extras menu -> ERP-Umgebung konfigurieren, select the Exporttabellen tabbed page.
In the Exporttabellen area, click on the Eintrag hinzufügen button and enter any desired table name (here EXPTAB for example.)
-
In the Tabelleneinträge area, click on the respective button and add projects or directories via Windows Explorer.
These are displayed under Projektpfad. Here exemplified "training".
-
Now switch to PARTadmin and insert the before applied table name in the Zu verwendende Exporttabelle field using the respective role in the category tree.

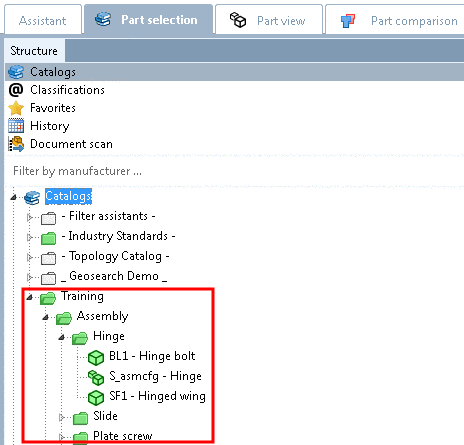
Now in PARTdataManager in the Teileauswahl the "Training" catalog with all sub-directories will display in green color, though it possibly doesn't contain any parts, which have an ERP_PDM_NUMBER.