-
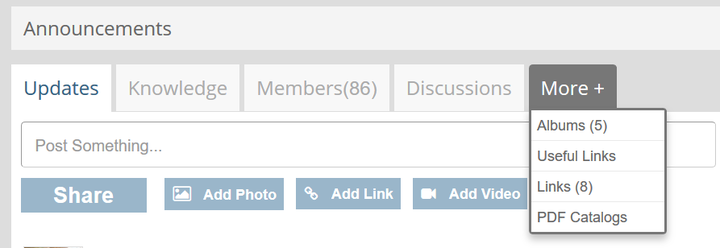
1. Go to the specific group and click on More+ and then on Albums.
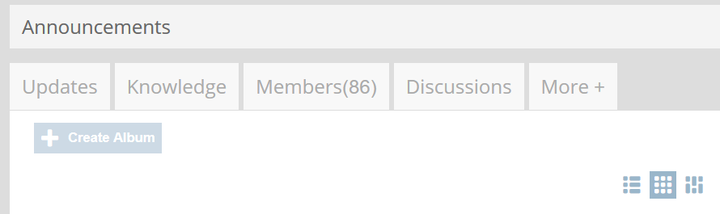
2. Click on Create Album.
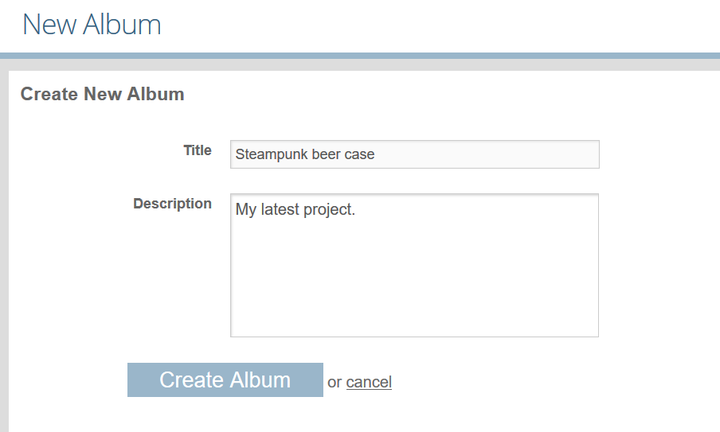
3. Write the title and add a short description (you can add your YouTube, Facebook, Twitter or any other link).
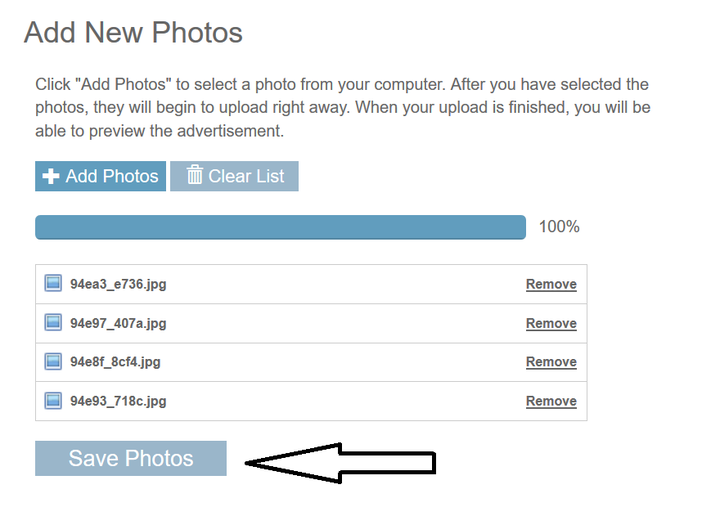
4. Add desired photos.
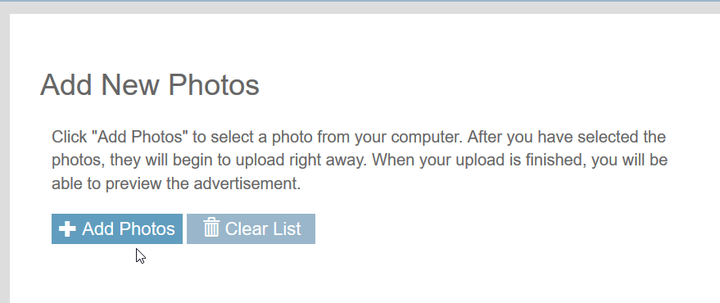
5. When all photos are uploaded, simply save photos. You photo album should be published now.
 0 comments, 0 likes, 4,655 views100% users marked this FAQ as helpful.
 -
This WebGL app simulates how any origami crease pattern will fold. It may look a little different from what you typically think of as "origami" - rather than folding paper in a set of sequential steps, this simulation attempts to fold every crease simultaneously. It does this by iteratively solving for small displacements in the geometry of an initially flat sheet due to forces exerted by creases. It calculates the geometry of folded or partially folded origami using a dynamic, GPU-accelerated solver; the solver extends work from the papers Origami Folding: A Structural Engineering Approach and Freeform Variations of Origami. It also supports an immersive, interactive VR mode using WebVR. More information about the solver and the app is being compiled into a paper and will be posted here soon.
Live demo here, code on Github.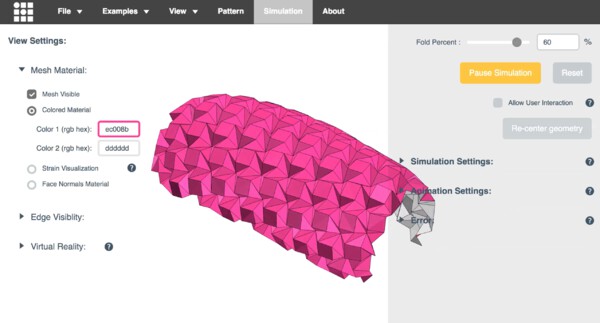 GIF
GIFThe Origami Simulator lets you simulate how any crease pattern will fold in 3D. Try it here.
 GIF
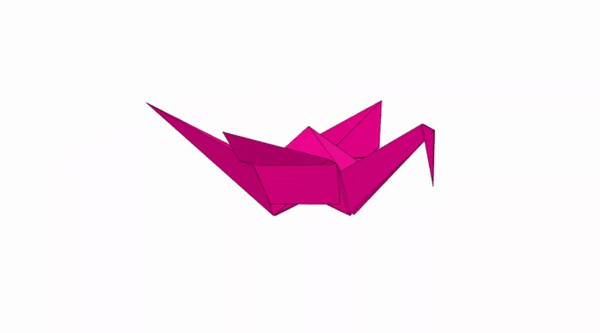
GIFFolding a traditional crane in one step in the Origami Simulator.
Crease patterns are uploaded into the app in SVG or FOLD formats. SVG crease patterns use color and opacity to set the direction and final fold angle of each crease. These patterns are triangulated and modeled as pin-jointed truss networks with additional angular constraints in the solver. At each step of the simulation, the displacements of nodes in the origami are calculated and used to update the visualization.
 GIF
GIFThis crease pattern was generated by Maze Folder, an app by Erik Demaine, Martin Demaine, and Jason Ku that creates crease patterns for any raised maze on a square grid. Based on the paper Folding Any Orthogonal Maze by the same authors.
This app uses a compliant dynamic simulation method to solve for the geometry of an origami pattern at a given fold angle. The simulation sets up several types of constraints: distance constraints prevent the sheet from stretching or compressing, and angular constraints fold or flatten the sheet. Each of these constraints is weighted by a stiffness - the stiffer the constraint, the better it is enforced in the simulation.
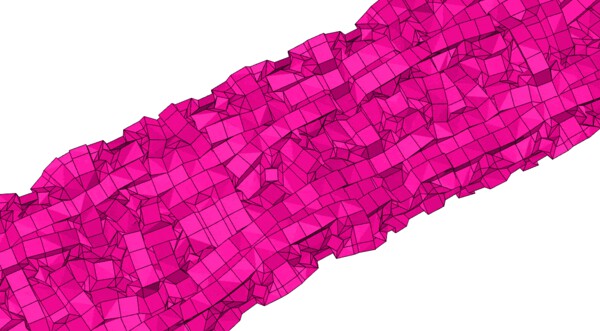
Cauchy strain or engineering strain is a unitless measurement of how much a material is being stretched or compressed under load. The app can be put into a strain visualization mode that illustrates the strain across an origami sheet by mapping it to a color from blue (no strain) to red (max strain). Visualizing strain gives a sense of how much the distance constraints in the origami pattern are being violated (i.e. how much the sheet is being stretched). The strain at each vertex is evaluated by averaging the percent deviation of all its distance constraints with adjacent vertices. This deviation is reported as a percent of the total length of the distance constraint to remove scaling effects.
Strain map of folding waterbomb tessellation. The pattern tends to curl to minimize internal strain in the material.
 GIF
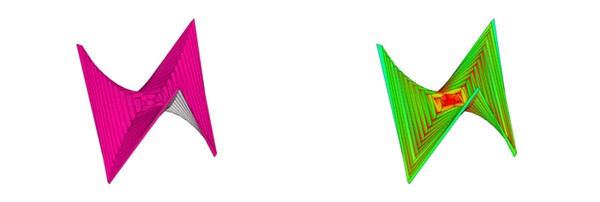
GIFSix-Pointed Hypar variant with strain map. This model was triangulated in an alternating asymmetric hinge triangulation based on the paper (Non)existence of Pleated Folds: How Paper Folds Between Creases.
 GIF
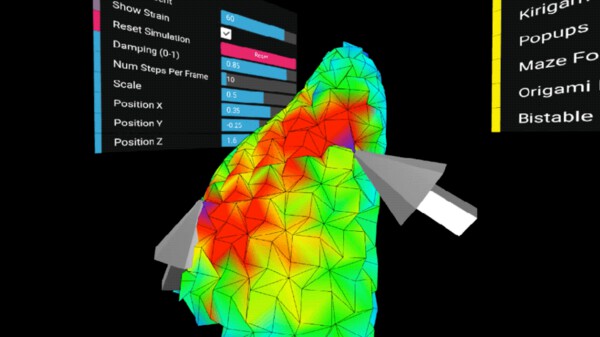
GIFDirect interaction with a Huffman Waterbomb tessellation in virtual reality. This app connects to virtual reality hardware via the WebVR api. In this mode, you can visualize the mesh folding in 3D and interact with it directly. Grab the mesh with both hands to see how it moves and watch internal strain propagate through the model. A longer VR demo video is on YouTube.
Typically, origami patterns are made from many straight creases, but by using curved creases it's possible to create more organic forms. Curved creases are simulated in the app by discretizing them into many small, straight segments - according to the paper Curved Folding.
 GIF
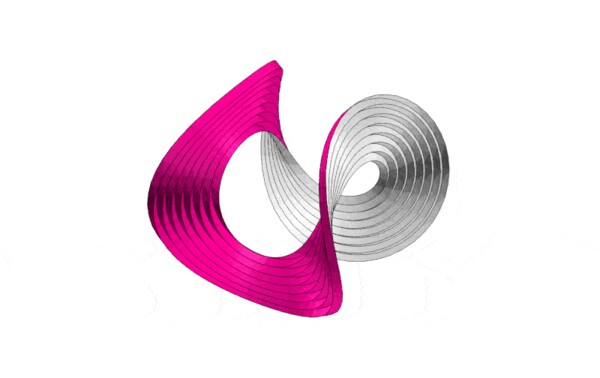
GIFHarmonics of a circular pleat origami, eventually resting in a low frequency configuration.
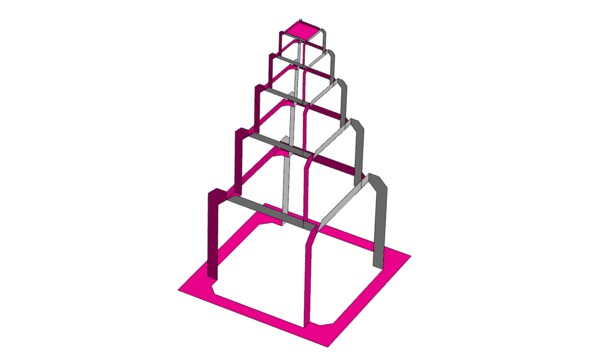
Kirigami is a variation on origami that incorporates cuts into a folding pattern. Many "popup" patterns used in cards or books are examples of kirigami. Green lines in crease patterns are treated as cuts when imported into the app. Left is a crease pattern for a Miyamoto Tower by Happy Folding, middle and right are popup designs by Popupology.
 GIF
GIFMiyamoto Tower kirigami pattern designed by Yoshinobu Miyamoto. Crease pattern from Happy Folding.
 All images0 comments, 0 likes, 10,458 views
 -
1. Go to your account/profile and click on "Edit".
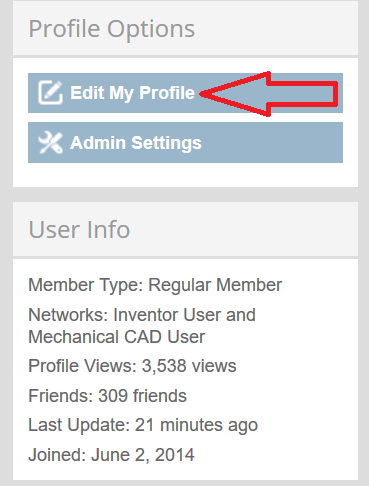
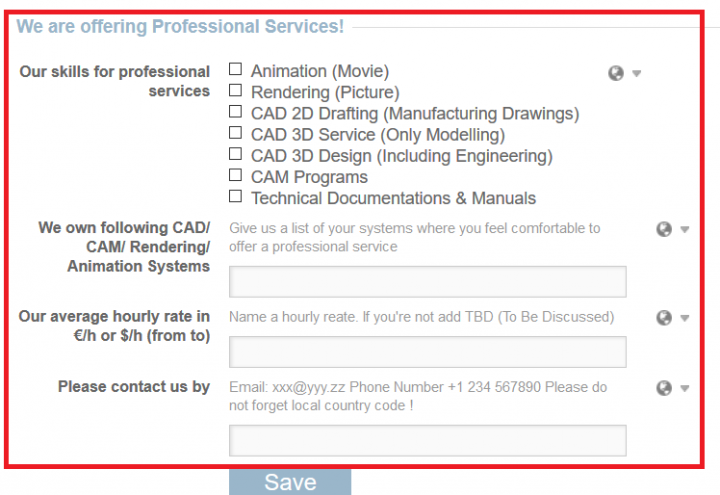
2. Scroll all the way down and you will find options where you can add info on services you offer. Once you are done, just click on "Save" and that's it.
 0 comments, 0 likes, 2,311 views
 -
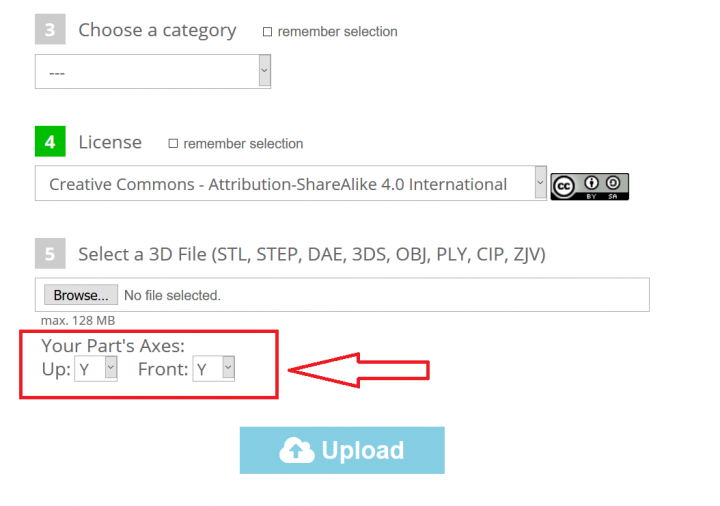
Simply choose wanted option in coordinate system while uploading your 3D model on PARTcloud.net
 0 comments, 0 likes, 2,319 views
 -
1. Go to "Weekly Challenge group" and click on "Chat" window.
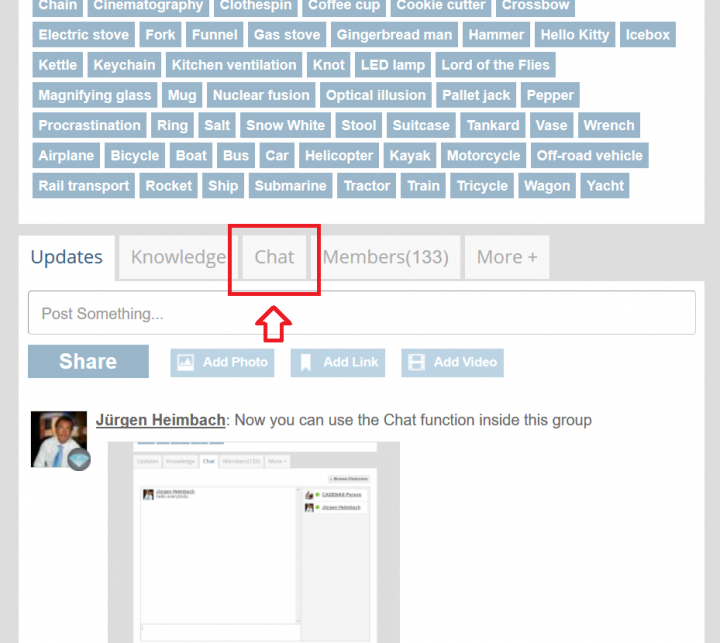
2. Scroll down and you will find the place where you can write a message to members who are online and start conversation.
 0 comments, 0 likes, 5,010 views
 -
1. Download the PLUGIN (BETA) and install to BLENDER addon directory
Filename:
Size (KB)
Expiration Date
Action
PARTcloud.zip
7.59 KB
19.11.2017 - 11:56:05
2. Start the EXPORT
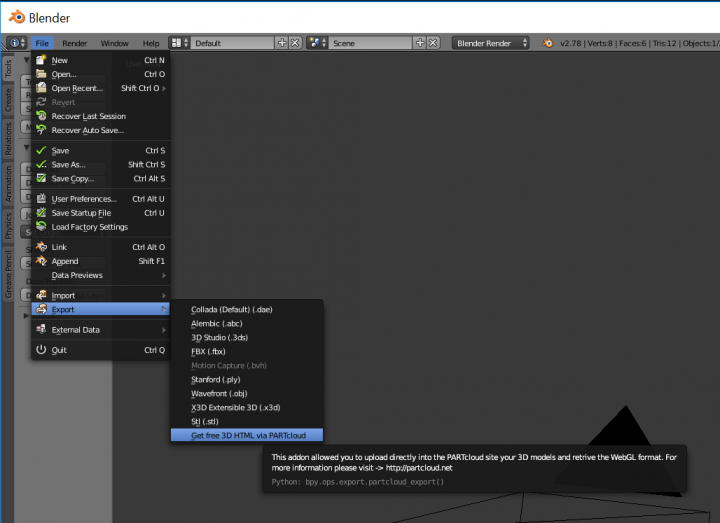
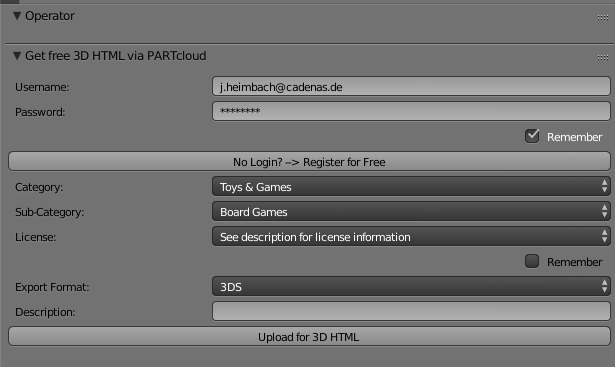
3. Define your EXPORT parameters
 0 comments, 0 likes, 2,183 views
 -
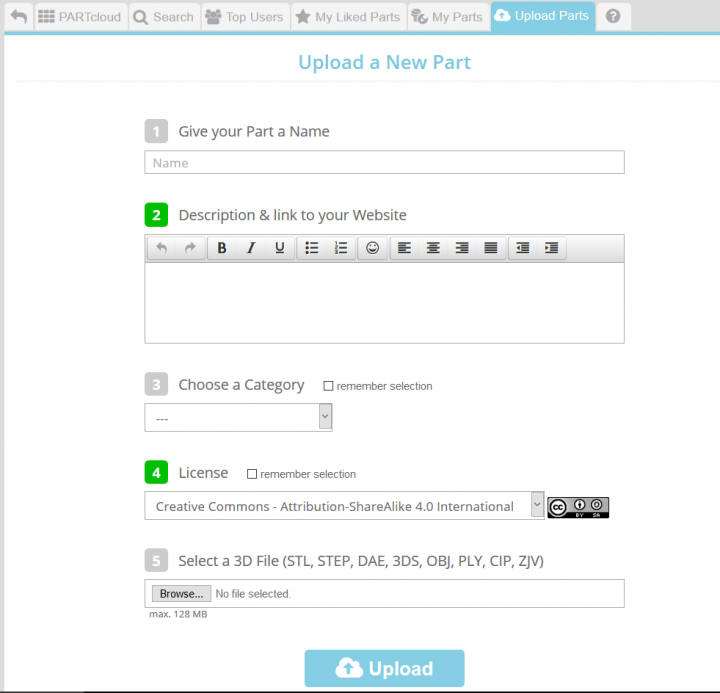
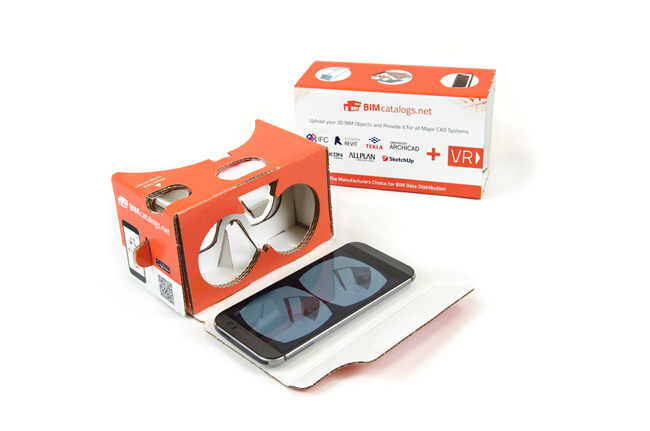
To share its 3D models with friends or colleagues, users can use the PARTcloud.net 3D Printing & Sharing Community app. Models can be uploaded via PARTcloud.net on the 3D CAD models download portal PARTcommunity in STL and STEP format.
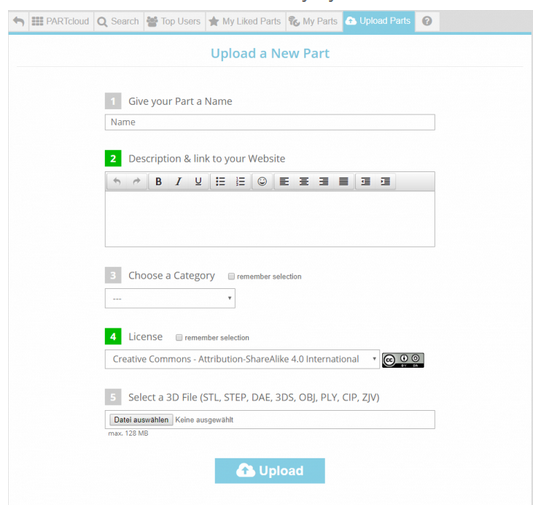
1. Users have to login at PARTcloud.net or create an account free of charge in order to enjoy all the advantages of the Sharing Community. If you are already registered for the 3D CAD models download portal PARTcommunity, this is also valid for PARTcloud.net .
The components are uploaded and the information as well as details filled in so that the 3D CAD model can be found more easily by other users.
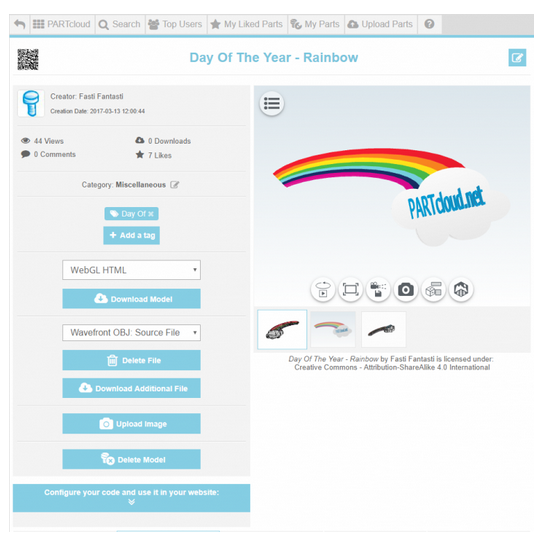
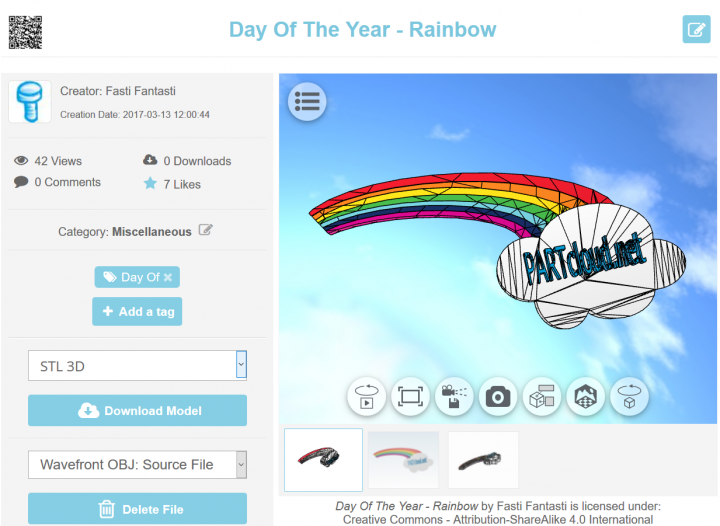
2. After uploading, the 3D CAD model appears in your own portfolio.
3. Now the app PARTcloud.net 3D Printing & Sharing Community by CADENAS has to be installed on the smartphone or tablet.
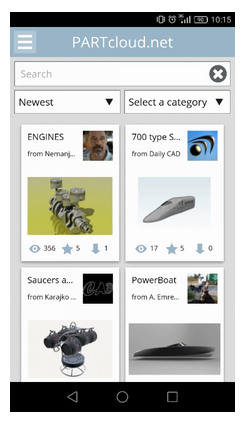
4. In the app itself, the search field is used to enter searched terms - in addition, the two filter functions "newest" and "select a category" can be used.
5. Once you have found the 3D model, you have a well-known features, such as downloading the model. In addition, app users have the opportunity to link model and camera function to each other. Thus, two realities can be linked for spectacular photo shots.
 0 comments, 0 likes, 5,521 views
 -
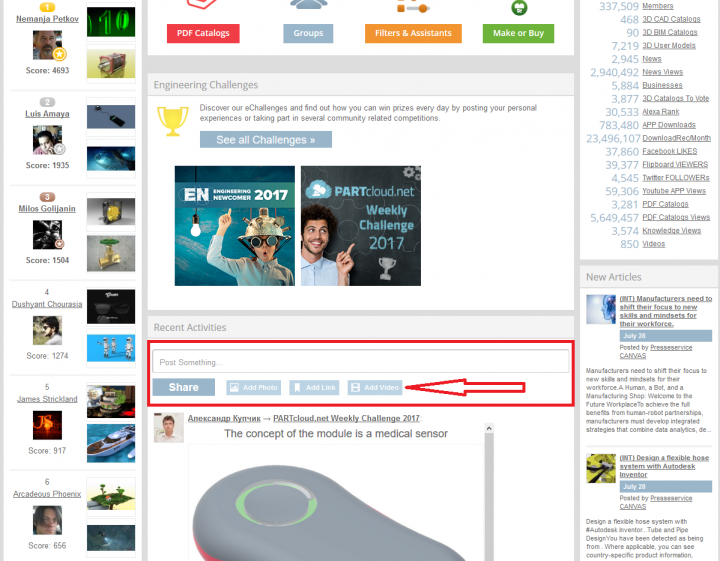
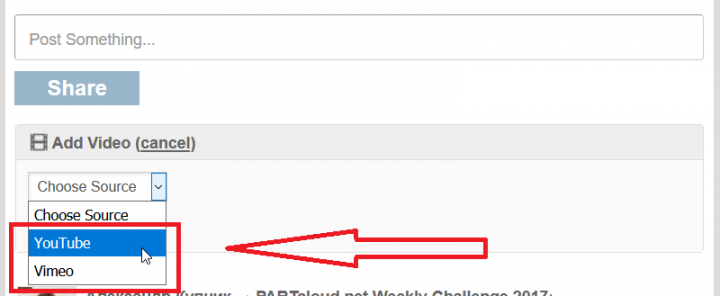
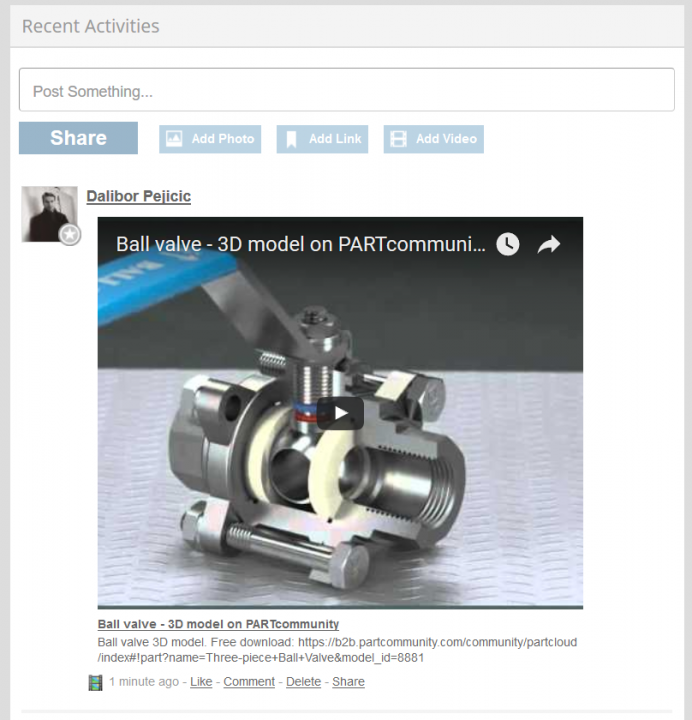
1. Go to PARTcommunity.com homepage and click on "Add Video"
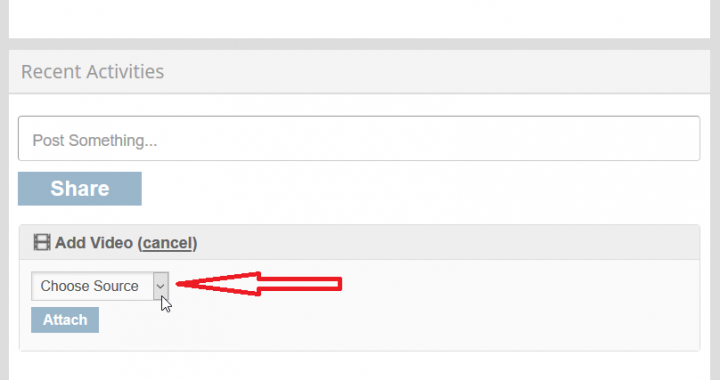
2. Click on "Choose Source"
3. Choose between YouTube or Vimeo (depending on the source of the video clip you would like to publish). You cannot publish video clip from your computer, only between this two options.
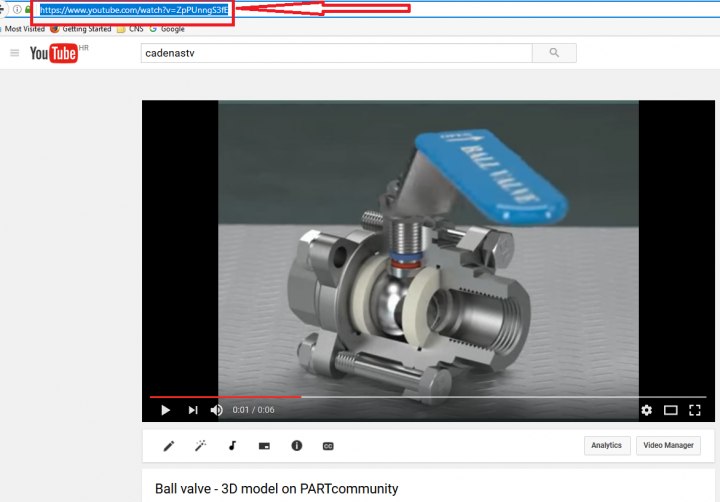
4. Go to the video clip and copy the link
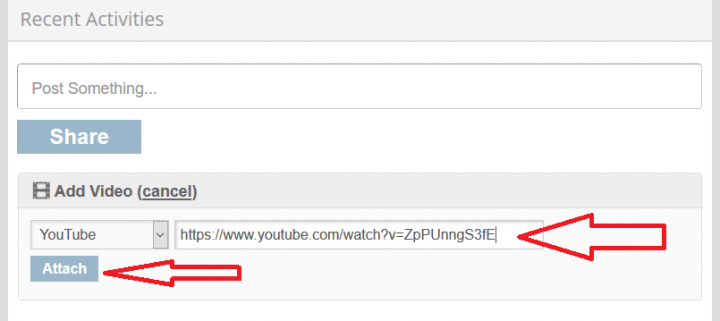
5. Paste the link and click on "Attach"
6. When the video clip is uploaded, click on "Share"
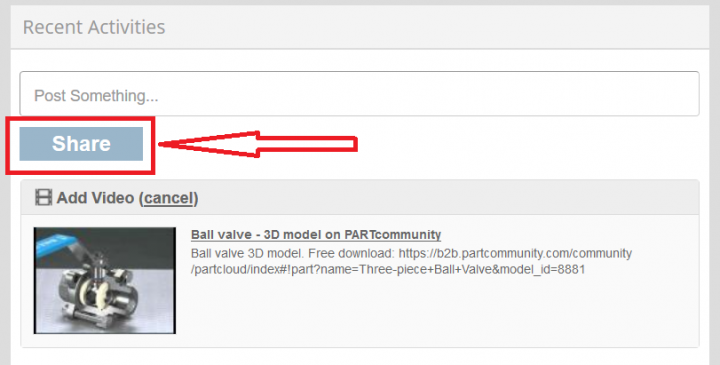
7. Your video clip should be published now. Simply click on it to watch it.
 0 comments, 0 likes, 2,579 views0% users marked this FAQ as helpful.
 -
1. Go to your 3D model (3D SHARE - PARTcloud.net). Click on "Description".
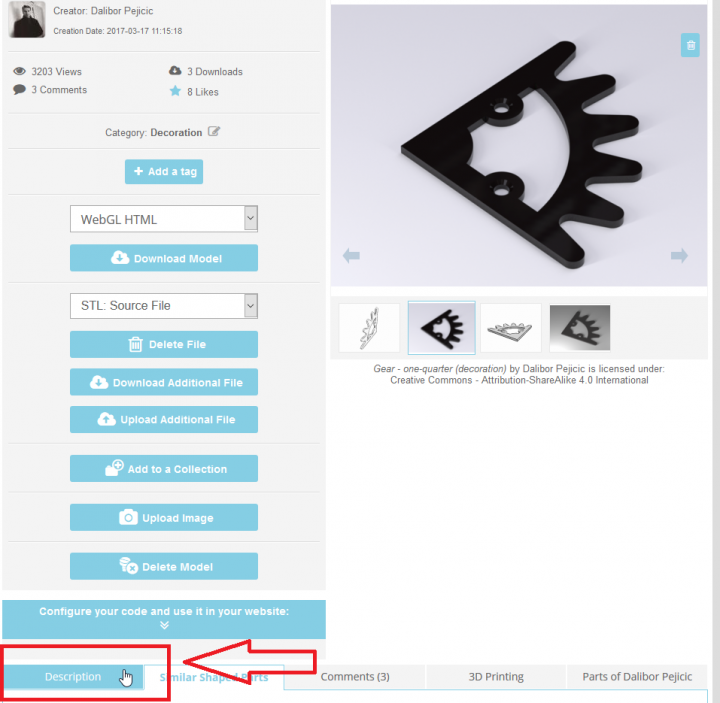
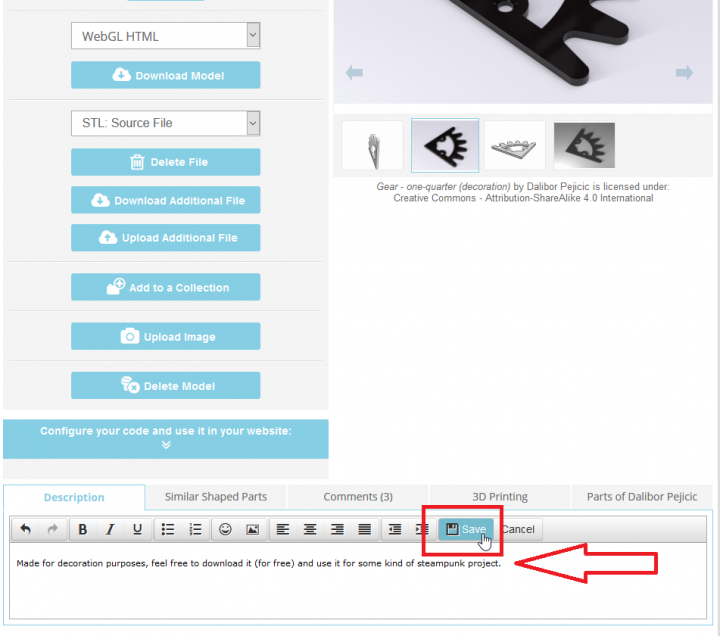
2. Click on "Edit".
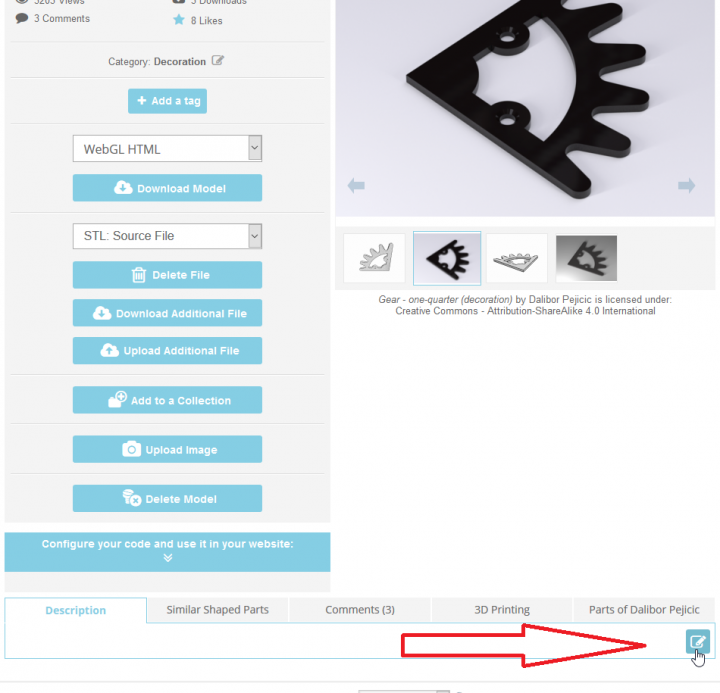
3. Write a text or add your website/YouTube link and click on "Save". Done!
 0 comments, 0 likes, 2,493 views
 -
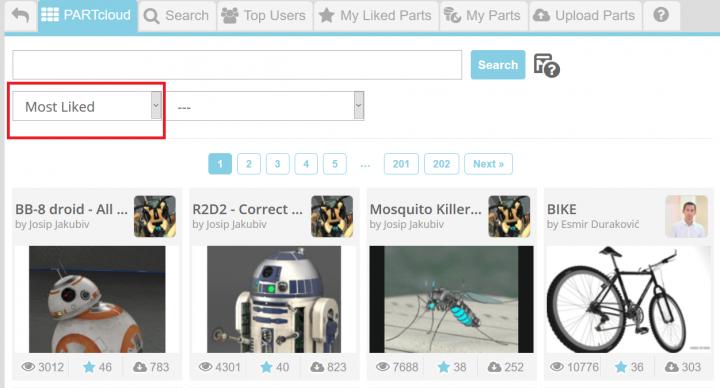
1. Go to 3D SHARE - PARTcloud.net and you will see the Newest 3D models. Click on it and other options will show up.

2. Choose one of them and click on it.
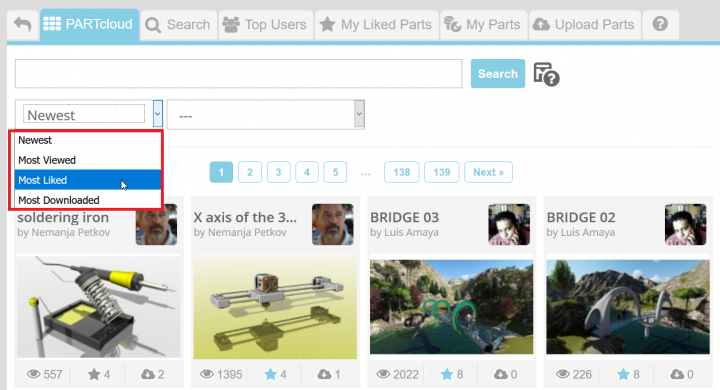
3. Desired 3D models will be shown.
 0 comments, 0 likes, 2,860 views
 -
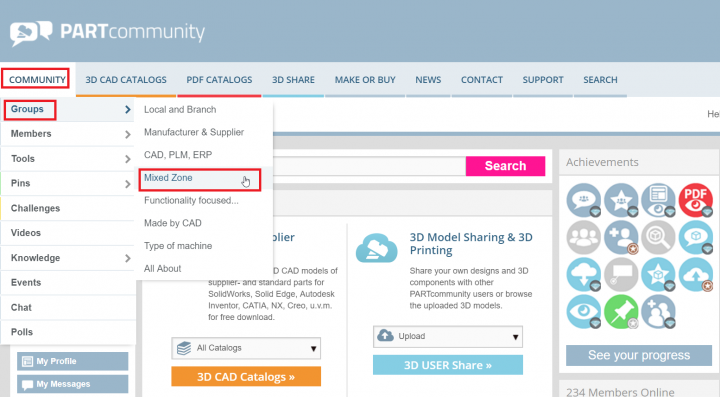
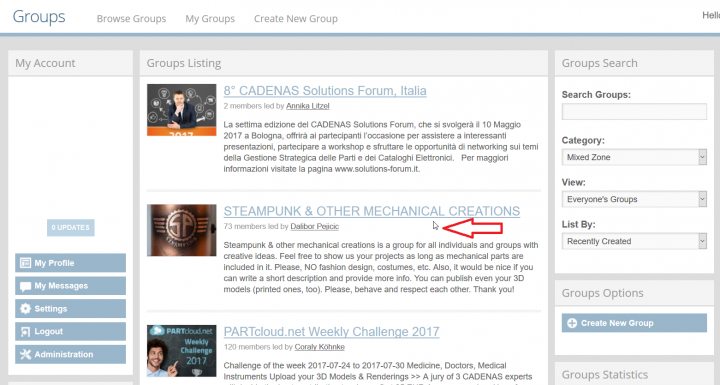
1. Search for your group. If you are not a member, you have to join in first. Click on "Community" and then "Groups". The group we are looking for, in this case, is Steampunk/Mechanical Creations and it is under "Mixed Zone".
2. Click on the group you are looking for.
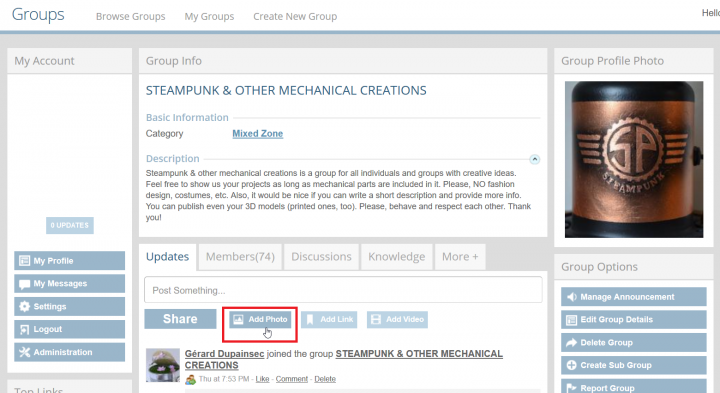
3. You are on homepage of your group now. Click on "Add Photo".
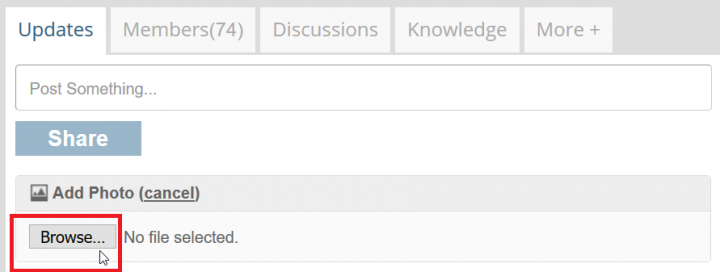
4. Click on "Browse".
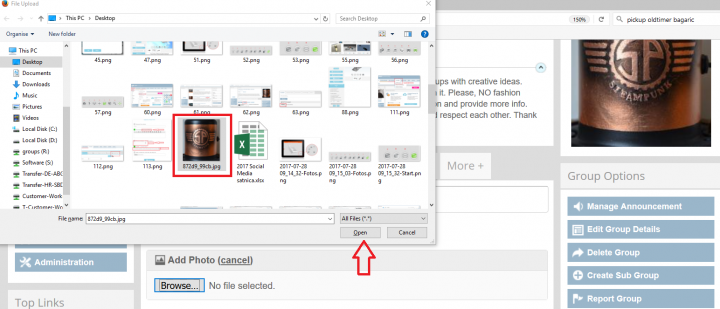
5. Find the photo you would like to publish, click on it and then click on "Open".
6. Wait for a few seconds and the photo should be uploaded. Click on "Share". You can write information/description ("Post Something...") to make it more interesting if you wish so.
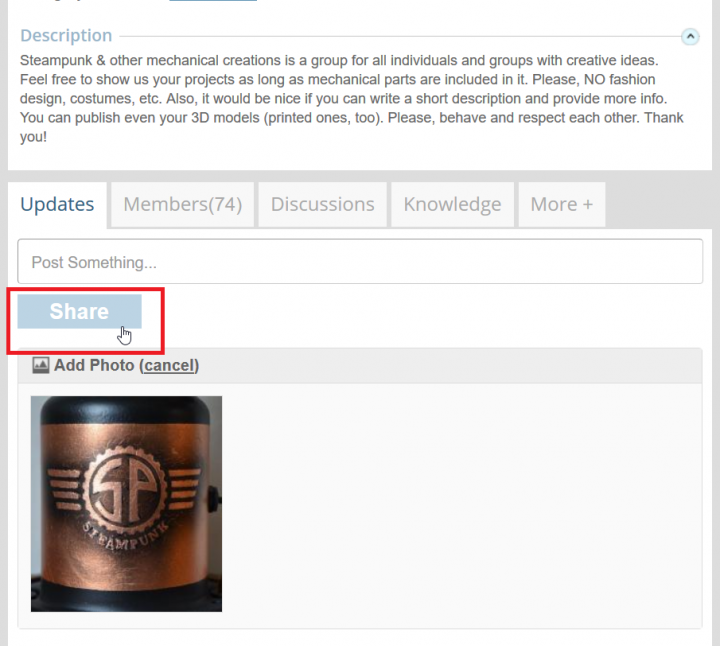
7. The photo should be published in your group now.
 0 comments, 0 likes, 2,638 views
 -
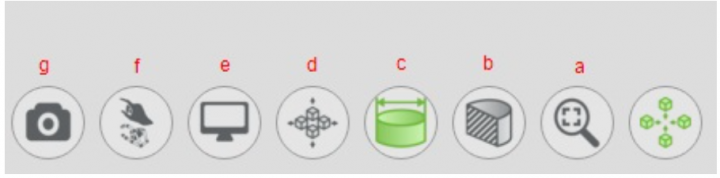
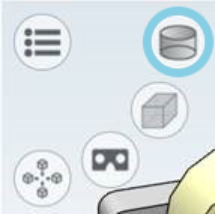
The 3D radial menu is available in the web apllications PARTcloud.net, BIMcatalogs.net and the 3D CAD model download portal PARTcommunity app as well as the PARTcommunity web app.
A single tap - manifold selection
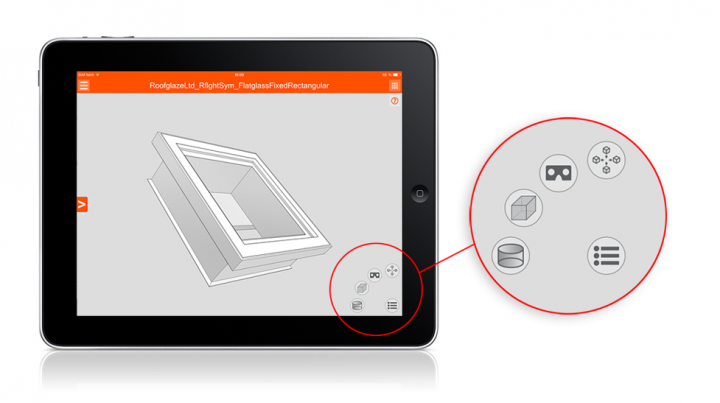
With only a single tap, different alignments of the 3D CAD models are displayed to the user and the model can be viewed from all angles. There is also the option of animated CAD models.
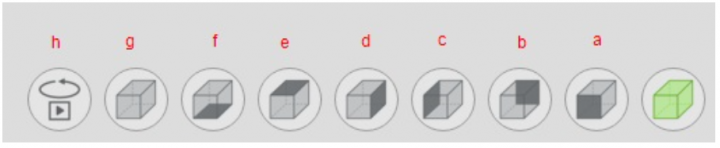
a. Front view (Z)
b. Rear view (-Z)
c. Left view (-X)
d. Right view (X)
e. Top view (Y)
f. Bottom view (-Y)
g. Isometric view
h. AnimationMoreover, various shading possibilities can be selected: The edges can be displayed or a combination of both possibilities is shown in a model.
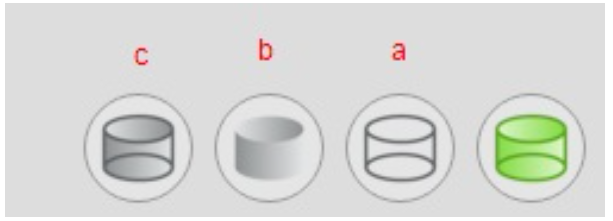
a. Edges
b. Shaded
c. Shaded with edgesThe 3D CAD model can also be used for different virtual realities and have them displayed.
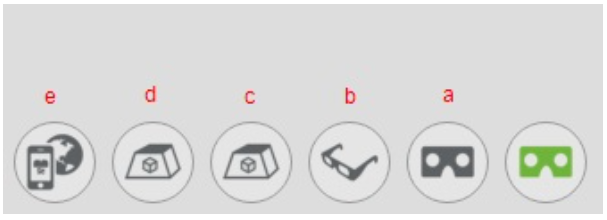
a. Virtual Reality (Cardboard etc.)
b. Anaglyph view
c. Dreamoc HD3
d. Dreamoc XL2
e. Camera backgroundAdditional features, such as dimensioning or screenshots, are also available to the user.
a. Scale to window size
b. Cut
c. Dimensioning
d. Explosion
e. Full screen
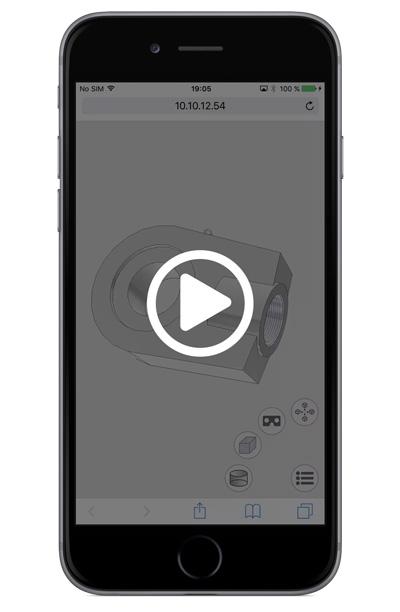
f. Leap MotionIn our video, you can see how the 3D radial menu looks on a mobile device:
 0 comments, 0 likes, 5,290 views
 -
Rotate and zoom your 3D Model
Save the new position as default
 0 comments, 0 likes, 1,865 views
 -
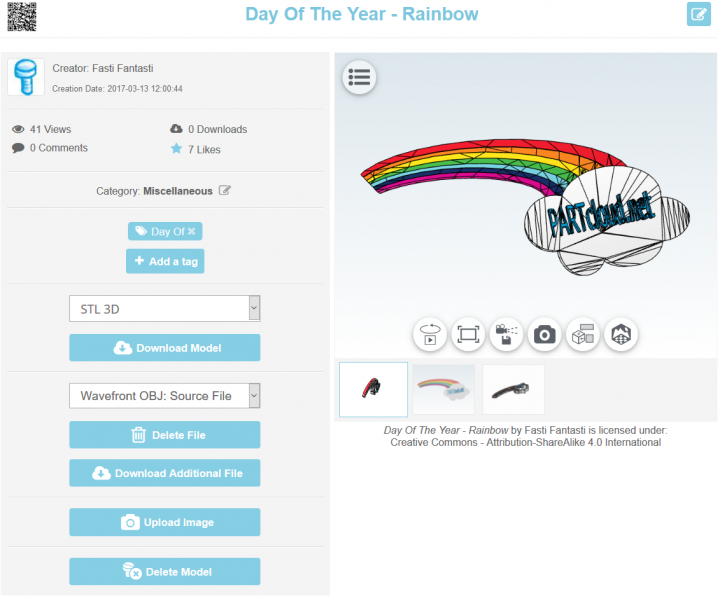
Augmented Reality (AR) is understood as computer-assisted extension of the perception of reality. Frequently, images or videos are supplemented with additional information or virtual objects by means of overlaying or superimposing.
1.Users have to login at PARTcloud.net or create an account. If you are already registered for the 3D CAD models download portal PARTcommunity, this is also valid for PARTcloud.net.The components are uploaded and the information as well as details filled in, so that the 3D CAD model can be found more easily by other users.

2.After uploading, the 3D CAD model appears in your own portfolio.
3. The users now activate the environment function by moving the cursor to the lower bar and clicking the last button.
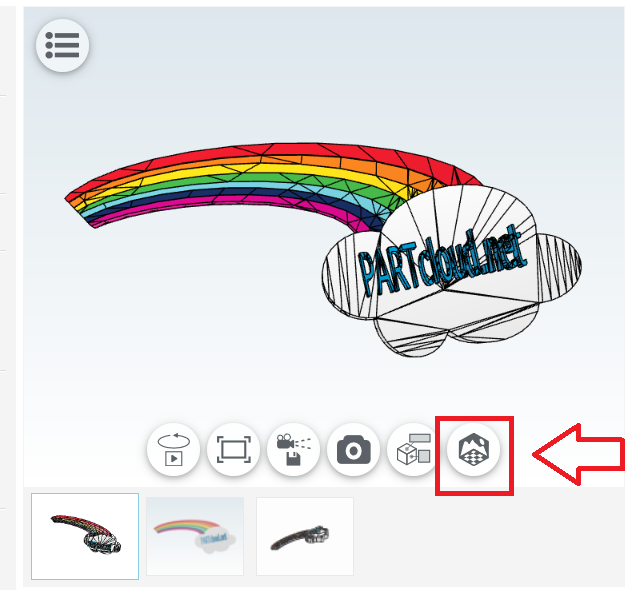
4. A new window appears, where the environments can be selected. Here are different environments available to the users, such as city silhouette and floor variants such as parquet. Both options can be selected at the same time.
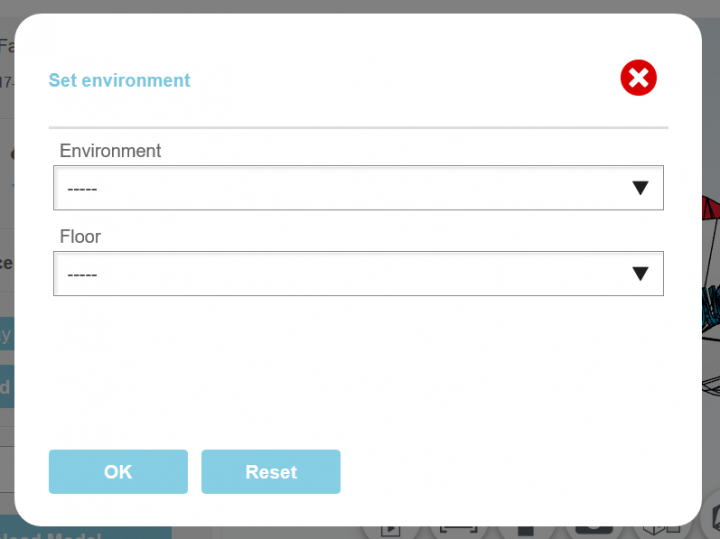
5. At the end, the users obtain their 3D model with the selected background. Now they can put the model in the scene accordingly per screenshot or in the PARTcloud.net app or add the image at social networks.
 0 comments, 0 likes, 2,408 views100% users marked this FAQ as helpful.
 -
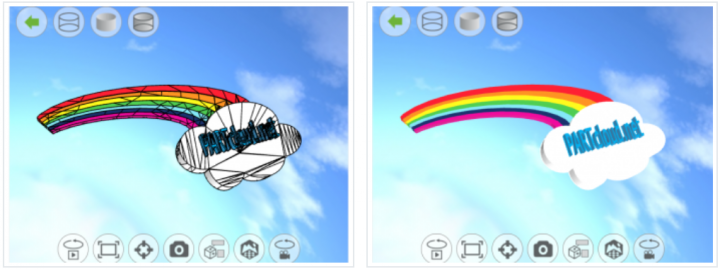
The CADENAS exchange platform PARTcloud.net offers the possibility to display edges of a model differently: Shading the edges makes the 3D model easier to recognize and gains in expressive power, without losing any information. The smaller the model and the overall view for the presentation as a screenshot or photo is decisive, the more likely users should go back to shaded edges.
1. Login at PARTcloud.net or create an account. If you are already registered for the 3D CAD models download portal PARTcommunity, this is also valid for PARTcloud.net. The components are uploaded and the information as well as details filled in so that the 3D CAD model can be found more easily by other users.
2. After uploading, the 3D CAD model appears in your own portfolio.
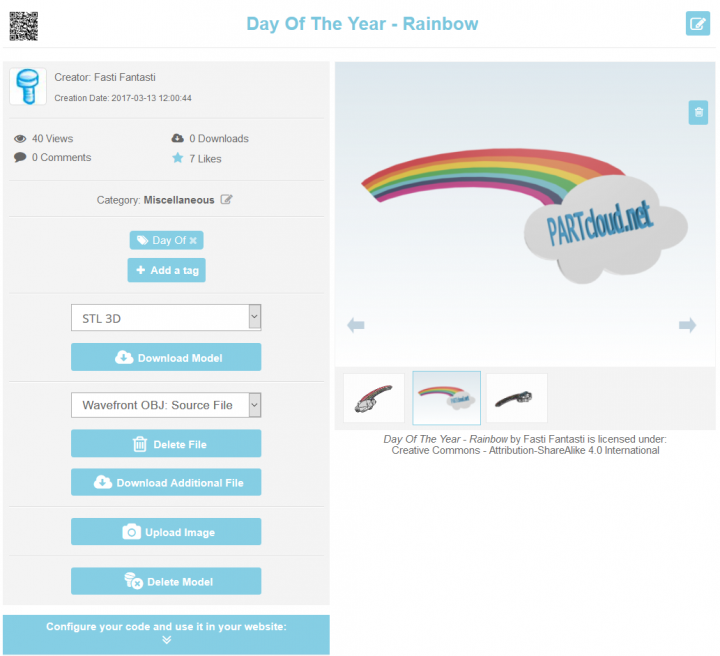
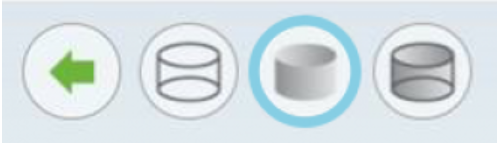
3. Users now enable the edge smoothing function by moving the mouse pointer to the menu point and clicking. There are four buttons.
4. On the right, the various stages of the representation are shown: edges, shaded and shaded with edges. The button in the center must be clicked to get the desired effect.
5. The result is a complete model that is now more even. Now users can set the model according to a screenshot or in the PARTcloud.net app or embed it on other websites.

Here is an example with a particularly small-scale model:
 0 comments, 0 likes, 2,282 views
 -
https://3dprint.nih.gov/discover
Discover 3D Models
View curated Collections or find Builds of 3D models from our users.


 0 comments, 0 likes, 4,790 views
 -
 Build your 3D LEGO® models onlineNo plug-in, no installation. Everything happens in your browser
Your work is available where ever you are0 comments, 0 likes, 5,124 views


