Manual
Login
Our 3D CAD supplier models have been moved to 3Dfindit.com, the new visual search engine for 3D CAD, CAE & BIM models.
You can log in there with your existing account of this site.
The content remains free of charge.

Top Links
Manual
 |
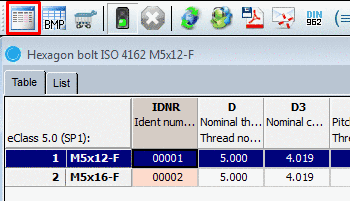
Different characteristics of the currently selected element are displayed in the table.
Especially with large parts, the restriction of characteristics to specific values is helpful.
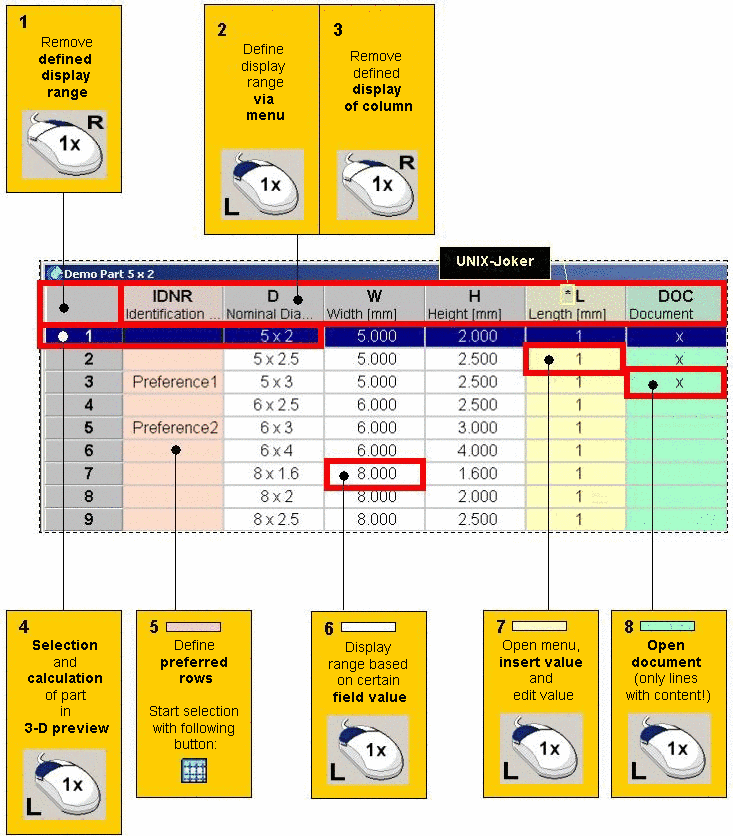
The possible functions of the table view are shown below.
-
There are two possibilities tables can be displayed with limited lines and so there are two different filter symbols:
In order to remove limitations click on the respective filter icon top left.
The filters can work together or each for itself.
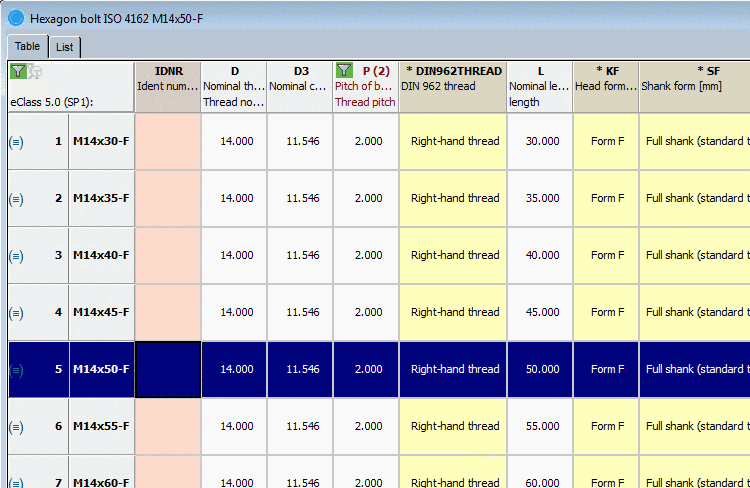
A Full-text search with the current selection "ISO" with the following search term is performed:
hexagon bolt D>=10 D<=16 L=50
This results in filtering all table lines which do not meet the condition. The icon
 signalizes this.
With click on a table value only lines with this value are displayed. The following fig. shows the status after click on the value 2.000 in the column "P". (Both filters work together.)
The following fig. shows the table after deactivation of the search filter
. -
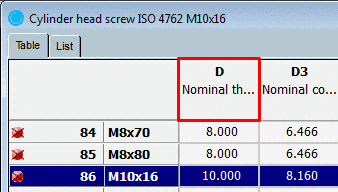
A possibility for restriction is the dialog Choose display range.
Open the dialog with a single click into the respective column headers.
-
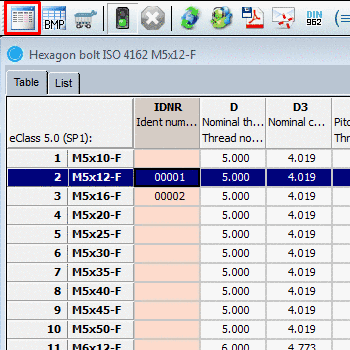
In order to display all characteristics unfiltered...
A click on the filter symbol top left removes all restrictions within the table.
-
Variant selection and calculation of the part in the 3D preview
By clicking on the line number or on the row description text a row is selected.
The chosen characteristic is immediately recalculated and shown in the 3D window.
-
A specific column can optionally be defined administratively as a preferred row column. In this case by clicking on Preferred rows on/off
 only those rows are shown which have an entry in
said column. (Often it is the column for the article number)
only those rows are shown which have an entry in
said column. (Often it is the column for the article number)Under Extras -> Preferences... -> Table -> Variable for preferred rows you can determine the variable for the preferred row.[57]
-
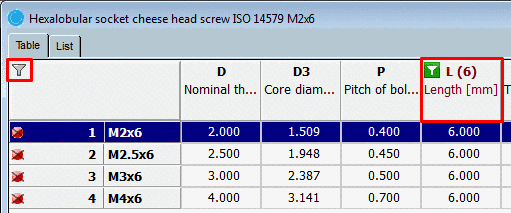
Restriction of a specific field value
Click on a specific field value directly whose value you would like to restrict. Now only characteristics with this value will be shown.
You can recognize the restrictions due to
-
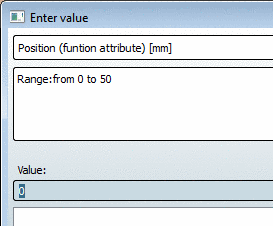
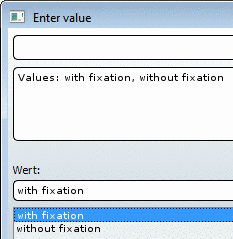
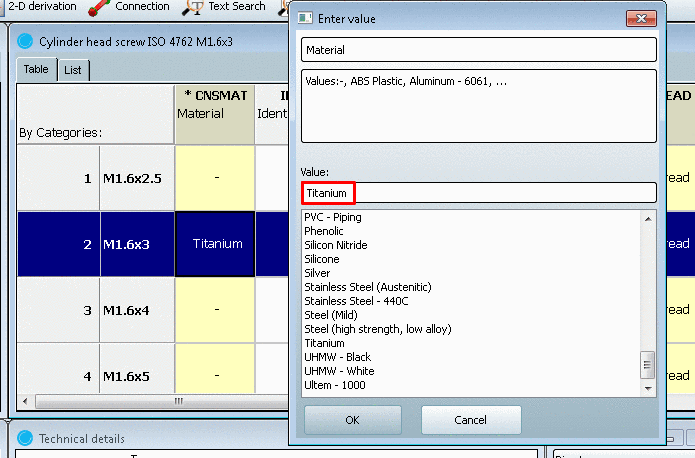
Open the Enter value menu and edit the value.
Certain parts have Value range variables. They do not have a fixed value.
In order to enter a certain value in a value range column, click on the respective field.
-> The Enter value dialog opens.
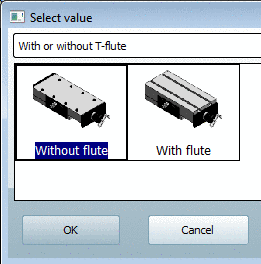
The display of the value range selection can be conducted in different ways depending on the particular part:
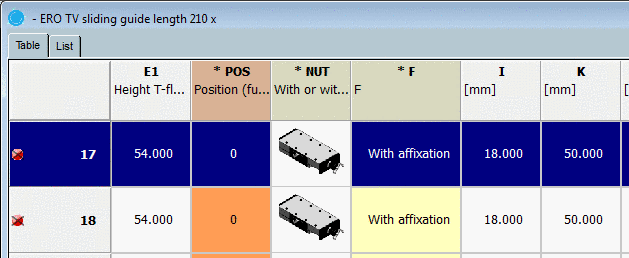
Value range Value ranges with images Name of value To clarify the selection options in the value range fields, graphics may also be used.
Choose one of the default values. --> By changing the table entry, the display in the 3D view changes as well.
Possibly existing graphics can be displayed in the table column.
Value range columns feature different background colors:
-
-
The function attribute is used for rod positioning and angularity, everything which defines a mechanical movement in a part/assembly (for example, the rod positioning of a cylinder).
-
 Dark yellow = Dimension attribute
The dimension attribute is used for half finished parts and profiles that are manufactured in running meter.
A special case is the column CNSMAT. It is optionally displayed and only when using PARTsolutions without ERP integration.[58] [59]
-
-
Open document with additional information.
Some tables contain green highlighted columns (in this example "BS") , in which additional information about parts is contained. Behind fields marked in green, documents in form of text, image or internet file formats are hidden, but additional programs can also be opened this way.


[57] See Section 3.3.6, “ "Table" tabbed page ” (without ERP integration). With ERP connection you can define the preferred row via role rights (see Registerseite Allgemein.
[58] See Extras menu -> Settings... -> Table -> Show material selection
[59] Administrative notes can be found under Section 2.2.5.1, “Material mapping without ERP integration ” in PARTsolutions / PARTcommunity4Enterprise - Administration Manual.
