Manual
Login
Our 3D CAD supplier models have been moved to 3Dfindit.com, the new visual search engine for 3D CAD, CAE & BIM models.
You can log in there with your existing account of this site.
The content remains free of charge.

Top Links
Manual
 |
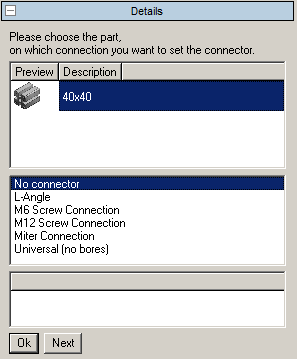
In order to add on further parts, choose the desired part.
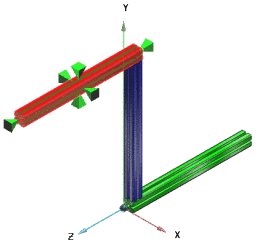
The active part shows up in Red. Connections are visible.
All inactive parts are shown in Gray.
The starter part is shown in Green.
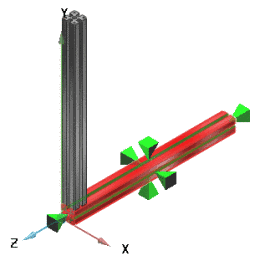

Mark the part to which you want to add the other part (In the above example, it is part 2)
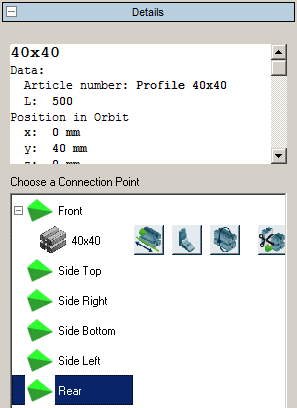
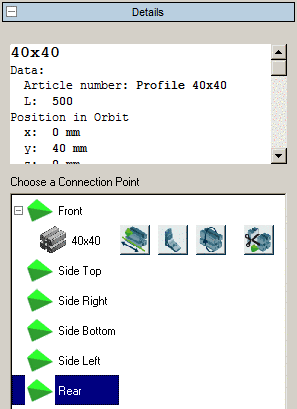
--> The connection points in the part become visible in the dialog area Details.
Choose the connection point. (In this example Back)
![[Note]](/community/externals/manuals/%24%7Bb2b:MANUALPATH/images/note.png) |
Note |
|---|---|
|
In the dialog area the currently added parts and their adapting options are shown at every connection point. Via the buttons below you can carry out the following options:
| |


Double-click on the desired connection point.
--> The directory tree for choosing the part to be connected and its connection parts is again displayed.
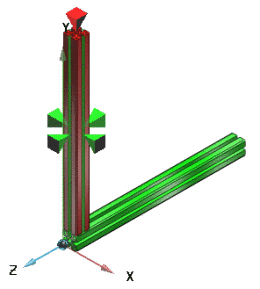
Double-click on the desired connection point.
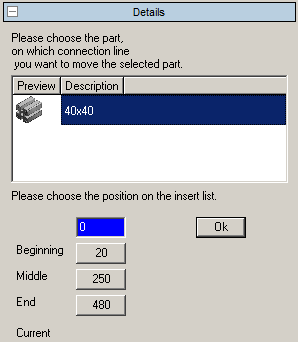
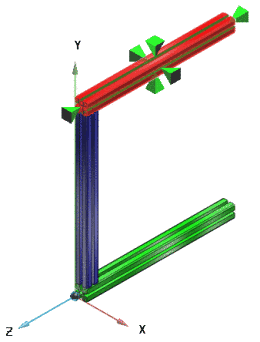
--> Part 3 as the active part (red) is connected to part 2 and shows up in the positioning.
Accept the default value with OK or, as in this example, click on 480.
Basically the dialog for the selection of a connector always shows up after the completed positioning.