Manual
Login
Our 3D CAD supplier models have been moved to 3Dfindit.com, the new visual search engine for 3D CAD, CAE & BIM models.
You can log in there with your existing account of this site.
The content remains free of charge.

Top Links
Manual
 |
Which steps are necessary beginning from the creation of a mapping and the catalog publishing with the included mapping information up to the installation at the customer?
-
Initial situation: Finalized SVN status (ready for publishing, everything checked in)
-
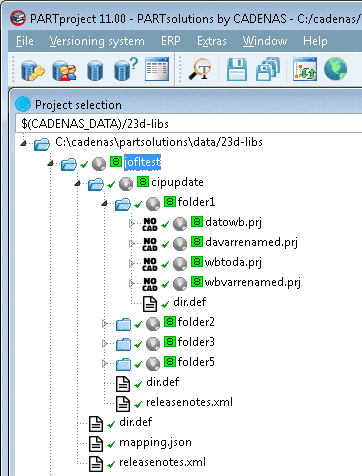
In PARTproject, on the catalog root directory, call the context menu. Under Publication, click on the Add ERP-Mapping... command.
-
Either select the option Search for a published catalog version or Load CIP file.
-
Search for a published catalog version
Catalog modeling is based on SVN so this is the standard approach. However, only catalog status as of November 2014 are valid, older ones are hidden. In that case use the variant Load CIP file.
-
If the last catalog status is before November 2014, the mapping can be created with the help of a CIP file. At this variant the mapping is not verified during publishing.
Use order numbers to create mappings:
This option only fits for catalogs which have an order number. Advantage: With an unique ID the mapping should automatically be created in any case.
-> The mapping is created and the protocol displayed.
-
-
In PARTproject, on the catalog root directory, call up the context menu. Under Publication, click on the command Edit ERP-Mapping....
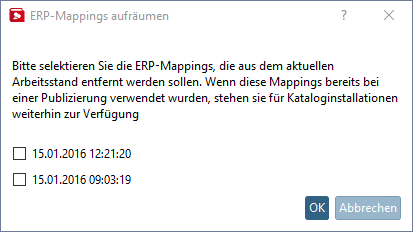
-> If several mappings had been created, the dialog box Select source version opens. Here, select which mapping you want to edit.
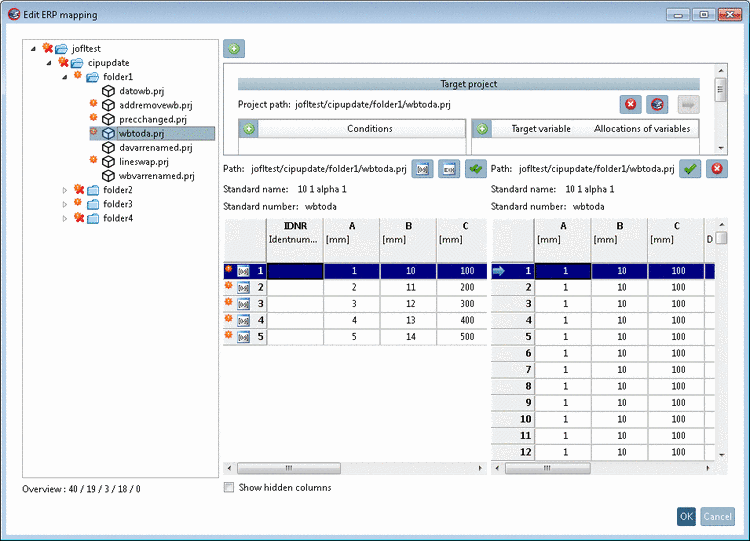
-> The dialog box Edit ERP mapping opens.
-
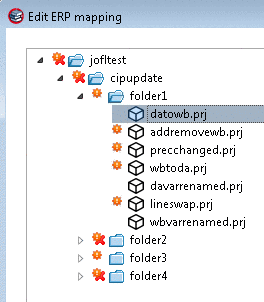
Edit all assignments which are not unique.
At projects not showing icons, in the directory tree, the assignment has automatically been performed. No manual editing of the mapping is needed here. In the directory tree simply use the context menu command Verify all mappings for the respective directory level.
At projects showing icons an ERP mapping has to be created, at projects without icon the mapping has automatically been created.
Once all assignments are confirmed a green checkmark is displayed, at the catalog, at all directories, projects and project lines.
Once everything is assigned you can publish the catalog.[36] All mapping information is included[37] and will be processed at the catalog installation.


![[Note]](/community/externals/manuals/%24%7Bb2b:MANUALPATH/images/note.png)


![[Caution]](/community/externals/manuals/%24%7Bb2b:MANUALPATH/images/caution.png)

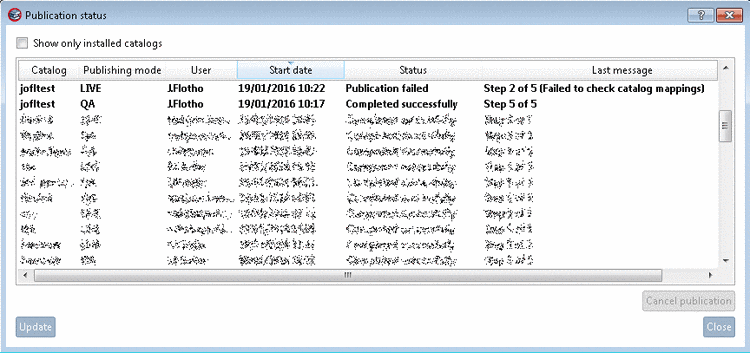
[36] Detailed information on publishing can be found under Section 5.10, “ Publish catalog ”.
[37] in the file "mapping.json"
