Manual
Login
Our 3D CAD supplier models have been moved to 3Dfindit.com, the new visual search engine for 3D CAD, CAE & BIM models.
You can log in there with your existing account of this site.
The content remains free of charge.

Top Links
Manual
 |
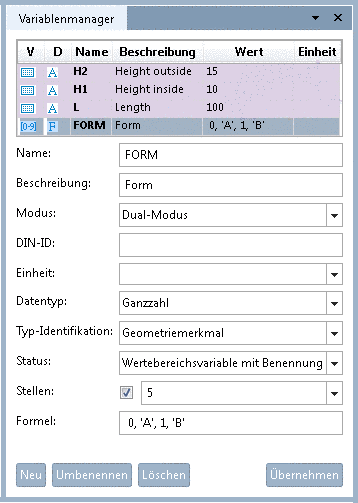
If you do not want to display the original values, but instead of it mapped textual values such as "on" / "off" or "Form A" / "Form B", then choose the type Value range variable with naming.

In the following the procedure is described with the help of a little example:[56]
A rotation of a cut shall get a condition and then the feature display shall be controlled by a value range variable.
-
In the first step a value range variable is created in the Variable Manager.
Create a variable with the respective parameters.[57]
-
-
Data type: Here in the example Integer is chosen.
-
0 is assigned to A, 1 to B. The internal values are numbers, so for this variable the data type Number (Integer / Decimal number) has to be set.
H is assigned to Hexagon, C to Cylinder, B to Bolt. The internal values are Text, so for this variable the data type Text has to be set. Textual values have to be set between two single quotation marks ('Text').
-
In the second step a sketch is created in the Sketcher, which is used for a "Cut".
-
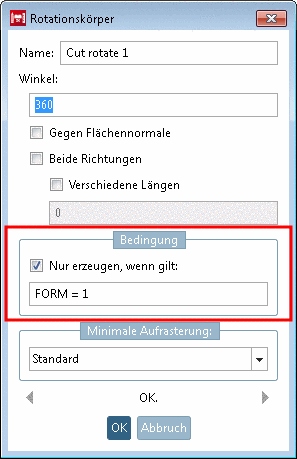
In the third step the cutting sketch gets a respective Condition, which creates the cut depending on the value of the variable FORM.
-
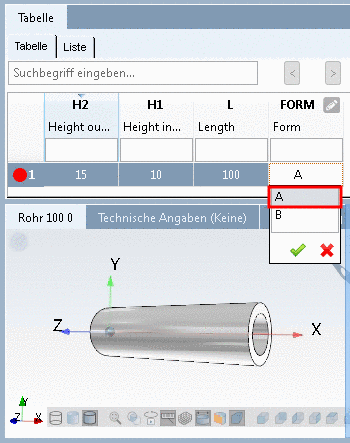
To display the column of the value range variable with naming in the PARTdesigner, go to the Test mode.
Click into the value range field and select the desired value.
-
Just as well you can test in the PARTdataManager. Table view and value selection is identical as in the PARTdesigner.
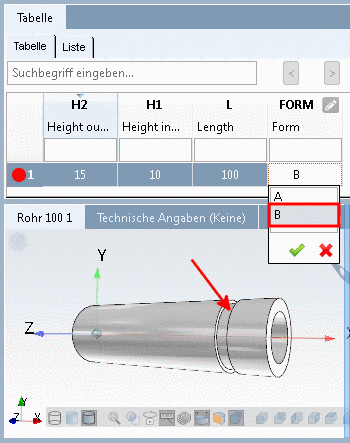
In the column FORM, click on the value range icon
 and select the desired form.
![[Note]](/community/externals/manuals/%24%7Bb2b:MANUALPATH/images/note.png)


[56] The adequate
example can be found in the "Training" catalog under \v11_news\value_ranges\value_ranges_with_naming\value_ranges_with_naming.prj.
[57] General on the procedure can be found under Section 6.8.1, “Create new variable ” und Section 6.8.3, “ Variable Manager - The individual parameters”.
