Manual
Login
Our 3D CAD supplier models have been moved to 3Dfindit.com, the new visual search engine for 3D CAD, CAE & BIM models.
You can log in there with your existing account of this site.
The content remains free of charge.

Top Links
Manual
 |
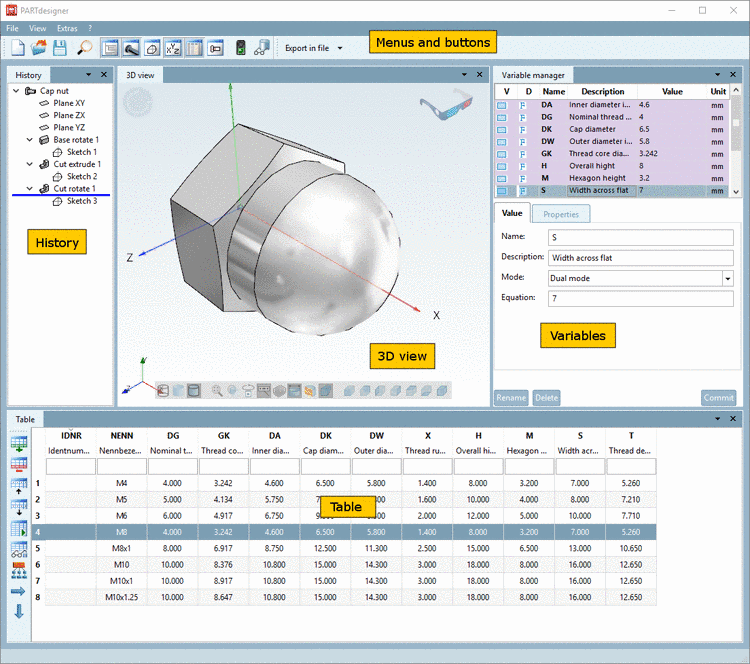
With the training documentation in hand you will learn how to create a cap nut by yourself.
The training documents for eCATALOGsolutions contain a
sketch with the dimensioning parameters and a Table. In the print version you can find this
as a foldout image before the chapter. If you have the document as Online
Help, you can find the foldout image in the start menu as "eCATALOGsolutions
Training foldout" or under $CADENAS/proghelp/<language>.
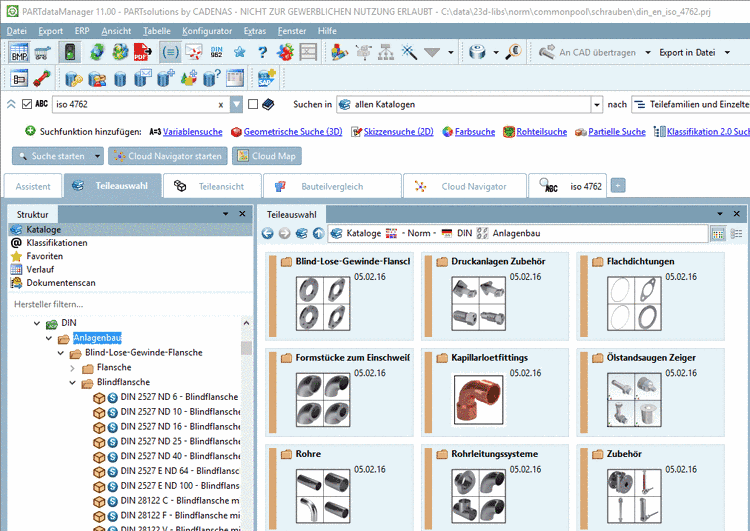
Before a part can be displayed, selected and exported to the CAD system in the PARTdataManager, the catalog structure is created individually in PARTproject (for example using existing structures in the product range).
Project files are created and the corresponding data such as 3D object, table, preview images, dimensioning images, technical views and additional information is integrated or created.

In PARTproject, the whole catalog management happens:
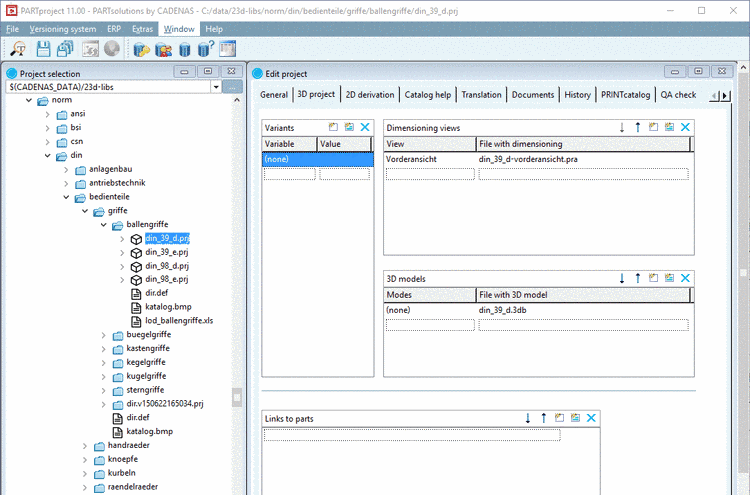
The module PARTdesigner is started from PARTproject. There, the geometry (*.3db) and the characteristic attribute table (*.tac) is created and edited.
With PARTdesigner 3D, drawings of standard parts and catalogs can be created.
By using sketches, extrusions, rotations and geometric operations, the components are created totally parametric and linked with the characteristic attribute table.
Because of the open format, the standard parts of bigger companies can be mapped in a standardized system.
Geometries created In PARTdesigner can be transmitted directly to a multitude of common CAD systems via PARTsolutions interfaces.
After inclusion in the index the created parts are ready for the export to the CAD system in PARTdataManager.