Manual
Login
Our 3D CAD supplier models have been moved to 3Dfindit.com, the new visual search engine for 3D CAD, CAE & BIM models.
You can log in there with your existing account of this site.
The content remains free of charge.

Top Links
Manual
 |
![[Note]](/community/externals/manuals/%24%7Bb2b:MANUALPATH/images/note.png) |
Note |
|---|---|
|
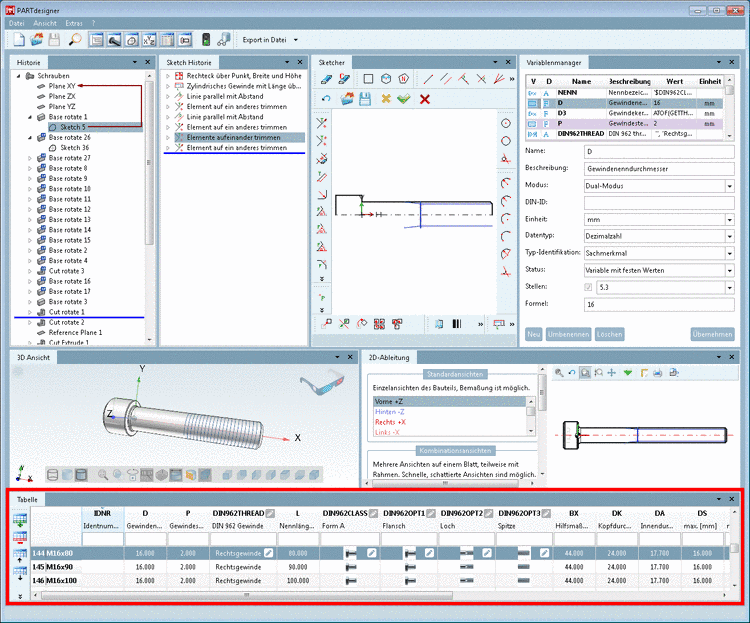
The above figure shows all existing docking windows (working areas) as an overview. Normally you won't use all docking windows at the same time. Make your own user interface as desired.
| |


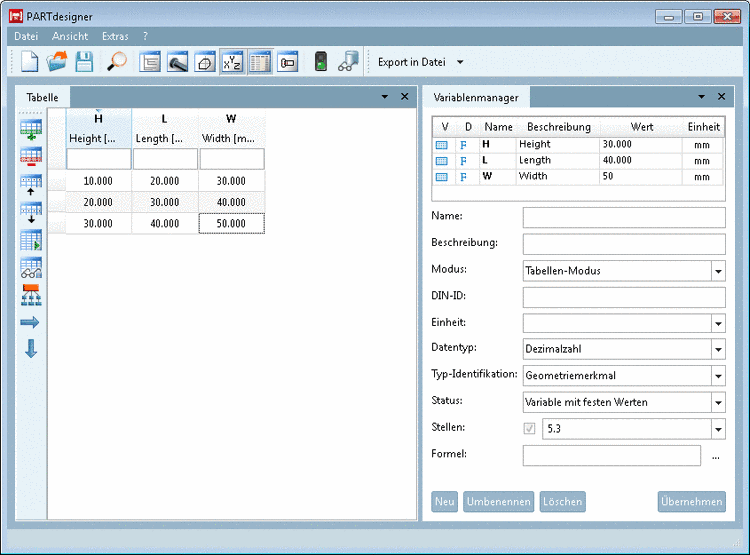
In the opened PARTdesigner, under File menu, when calling New table, the docking area Table automatically gets an enlarged working area (beside the Variable Manager). Other docking windows are normally not needed.
A small example on this can be found under Section 6.5, “Create table: Small example from A to Z ”.
In the table, you can find the following commands as buttons.

