Manual
Login
Our 3D CAD supplier models have been moved to 3Dfindit.com, the new visual search engine for 3D CAD, CAE & BIM models.
You can log in there with your existing account of this site.
The content remains free of charge.

Top Links
Manual
 |
Before projects are transferred to the directory tree of PARTdataManager or get Status 5 under SVN Administration (see Section 5.5.3.2.4, “Level 4”), new entries or changes have to be checked for any errors. You can choose from a large number of test criteria.
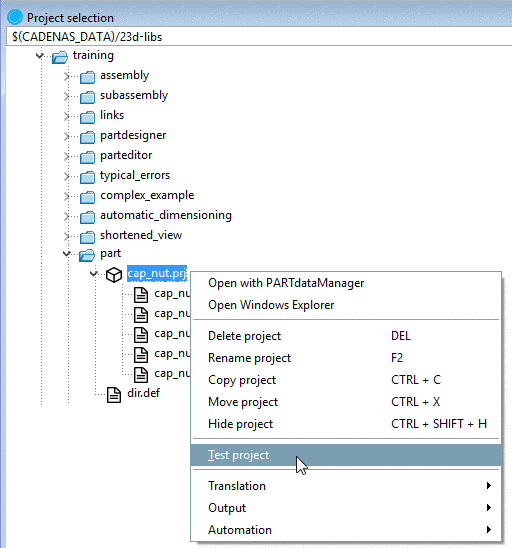
The call is made in PARTproject under Project selection, in the context menu of projects (Test project) or directories (Test directory).
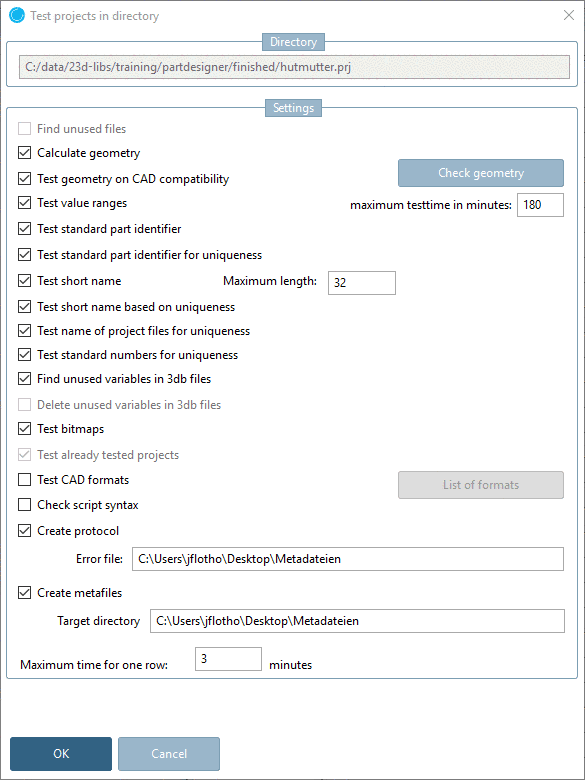
-> The dialog box Test projects in directory is opened.
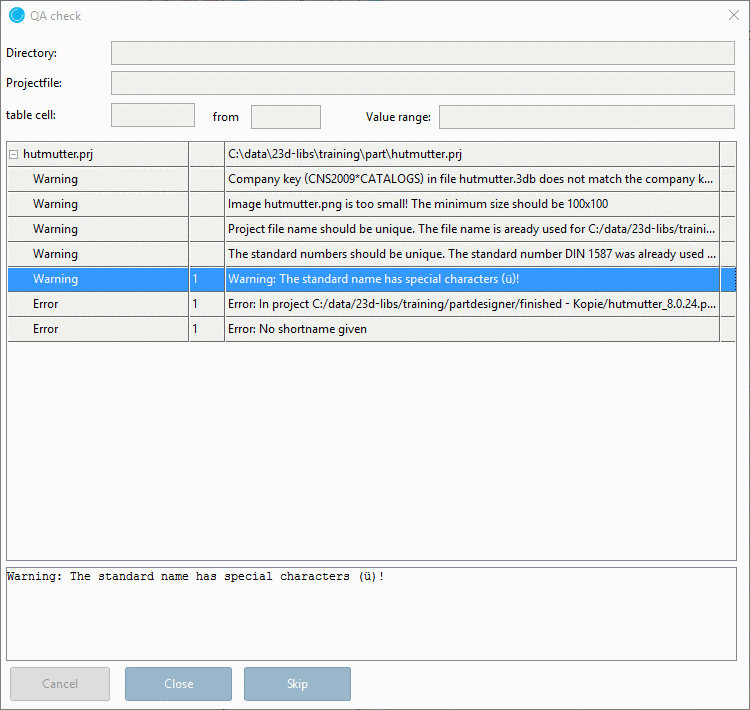
The results of this check are summarized in a log. This information allows you to make the required corrections in targeted manner.
Calculate geometry: This function builds up the attributes (table rows) of all geometries (*.3db drawing files) on a trial basis. Attributes which lead to an “impossible” structure, such as a negative value for width across flats, are logged as an error. The calculation process may take a very long time (depending on catalog size).

-
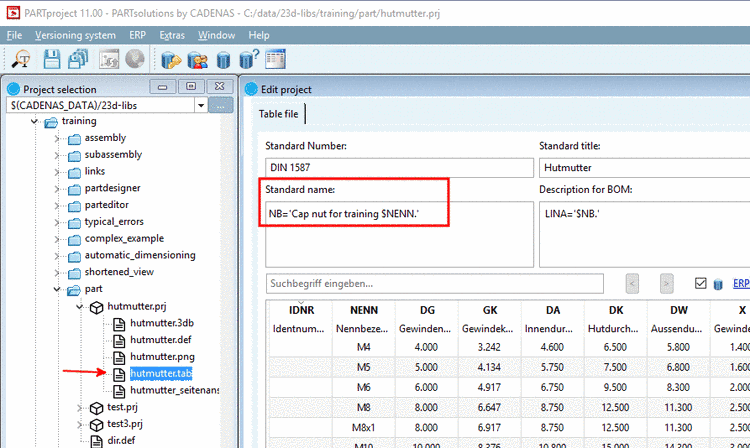
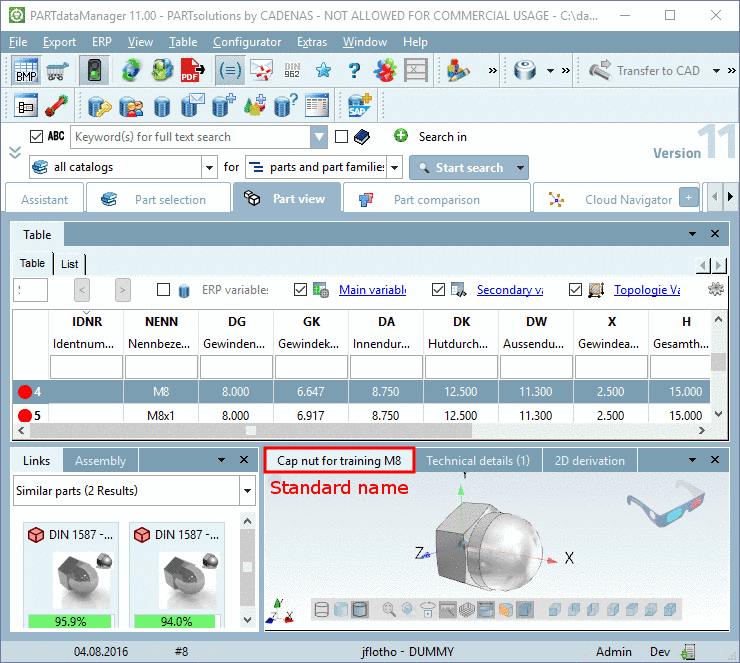
Test standard part identifier: The standard part identifier, e.g. ’Hexagon nut DIN 1587 $ NENN.’(displayed in PARTdataManager, in the tab of the docking window of the 3D view), which you have entered in PARTdesigner (ID data) may, under certain circumstances, be incomplete or incorrect. For example, if column values (representing an element of the standard part identifier) prompted in certain rows are not present.
-
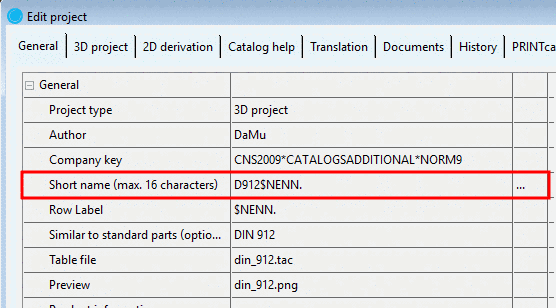
Test short name: During the export of parts from PARTsolutions to different CAD systems, it is normal for the Standard name (NB) to be adopted as part name. As certain CAD systems have a string limit for the part name, alternatively the Short name is applied.
The Short name is a "reduced" (preferably as short as possible) version of theStandard Name (NB), limited to the - maximum length (max. 16 characters according to CAD!).
If the string of a Short name is larger than this limit, an entry is created in the log file.
![[Important]](/community/externals/manuals/%24%7Bb2b:MANUALPATH/images/important.png)
Test bitmaps: PARTproject sets a limit for the bitmaps used as a preview. This limit is 100 x 100 pixels and 256 colors. Images which exceed this limit are recorded in the log. The file size (and, thus, the loading time) of the bitmap can be reduced accordingly using conventional image editing programs.
Create metafiles: Creates a file in PARTsolutions export format *.ps3. This file can be imported in the relevant CAD system using the corresponding menu command of the PARTsolutions interface. The Destination directory field (file location of the ps3 file) can be activated by checking the Create metafiles option.
Maximum time for one row: ..., that should be permitted for the buildup of a single *.3db part geometry (per model). A limit of 5 minutes is recommended. If the limit is exceeded an entry in the log file follows. Check the relevant geometries and if so, make the necessary corrections in their creation.
By clicking the selected test criteria will be used and the test run will be started.
![[Note]](/community/externals/manuals/%24%7Bb2b:MANUALPATH/images/note.png) |
Note |
|---|---|
The test run for extensive directories may take several hours under certain circumstances. It is advisable to run the test either overnight or on a separate computer. | |
Once the test run is finished, the dialog box QA check is displayed. Correct the shown warnings and errors.