Manual
Login
Our 3D CAD supplier models have been moved to 3Dfindit.com, the new visual search engine for 3D CAD, CAE & BIM models.
You can log in there with your existing account of this site.
The content remains free of charge.

Top Links
Manual
 |
- 4.7.2.1.15.3.1. Add variable / change variable value
- 4.7.2.1.15.3.2. Change value of variable
- 4.7.2.1.15.3.3. Replace variable value
- 4.7.2.1.15.3.4. Delete variables
- 4.7.2.1.15.3.5. Rename variable
- 4.7.2.1.15.3.6. Add variables from CSV / change variable values from CSV
- 4.7.2.1.15.3.7. Input options in field "Name of variable"
- 4.7.2.1.15.3.8. Use of keywords
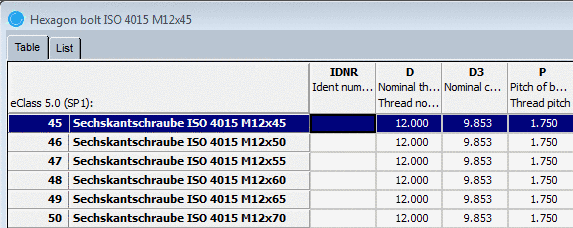
The attribute tables, assigned to the individual parts/projects of a catalog, can be modified via a batch run.
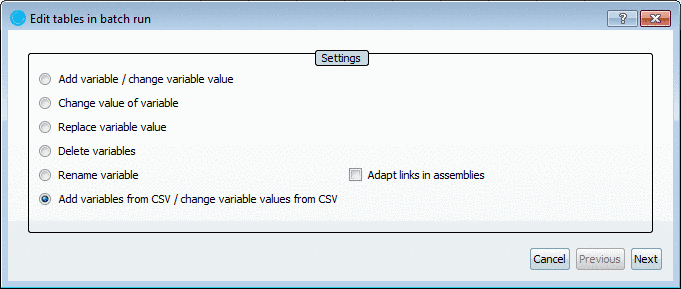
There are different ways to edit the table variables. Depending on the selected option Add variable / change variable value | Change value of variable | Replace variable value | Delete variables | Rename variable | Add variables from CSV / change variable values from CSV) in the Settings section the respective input fields in the sections Search criteria and Values to set are active.
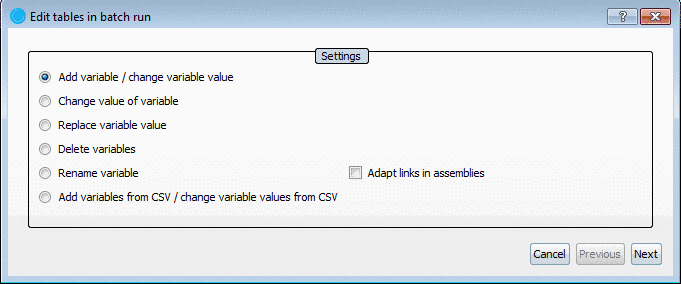
Select the desired option and click on .
This function both enables adding a new variable and at the same time setting the variable value, but in addition setting of characteristics such as column position inside the table for example.
-
First, under Settings select the option Add variable / change variable value and click on .
-> The respective dialog opens.
-
Settings in the Values to set section:
-
-
Identification type: (compare Section 8.5.2.2.2, “ Identification type ”)
-
With Variable position "2" for example, you set the new variable at the second position within the table.
Value for variable: You can insert a fixed value or a variable.
-
If you do not want to use the entire "$NB." expression as the variable value, but only a part string, then, under Cutout from value restrict it to, for example, the characters "1-5".

![[Important]](/community/externals/manuals/%24%7Bb2b:MANUALPATH/images/important.png)
![[Note]](/community/externals/manuals/%24%7Bb2b:MANUALPATH/images/note.png) |
Note |
|---|---|
|
There is no difference in functionality whether a new variable with the desired value is added or whether the value of an existing variable is changed. That's why the setting options of the functions Add variable / change variable value and Change value of variable are identic. Compare Section 4.7.2.1.15.3.1, “ Add variable / change variable value ”. | |
|
Note |
|---|---|
The option Replace variable value enables the declaration of a concrete value (Value to replace) as search criteria. | |
Regular expressions can be used as well, if the checkbox Regular expression is activated. You can find detailed information on this under Section 17.1, “Regular expression ”.
-
First, under Settings select the option Replace variable value and click on .
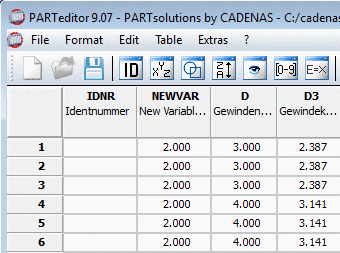
Under Name of variable define the respective variable (in this example NEWVAR). Also see Section 4.7.2.1.15.3.8, “Use of keywords ”.
Under Value to replace enter the current variable value (here "2").
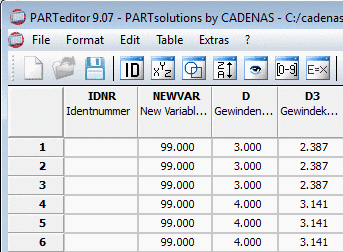
Under Values to set , Value for variable assign the new variable value (here "99").

Open the table file(s) of the corresponding projects.
-> The changed column value(s) have been transferred.


First, under Settings select the option Rename variable and click on .
-
Under Search criteria, Name of variable enter the name of the variable that you would like to rename.
Normally you leave the default under Data type and Variable types (Text and number, All variable types).
Under Values to set -> New variable name enter the new variable name.
Under Values to set -> Variable description you can enter the new variable description optionally.
|
Note |
|---|---|
The renaming of variable names does not only influence the table, but also all files (*.prj, *.3db and the translation file), in which the variable comes up. | |
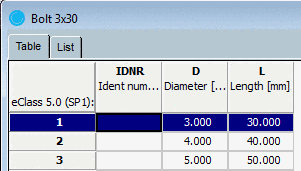
You can overtake table values and/or add variables from a CSV file. In the following the procedure is explained with a small example:
-
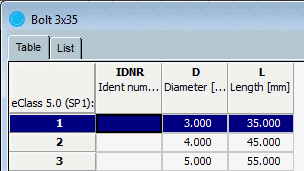
The values of length of the variable "L" currently are 30.000, 40.000, 50.000 and shall be changed to 35.000, 45.000, 55.000.
-
Make the desired values available via CSV file:
D;L
3.000;35.000
4.000;45.000
5.000;55.000
-
Select the option Add variables from CSV / change variable values from CSV and click on .
-
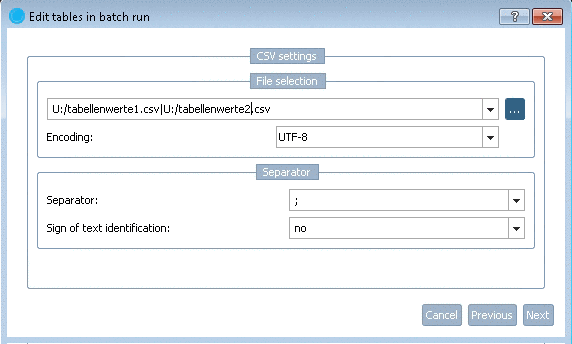
-
Via browse button , select one or several (Ctrl key) CSV files. If several are selected then these are displayed separated by the pipe icon.
-
Encoding: In the list field, select the desired codec.
In this way you can ensure that umlauts for example are correctly handled. Using the default setting UTF-8 this should be the case normally.
-
Select the respective Separator and Sign of text identification in the list field.
-
-
-
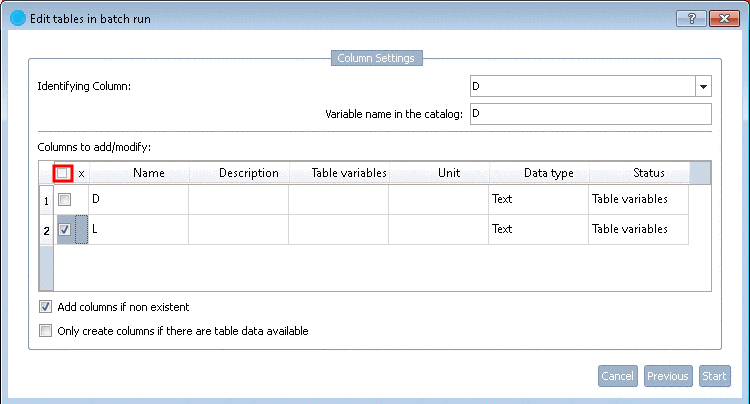
Identifying Column (in CSV file):
All columns of the CSV file are displayed in the list field. Select the desired variable for the mapping between CSV file and catalog.
In this example the mapping is made via the variable "D". In practice this also may be the variable for the ID number. With an unique ID number, even when using several CSV files the assignment to the correct project can easily be made.
-
Insert the desired variable in the input field for the mapping between CSV file and catalog.
-
-
Checkbox: Activate those variables, where you want to change the values.
With the checkbox in the column header you can select / deselect the variables altogether.
-
You may explicitly specify names of table variables.
The specification is taken into account when checking the names. If the variable name in the CSV is invalid for the table (not allowed character e.g.) you can either adjust the name or explicitly set another name and leave the invalid original name.
-
Once you click into the field you can open the list field. The following options are available:
-
Once you click into the field you can open the list field. The following options are available:
-
Add columns if non existent: If needed activate the checkbox.
-
-
The following table shows the input options in the Name of variable field:
|
for example: NB, L, etc. (comma-separated listing is possible as well) |
|
|
Exclamation point plus variable(e.g. !NB) means: all variables are addressed, except those behind the exclamation point. |
|
|
@ sign plus keyword (e.g. @FIGUR) means: The keyword "FIGURE" is being addressed. Also see Section 4.7.2.1.15.3.8, “Use of keywords ”. |

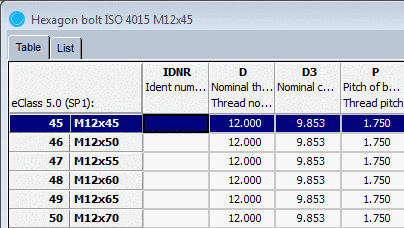
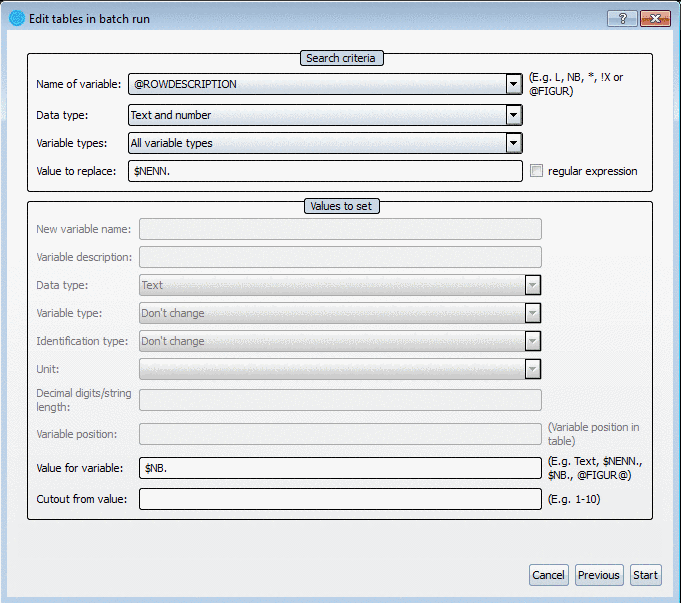
This will be explained using the example of the keyword in the Row Label field.
It is called ROWDESCRIPTION and controls the display of the respective column in the PARTdataManager table. Currently the column contains values according to "$NENN." (see project file).
In order to apply new values to this column, do the following: |
|
||||
--> In PARTdataManager, instead of NENN the new row description NB is located.