Manual
Login
Our 3D CAD supplier models have been moved to 3Dfindit.com, the new visual search engine for 3D CAD, CAE & BIM models.
You can log in there with your existing account of this site.
The content remains free of charge.

Top Links
Manual
 |
If project data
(Standard number, Standard text, etc. and table data) have been saved via
Save as CSV file  (see Section 7.11.15, “
Save as CSV file
”), you can import them again via
Import CSV file
(see Section 7.11.15, “
Save as CSV file
”), you can import them again via
Import CSV file  with enhanced data:
The procedure is explained with the help of a little example.
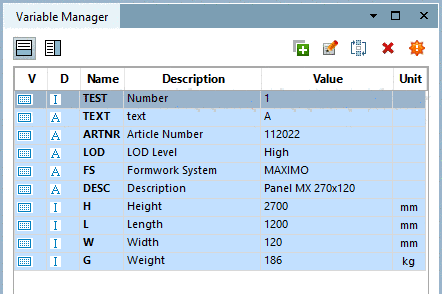
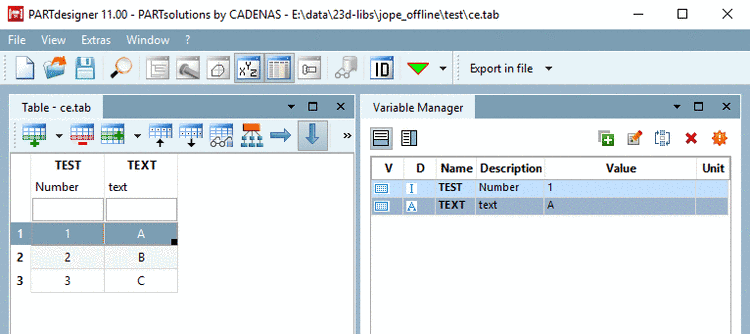
At the moment the
table only contains the variables TEST and TEXT.
Data from following CSV file shall be imported. TEST and TEXT are already available and have the same values as in the initial situation. All other data shall be imported into the table now.

-
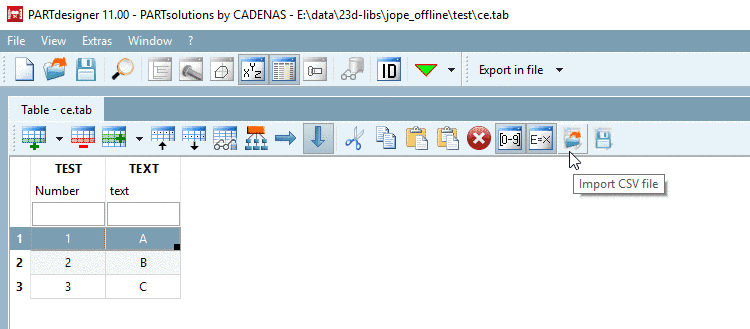
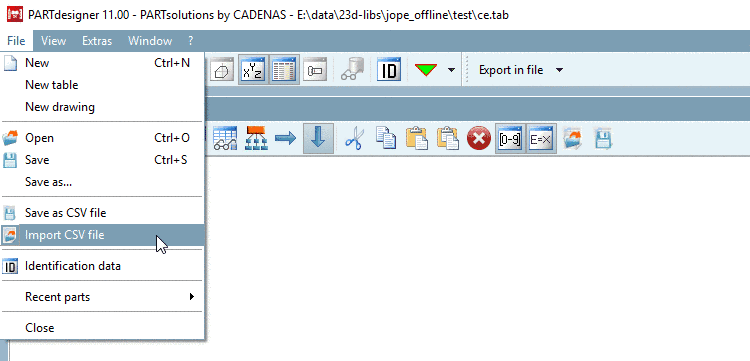
Above the table or in File menu, execute the command
 Import CSV file.
 -
In the Explorer window, choose the desired CSV file.
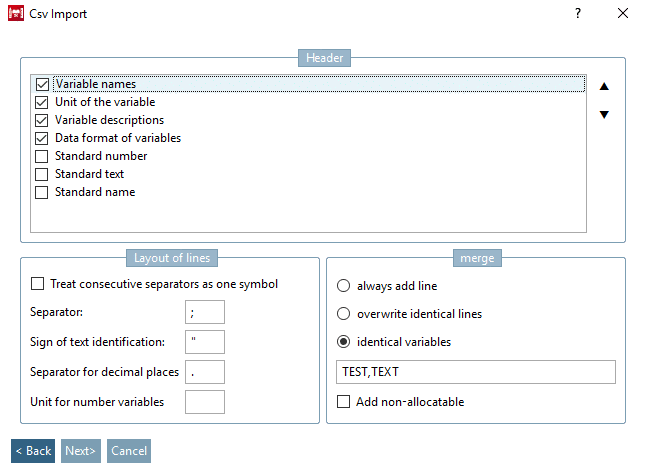
-> The dialog box Csv Import is opened.
Before a CSV file can be imported into the table, some settings have to be made.
-
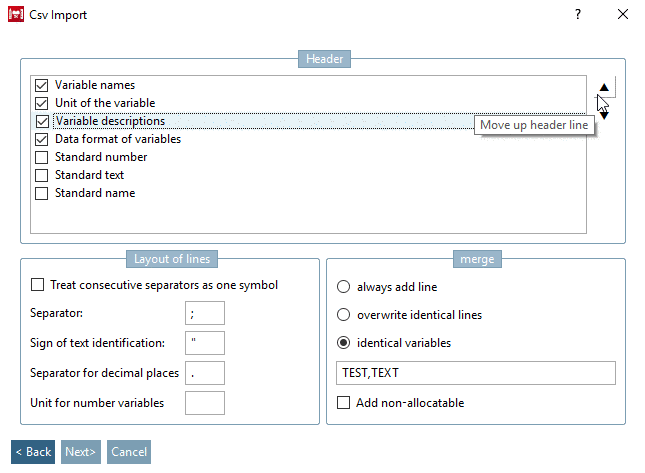
In the Header dialog area, determine which parts of the CSV file shall be taken into the column headers of table. At desired options, set the checkmark.
If the sequence should not be fitting, select the respective option and determine their position by arrow keys. The top most option will become the main title of column.
-
-
Treat consecutive separators as one symbol:
In many text files, several consecutive blanks separate the individual information items. In order to prevent PARTdesigner interpreting each individual blank as a separate delimiter, you can handle delimiters as one sign with this option.
-
Sign of text identification: Sign for limitation of character string (normally double quotes "").
-
Decimal places can be separated either by a comma or by a period.
-
If no unit has yet been defined within the text file, you can do this in the Unit for numeric variables field.
-
-
always add line: Always all lines of CSV file are added to the table.
overwrite identical lines: If the existing table contains the same line as in the CSV, it will be overwritten. Every other line is added to the table.
-
identical variables: Compares the values of variables set in the input field, meaning the values of table and CSV. If a match is found, the table is updated with the values from the CSV file.
If no match is found AND the option Add non-allocatable is activated, the line is added to the table.
If there are no entries in the input field, no matches will be found.
If the option Add non-allocatable is not activated, no lines are added, but the new variables.
In example in hand the option identical variables is used and in the input field, the already existing variables
TESTandTEXTare entered. With this option, no additional lines are added, but the existing ones filled with the additional data.
-
-
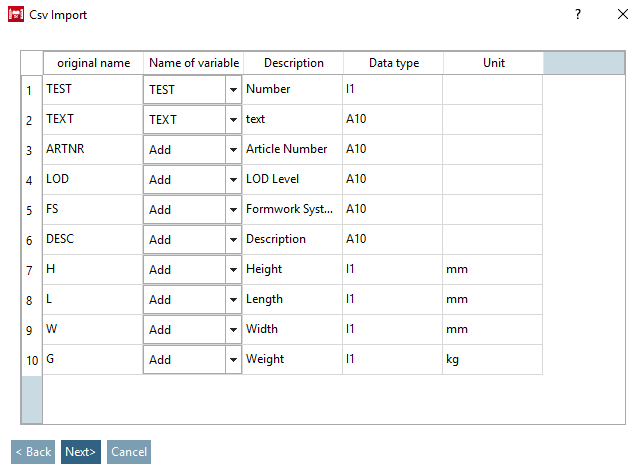
-> A preview is opened. If you want to make changes, you can open the previous window via . Furthermore the fields are editable.
original name: All variables of the CSV file are listed in the column original name.
-
Name of variable: If matches with the current table are found, they are displayed in the preview table, in the column Name of variable.
If the CSV file contains new, not yet available variables, please select desired option in the list field:
Description: corresponds to Variable description under Header on previous page
-
Data type: compare Variable Manager -> column D
Unit: corresponds to Unit of the variable under Header on previous page
Should the preview show wrong column allocation (compare Fig. „Preview (wrong column allocation of "Description" and "Unit")“), you can correct the sequence in the dialog area Header. Select the respective option and adjust the desired position with the arrow keys. (The topmost option will become the actual column title.)
The following figure shows a correct match of columns now.
-
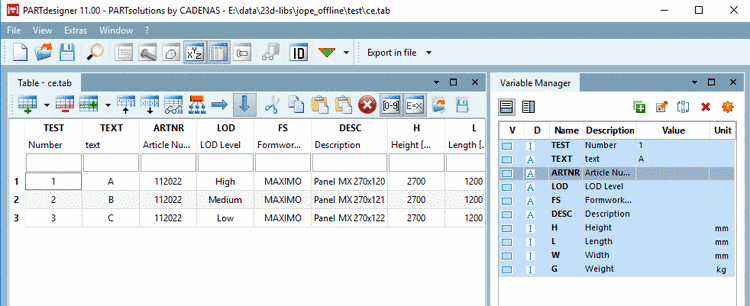
-> The data is read in the table.
-
Save the new created table file.
![[Note]](/community/externals/manuals/%24%7Bb2b:MANUALPATH/images/note.png)
Note When saving a table for the first time, you have to apply Identification data (seeSection 7.12.7, “ Identification data ”).
![[Tip]](/community/externals/manuals/%24%7Bb2b:MANUALPATH/images/tip.png)