Manual
Login
Our 3D CAD supplier models have been moved to 3Dfindit.com, the new visual search engine for 3D CAD, CAE & BIM models.
You can log in there with your existing account of this site.
The content remains free of charge.

Top Links
Manual
 |
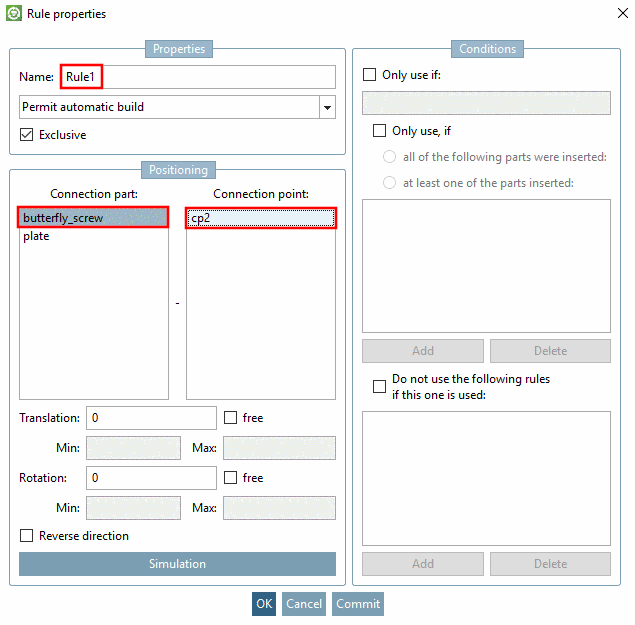
A butterfly screw is to be added to the start element plate via connection point cp.
-
-
-> The Rule properties dialog box is opened.
In the Connection part field, all parts which may be connected, and which are contained in the Configurator docking window, are listed.
If you mark one of these parts, their possible connection points are displayed in the Connection point field.
-
In the Connection part field, click on "butterfly screw" as well as in the Connection point field on expression "cp2" and confirm your entries with .
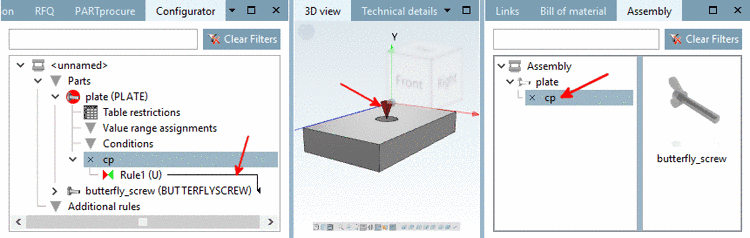
-> Docking window Configurator: The connection is now marked by a connection line between Connection point of first part and Connection part.
-> Docking window Assembly: The connection point Boring has become part of the plate.
-
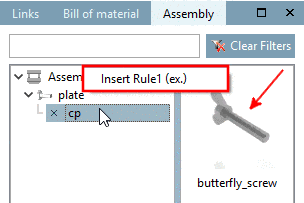
Then in Assembly, open the context menu of the connection point cp.
-
Select the command Insert Rule1 (ex.) or as an alternative, click on the preview image of the butterfly screw.
-> The butterfly screw is transferred into the assembly structure. As by the plate, the symbol is still crossed out, since there are still several characteristics.
-
In the corresponding Table, select a characteristic.
-> In the docking window Assembly, the butterfly screw is inserted. In the 3D view, it is placed in at the connection point cp with the chosen characteristic, however, not yet with the correct fitting diameter.