-
The 3D radial menu is available in the web apllications PARTcloud.net, BIMcatalogs.net and the 3D CAD model download portal PARTcommunity app as well as the PARTcommunity web app.
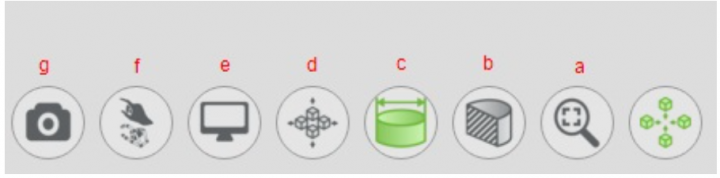
A single tap - manifold selection
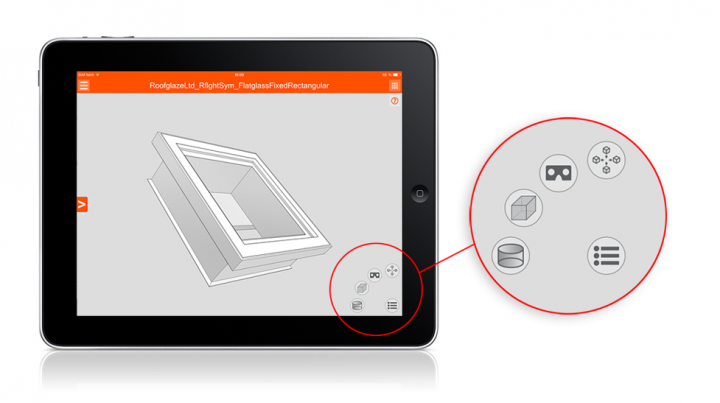
With only a single tap, different alignments of the 3D CAD models are displayed to the user and the model can be viewed from all angles. There is also the option of animated CAD models.
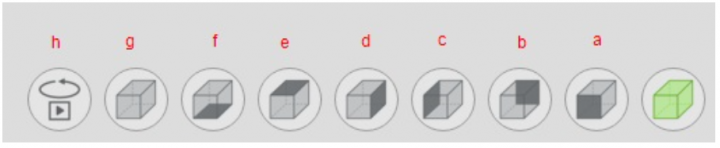
a. Front view (Z)
b. Rear view (-Z)
c. Left view (-X)
d. Right view (X)
e. Top view (Y)
f. Bottom view (-Y)
g. Isometric view
h. AnimationMoreover, various shading possibilities can be selected: The edges can be displayed or a combination of both possibilities is shown in a model.
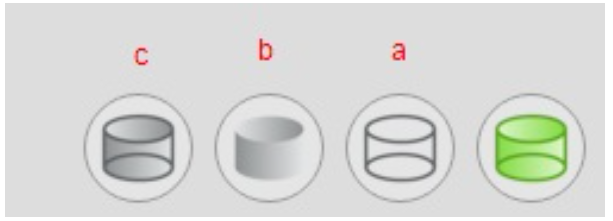
a. Edges
b. Shaded
c. Shaded with edgesThe 3D CAD model can also be used for different virtual realities and have them displayed.
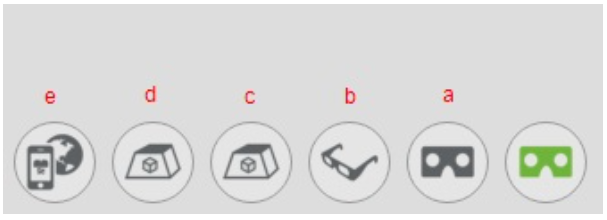
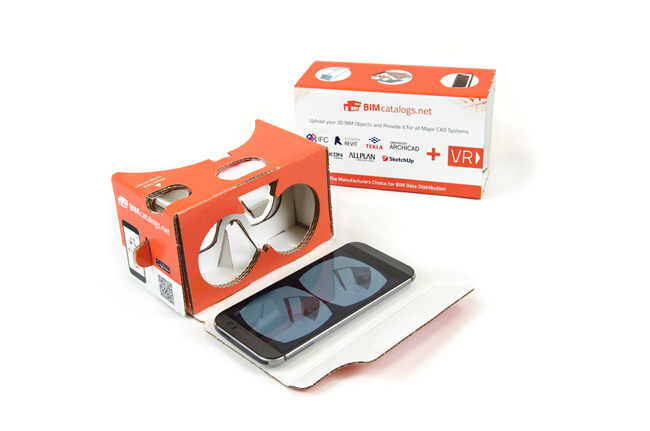
a. Virtual Reality (Cardboard etc.)
b. Anaglyph view
c. Dreamoc HD3
d. Dreamoc XL2
e. Camera backgroundAdditional features, such as dimensioning or screenshots, are also available to the user.
a. Scale to window size
b. Cut
c. Dimensioning
d. Explosion
e. Full screen
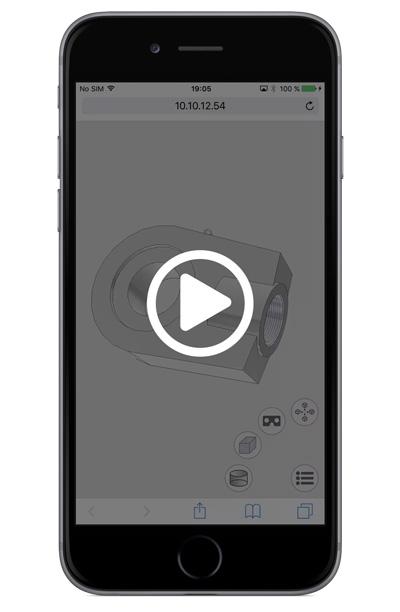
f. Leap MotionIn our video, you can see how the 3D radial menu looks on a mobile device:
 0 comments, 0 likes, 5,291 views
 -
Rotate and zoom your 3D Model
Save the new position as default
 0 comments, 0 likes, 1,865 views
 -
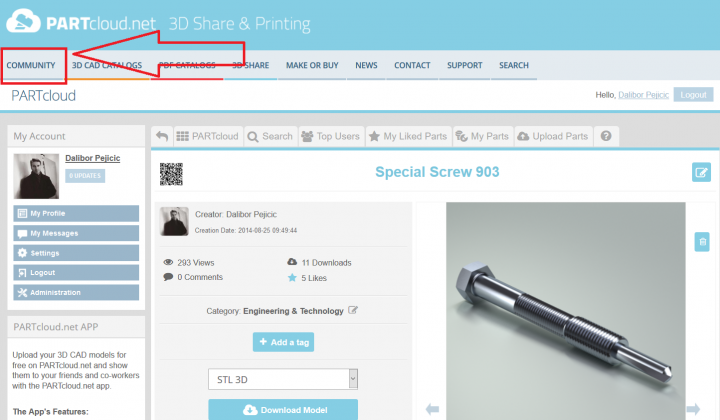
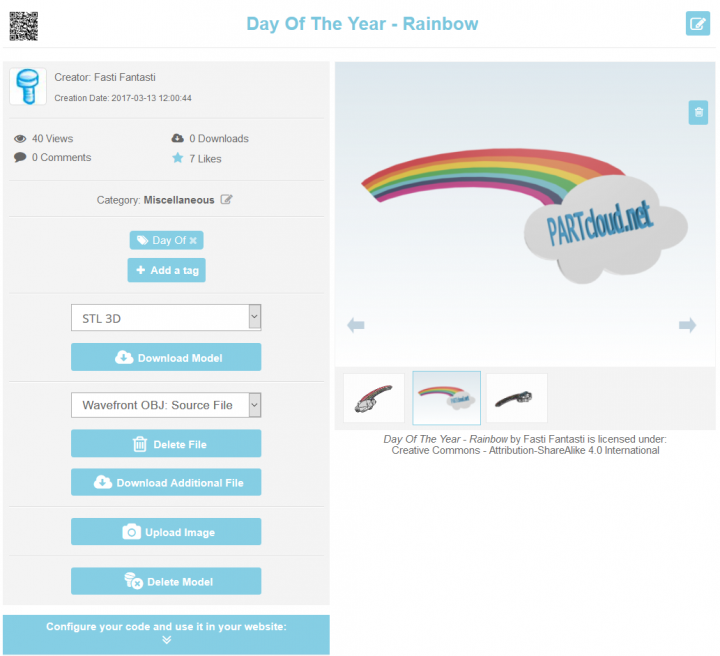
1. Go to your published 3D model on PARTcloud.net (3D SHARE)
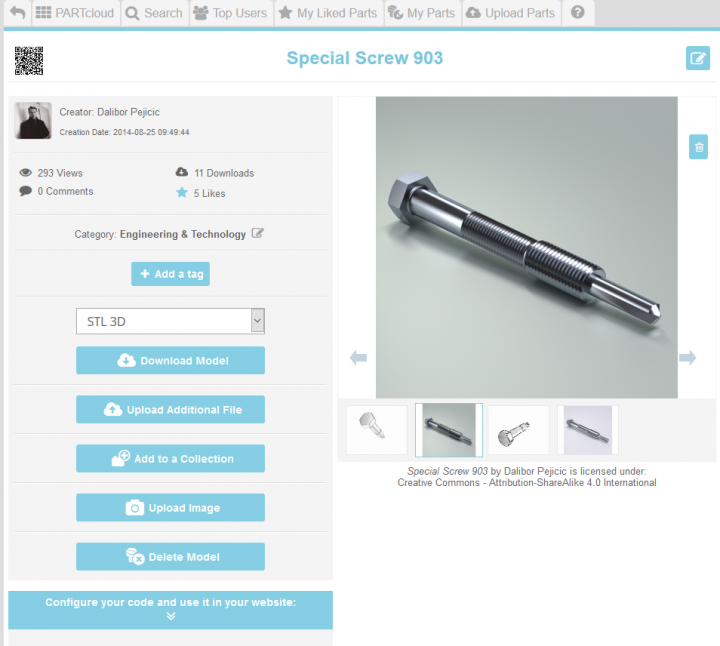
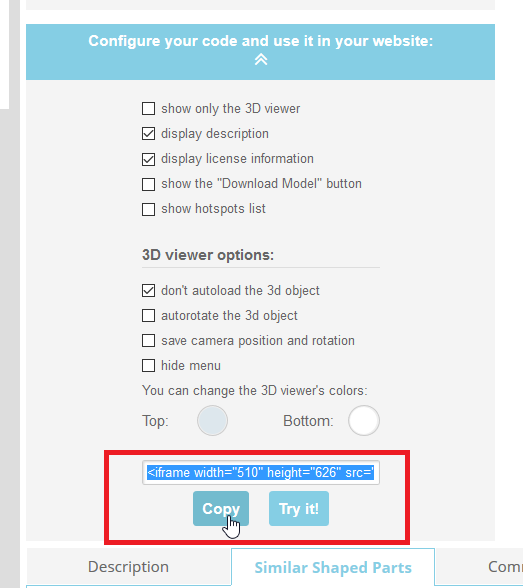
2. Click on "Configure your code and use it in your website". Also, click on the render to be visible, not 3D model (upper red box).

3. Click on "Copy" and the link will become blue
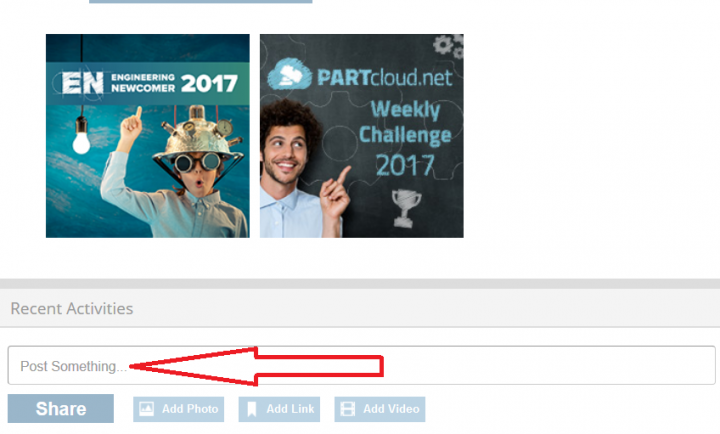
4. Click on "Community" (upper-left)
5. Once you are on homepage, just "Paste" it on "Post Something..." and you will see the link of your 3D model. Click on "Share".
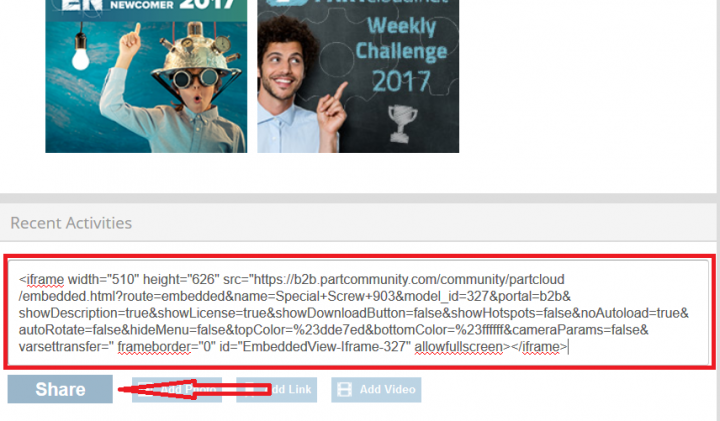
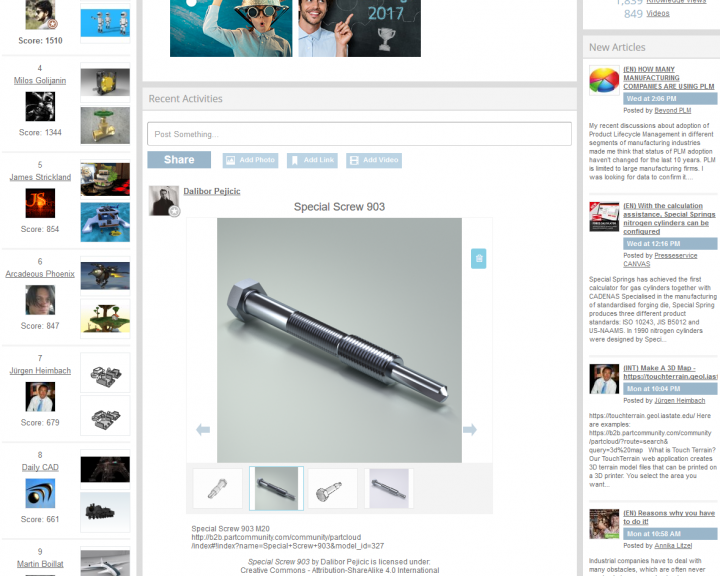
6. Your 3D model/render should be published on homepage now and it will get more attention like that!
 0 comments, 3 likes, 5,814 views100% users marked this FAQ as helpful.
 -
Augmented Reality (AR) is understood as computer-assisted extension of the perception of reality. Frequently, images or videos are supplemented with additional information or virtual objects by means of overlaying or superimposing.
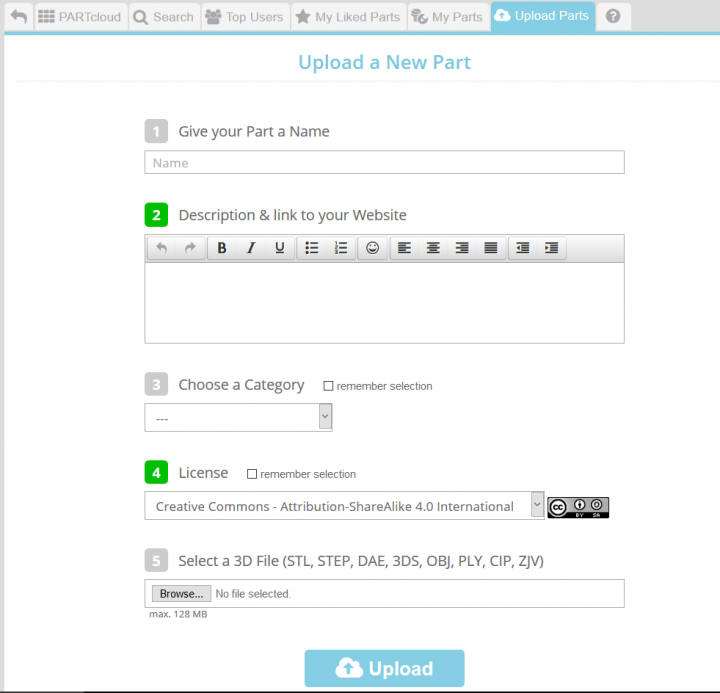
1.Users have to login at PARTcloud.net or create an account. If you are already registered for the 3D CAD models download portal PARTcommunity, this is also valid for PARTcloud.net.The components are uploaded and the information as well as details filled in, so that the 3D CAD model can be found more easily by other users.

2.After uploading, the 3D CAD model appears in your own portfolio.
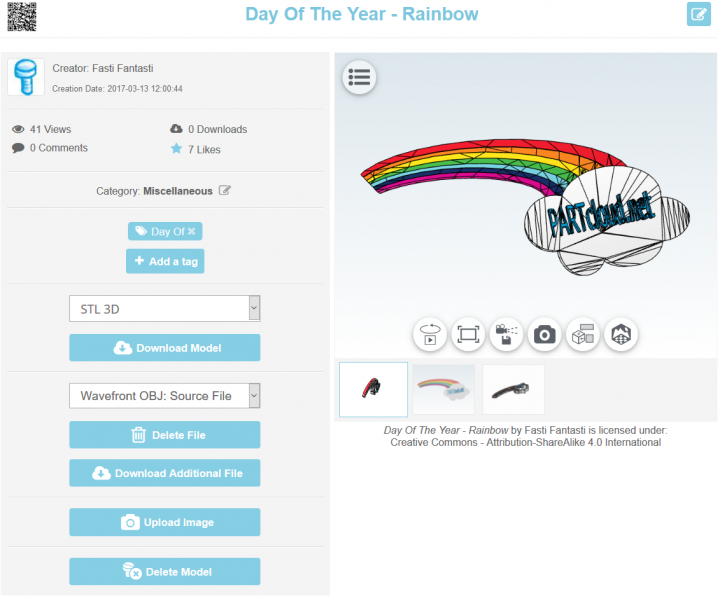
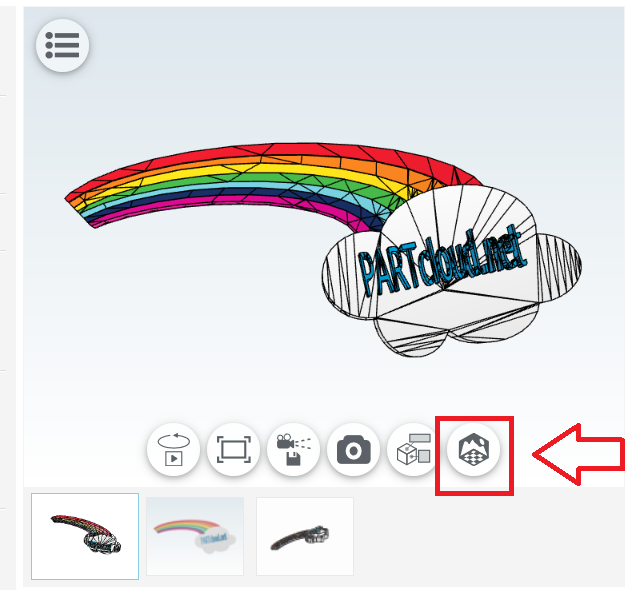
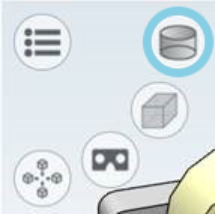
3. The users now activate the environment function by moving the cursor to the lower bar and clicking the last button.
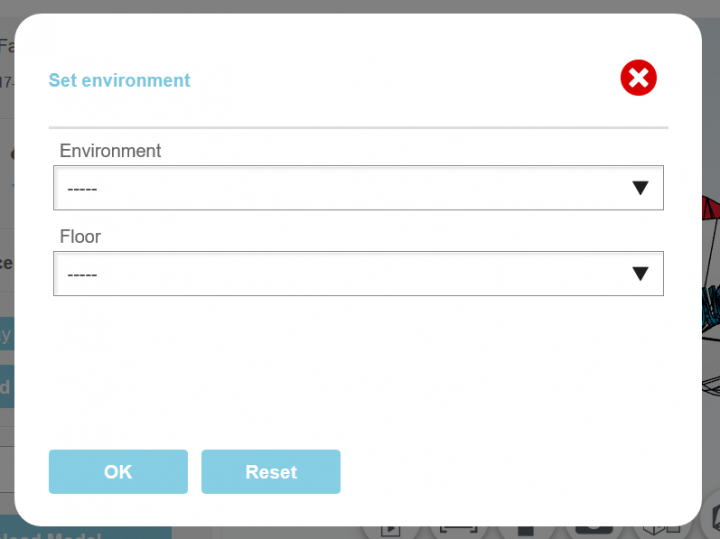
4. A new window appears, where the environments can be selected. Here are different environments available to the users, such as city silhouette and floor variants such as parquet. Both options can be selected at the same time.
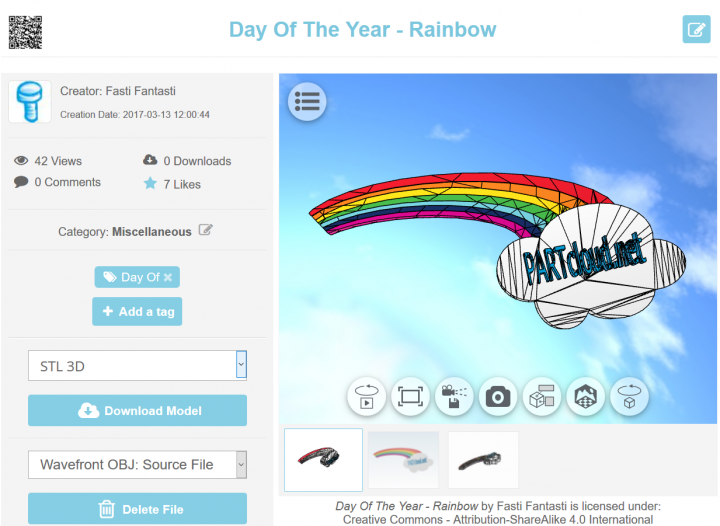
5. At the end, the users obtain their 3D model with the selected background. Now they can put the model in the scene accordingly per screenshot or in the PARTcloud.net app or add the image at social networks.
 0 comments, 0 likes, 2,409 views100% users marked this FAQ as helpful.
 -
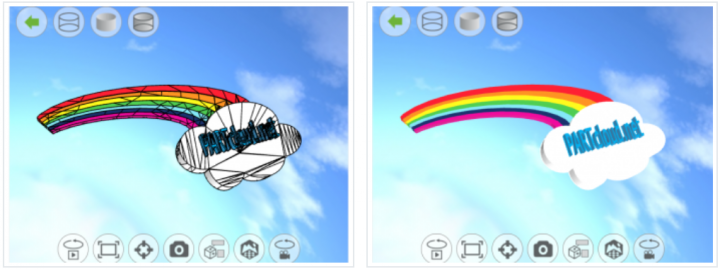
The CADENAS exchange platform PARTcloud.net offers the possibility to display edges of a model differently: Shading the edges makes the 3D model easier to recognize and gains in expressive power, without losing any information. The smaller the model and the overall view for the presentation as a screenshot or photo is decisive, the more likely users should go back to shaded edges.
1. Login at PARTcloud.net or create an account. If you are already registered for the 3D CAD models download portal PARTcommunity, this is also valid for PARTcloud.net. The components are uploaded and the information as well as details filled in so that the 3D CAD model can be found more easily by other users.
2. After uploading, the 3D CAD model appears in your own portfolio.
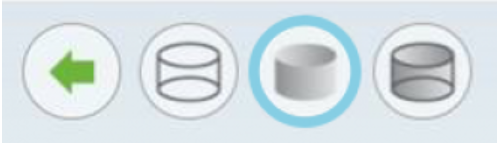
3. Users now enable the edge smoothing function by moving the mouse pointer to the menu point and clicking. There are four buttons.
4. On the right, the various stages of the representation are shown: edges, shaded and shaded with edges. The button in the center must be clicked to get the desired effect.
5. The result is a complete model that is now more even. Now users can set the model according to a screenshot or in the PARTcloud.net app or embed it on other websites.

Here is an example with a particularly small-scale model:
 0 comments, 0 likes, 2,282 views
 -
https://3dprint.nih.gov/discover
Discover 3D Models
View curated Collections or find Builds of 3D models from our users.


 0 comments, 0 likes, 4,790 views
 -
 Build your 3D LEGO® models onlineNo plug-in, no installation. Everything happens in your browser
Your work is available where ever you are0 comments, 0 likes, 5,124 views -
https://buffy.run/tutorial/designer
Buffy Designer Tutorial
 This tutorial introduces basic features of Buffy Designer, the tool for creating 3D models with cubes.START TUTORIAL0 comments, 0 likes, 4,204 views
 -
http://www.realtimerendering.com/erich/minecraft/public/mineways/index.html
Mineways lets you export your Minecraft creations into files you can use for making images, movies, or 3D prints. It is a free, open-source program for exporting your Minecraft models for 3D printing on your own printer or through a service such as Shapeways or Sculpteo, viewing on the web through Sketchfab, and rendering with Blender, 3DS MAX, Maya, Cinema 4D, or other rendering system.
The latest Windows version is 5.09; for Mac it's version 5.04, 32-bit only (read the notes for the Mac). For Linux, use WINE to emulate Windows.
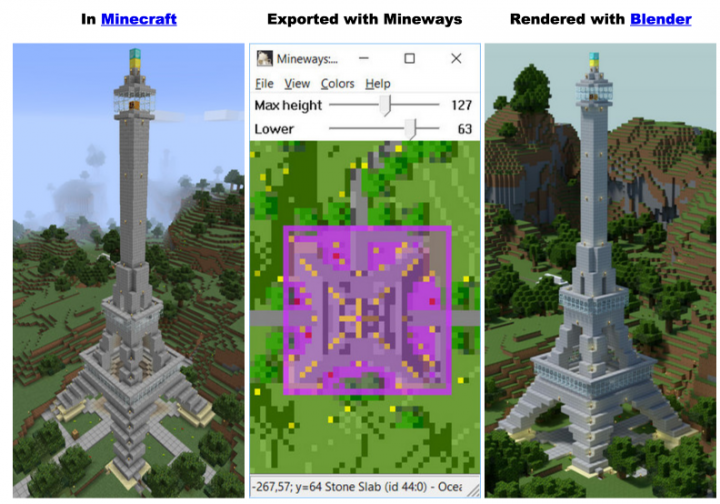
Minecraft is a computer game that randomly generates infinite worlds made up of cubic blocks of various materials, with each block being 1x1x1 meter. There are rules that govern how the world works, but no set goals. Generally you mine the materials from the world, combine ("craft") them into blocks, and place each block in the world to build structures, all using an in-game character that moves like it would in a first-person shooter game. You can play in worlds on your own computer, or with other players on multiplayer servers.
There is more to it than that, including monsters that can get in the way, but I refer you to a few sites that describe it in more detail:
- Wikipedia
- Minecraft wiki
- Rock, Paper, Shotgun
- Penny Arcade comics here and here

A crafting example from the Minecraft wiki.The game has become quite popular over the past few months. The single Swedish programmer who is developing it has it has over 400,000 paying customers and has made over five million dollars on it so far. And it is only in an "alpha" state!
From my perspective, I find that it appeals to that part of you that loves LEGO, model trains, or building sand castles and pillow forts. I also find it very liberating to be limited to cubes, which sounds ironic. If I had more elaborate or complex tools to build with, the learning curve would discourage me from building something interesting. Only having cubes, I feel much more inclined to dive in and start building.
0 comments, 0 likes, 23,877 views -
https://brickify.it/
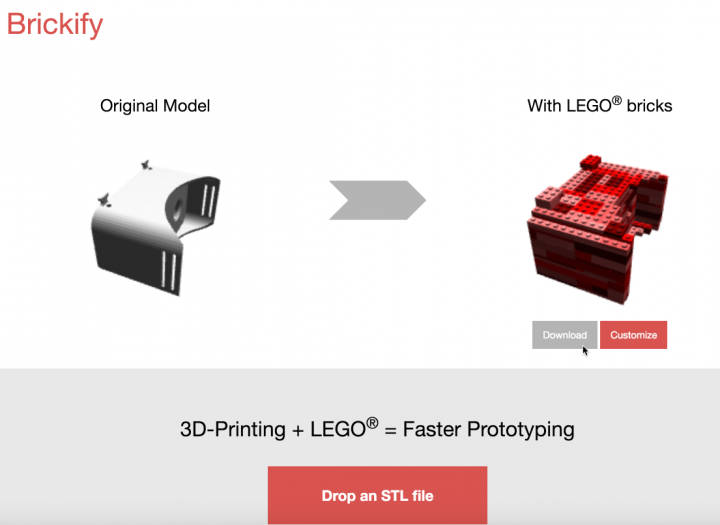
3D-Printing + LEGO® = Faster Prototyping
 0 comments, 0 likes, 7,623 views100% users marked this FAQ as helpful.
 -
https://stephaneginier.com/sculptgl/
- SculptGL is a digital sculpting web app, with sources available on github.
- Also available on the chrome web store.
- If you want to download a standalone version, you can download it here (identical as the web version).
- Sketchfab made a fork of the old SculptGL version with a new design : Sculptfab.
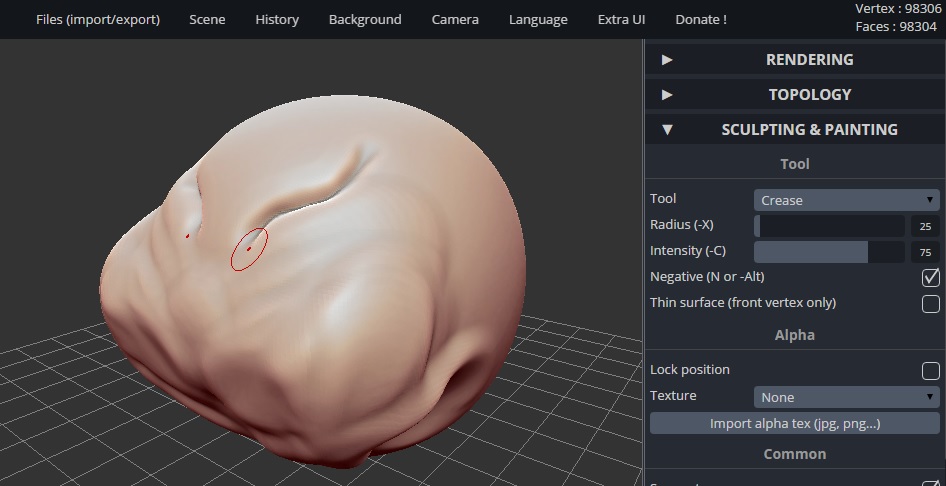
Main features :
- Sculpting tools
- Standard tools : Brush, Inflate, Smooth, Twist, Drag, etc
- PBR Vertex Painting (color, roughness, metalness)
- Alpha texture support for each tools
- Multiresolution sculpting
- Quad-tri Subdivison (catmull-clark/loop)
- Reversion (compute opposite of subdvision if possible)
- Navigating from low/high poly level subdiv will retain sculpting changes
- keep UVs (both reversion and subdivison)
- Voxel remeshing
- Uses SurfaceNets meshing algorithm (produces quad-only mesh)
- Uniform remeshing (quads will have the same size)
- Can also create non-manifold vertex :(
- In case of a non closed mesh, a naive holefilling algorithm is performed first
- Deletes UV
- Dynamic topology
- Triangles only
- Operates in real time
- Local subdivision (create new triangles)
- Local decimation (deletes triangles)
- Deletes UV
- Supports OBJ, PLY, STL import/export
- Reads vertex color
- Optimizes post and pre transform cache (tipsy algorithm)
- Undo/Redo support
0 comments, 0 likes, 7,907 views -
Convert 2D pictures and drawings into 3D STL (Stereolithography) files suitable for 3D printing or CNC routing. Turn JPEGs into lithophanes, reliefs, and other 3D design elements.
Features- Free low resolution ( ~ 108k facets ) renderings.
- $5 per high resolution rendering.
- Converts JPEG data to a STL (Stereolithography) file.
- Creates a perfectly enclosed tessellation of rendered 3D mesh.
Lighter the pixel, deeper facet in the mesh. Invert depth for the opposite.
 0 comments, 0 likes, 6,576 views
 -
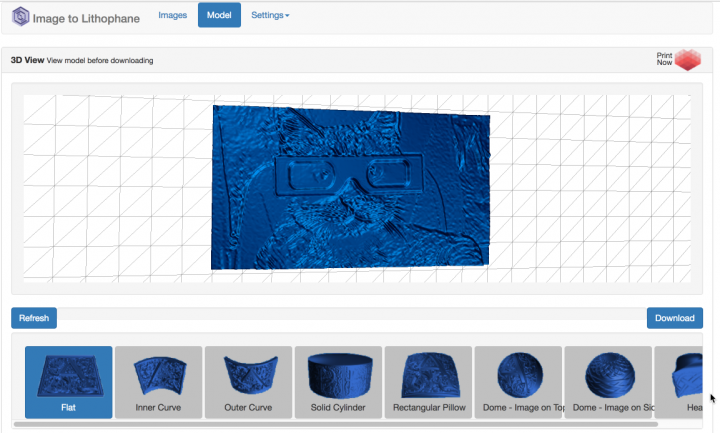 Help Some quick tips:Workflow
Pick an image, (Click on it in the Images screen), set Image parameters and Model parameters. Then refresh view to see the results. If autodownload is set, the STL will download each time you refresh.
Max SizeThe largest X or Y dimension of the output lithophane - X if original image wide, Y if high.
ThicknessThe maximum Z dimension of the output lithophane.
BorderThe thickness of the border around the edge.
Thinnest layerThis is the minumum layer thickness (for the brightest pixels in the image).
Vectors per pixelEach of the pixels in the image is translated into a number of 3D points on the surface of the lithophane, the larger this number, the more detailed the output (and the larger the STL file/slower the processing) 2 is a good value for this you can go up to 5, but it will take time and use memory.
Base/Stand depthA small stand on the base for when printing vertically. Positive number for base coming forward, negative for backward.
CurveNumber of degrees to curve the surface (for the curved forms).
Positive ImageSet to Positive Image, lighter areas of the original image will be thinner in the output and the thicker if set to Negative Image.
Mirror ImageSet to Mirror Image, the image will be mirrored about the X axis (for rear viewing), otherwise the output will be in the same orientation as the original image.
Flip ImageSet to File Image, the image will be fliped about the Y axis, otherwise the output will be in the same orientation as the original image.
Manual RefreshSet to Manual Refresh to only recreate the model when the 'Refresh' button is pressed, set to Automatic if you'd like the model to refresh when you select the image
Repeat X CountSet to repeat the image in the X direction prior to creating the output.
Repeat Y CountSet to repeat the image in the Y direction prior to creating the output.
Mirror RepeatSet to alternately mirror the image when the X Repeat setting is being used.
Flip RepeatSet to alternately flip the image when the Y Repeat setting is being used.
Binary STLSet to use a binary (smaller and faster) STL file format, otherwise use ASCII where needed for compatibility with other software.
Manual DownloadIf set to Automatic, the STL file will download each time you refresh the model, if set to Manula, the download will only happen when you press the download button.
FormSelect the form of the output model from the following types
FlatA rectangular model with the image impressed in one face. Curve setting is ignoed
Inner CurveA curved rectangular model with the image impressed on the inner face. Use curve setting to set the number of degrees in the arc.
Outer CurveA curved rectangular model with the image impressed on the outer face. Use curve setting to set the number of degrees in the arc.
Solid CylinderA cylindrical model with the image impressed on the curved face.
Rectangular PillowA rectangular pillow model with the image impressed on the top face
Dome - Image on TopA circular dome model with the image impressed as if from above the dome
Dome - Image on SideA circular dome model with the image impressed as if from the edge of the dome with the image wrapping the perimeter of the dome and the top of the image meeting in the centre
HeartA heart shaped model with the image impressed on the curved faces
0 comments, 0 likes, 5,854 views -

What is CookieCaster?
CookieCaster lets you design, share and create custom cookie cutters.
Our site makes it easy to create a 3D model of your cookie cutter. You can show off your designs to friends, family and fellow cookie cutter enthusiasts in our gallery and check out what others have made. If you have your own 3D printer, you can download the 3D model of your design for for printing at home.
0 comments, 0 likes, 5,865 views -
http://voxelbuilder.com/
Easy cube-based 3D design with DIY 2D/3D printing
Voxel Builder is an open source tool that lets anyone design and edit 3D voxel (cube) models easily, right in their web browser.
How it works
Use the Builder to create and edit voxel (AKA cube) models.

When you are done, export it as a PNG file (from the menu in Builder), like this:
You can manufacture your critter using either a 2D printer or a 3D printer.
2D printer
Visit this page and drop your critter PNG onto it to generate pages. Print the pages so that each layer is a different page on a color printer. Then use scissors and glue to assemble each layer!


3D printer
Visit this page and drop your critter PNG onto it to generate a 3D printable STL file.

The above shows three STL files loaded into MakerWare: unsmoothed, smoothed with surface nets and smoothed with marching cubes.
Here are the 3 variations of Mario printed out by @vladikoff at the Mozilla San Francisco office. You can view more photos from his print here. Thanks, Vlad!
Mikola Lysenko, the designer of the Mario model and author of many of the algorithms in Voxel Builder, also wrote a post about the process of creating the 3D mario.
At this point in time there are over 1400 creations that have been made with Voxel Builder. Any of them can be loaded into the ndarray-stl demo. Here are some good ones:
0 comments, 0 likes, 5,615 views -
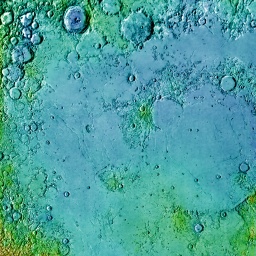
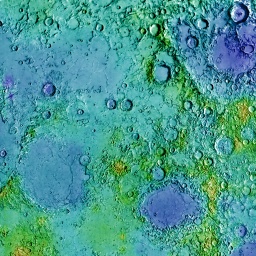
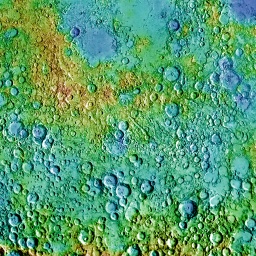
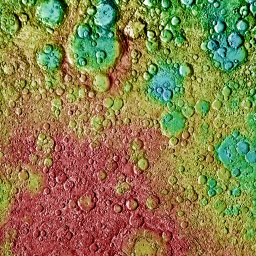
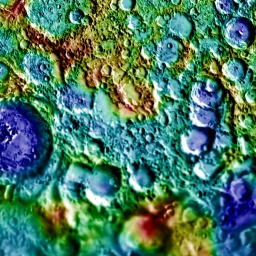
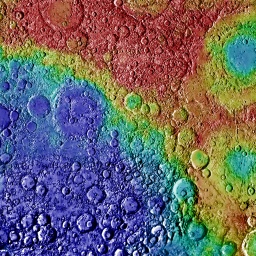
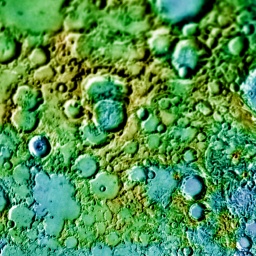
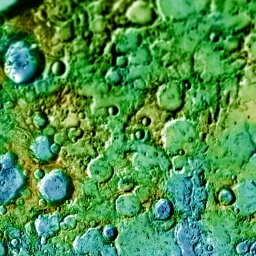
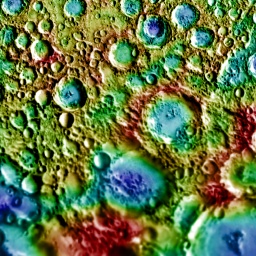
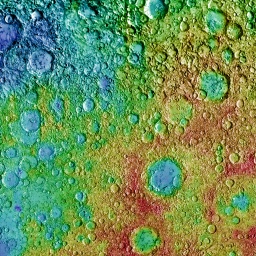
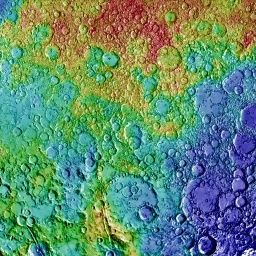
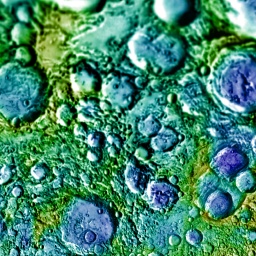
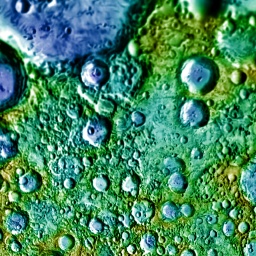
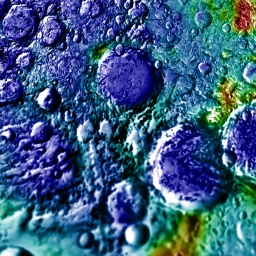
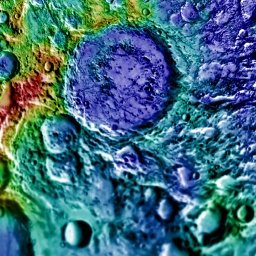
Moon2STL Print the Moon
Instructions
- Set the dimensions of the box using the scale slider
- Change the vertical scale for a more interesting-looking model
- Place a marker on certain location
- Switch between visible and height views in the top left
0 comments, 0 likes, 4,826 views -
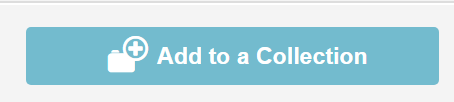
1.) Select ADD COLLECTION
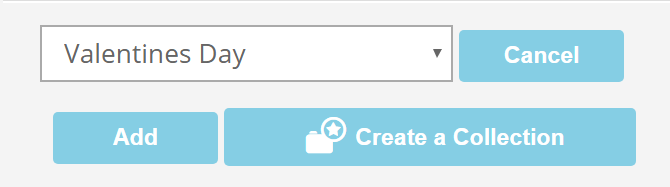
2.) Start a new COLLECTION or take an existing - the first added part always define the previe picture of your collection
 0 comments, 0 likes, 1,415 views100% users marked this FAQ as helpful.
 -
1.) Open your 3D Model and selct the UPLOAD IMAGE button
 0 comments, 0 likes, 4,203 views67% users marked this FAQ as helpful.


